Identify one item and deposit it in your stash

Updated
Tier 1 Craft or higher. Grid batches need Tier 2 Economy.

Identify one item and deposit it in your stash

Read the written guide

Follow each step in the app. Numbered markers show the real controls. To connect nodes, drag from output marker 1 to input marker 2. Connection maps show the completed route. Steps outside the app name where to continue.

  1. At a glance

    1. Read the scope

    Read the practice target and changes from the saved sample.

    The scope and limits are clear.

    Read and complete this step before continuing.

  2. Before you start

    2. Prepare the setup and test item

    Complete [setup](setup-first-run.md). Configure the inventory grid, stash opening detection, currency tab, Wisdom position and a general-purpose dump tab through setup and the relevant **Settings** location tabs. Leave space in that dump tab. Use one unidentified equipment item in your inventory. Keep **Current item** selected. Use equipment for this example because depositing stackable currency uses a different transfer action.

    Local captures, materials and input suitability are checked.

    Read and complete this step before continuing.

  3. 1. Add the identification decision

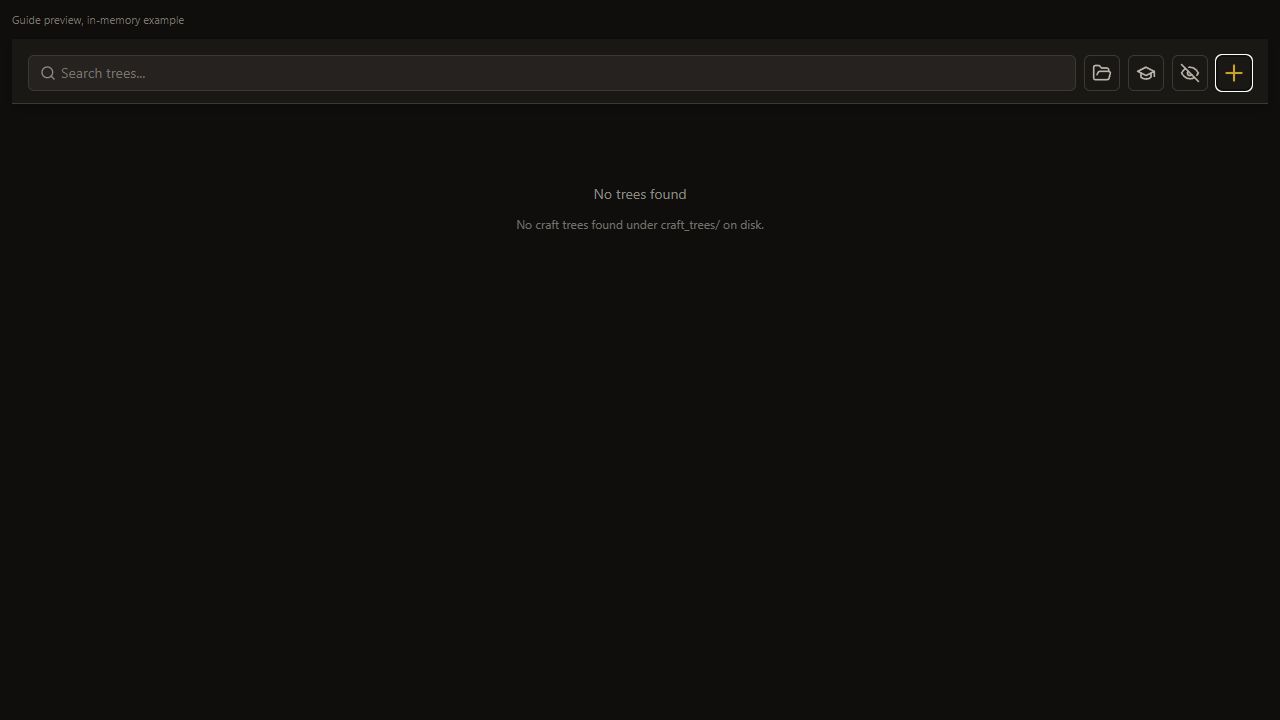
    3. Create a personal tree

    Choose + on the Hub.

    Create Tree opens.

    Open full-size screenshot
  4. 1. Add the identification decision

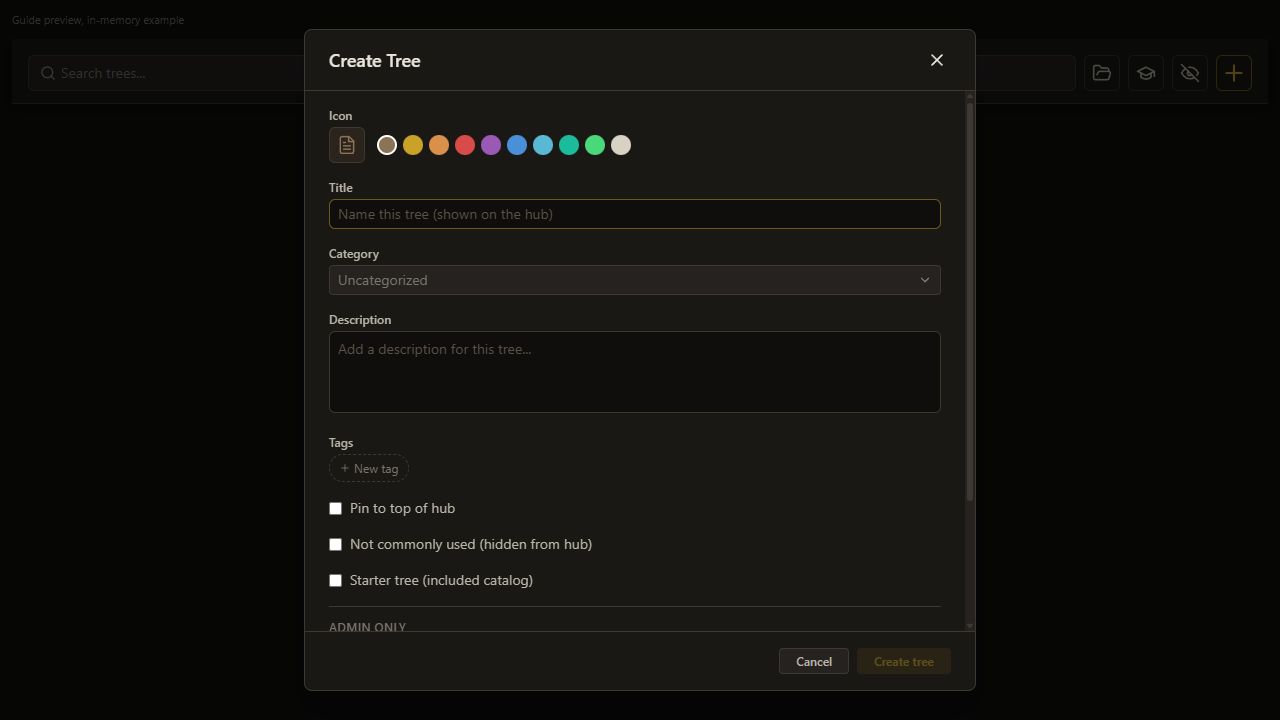
    4. Name the tree

    Set Name this tree (shown on the hub) to Identify and store.

    Name this tree (shown on the hub) keeps the selected value.

    Open full-size screenshot
  5. 1. Add the identification decision

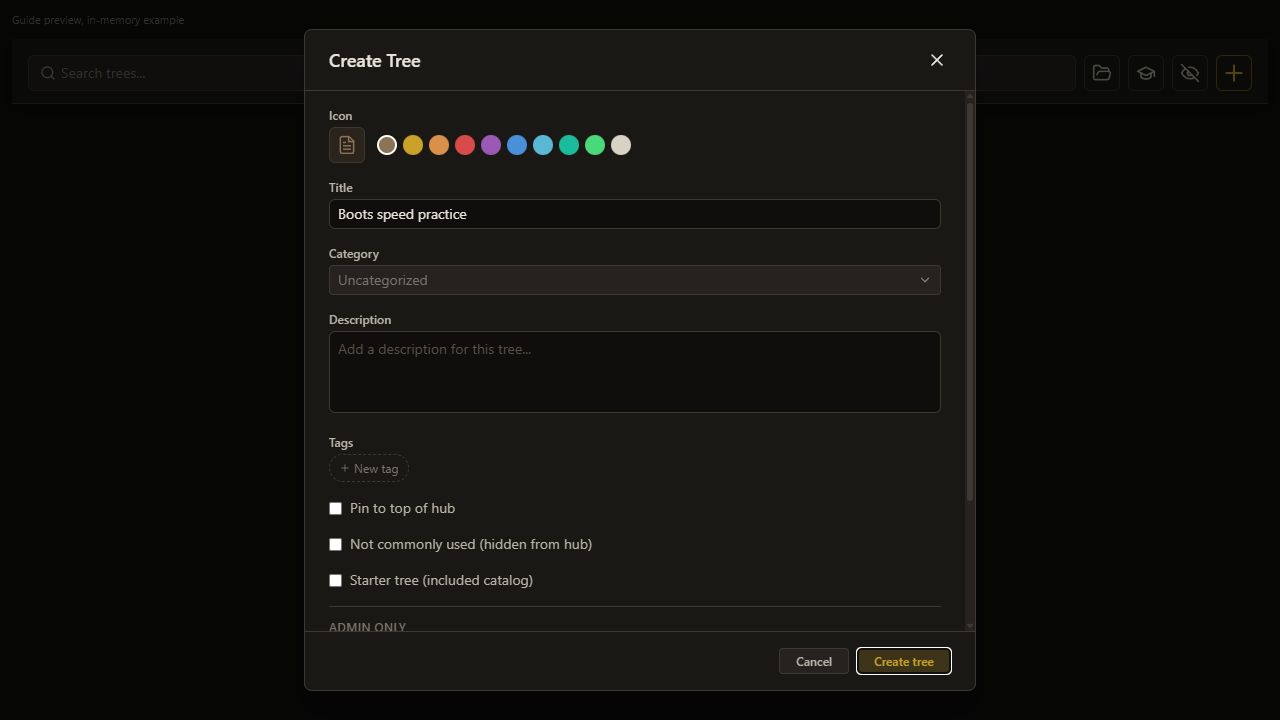
    5. Create the tree

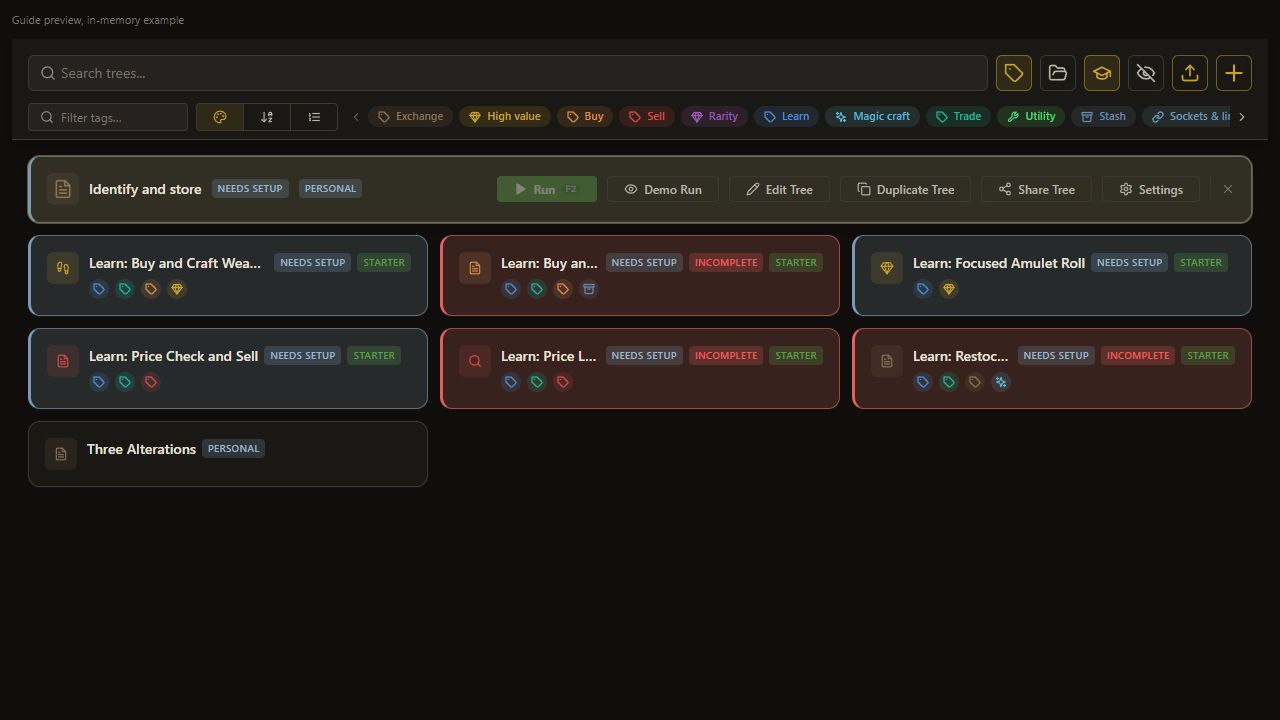
    Choose Create tree.

    The personal tree appears on the Hub.

    Open full-size screenshot
  6. 1. Add the identification decision

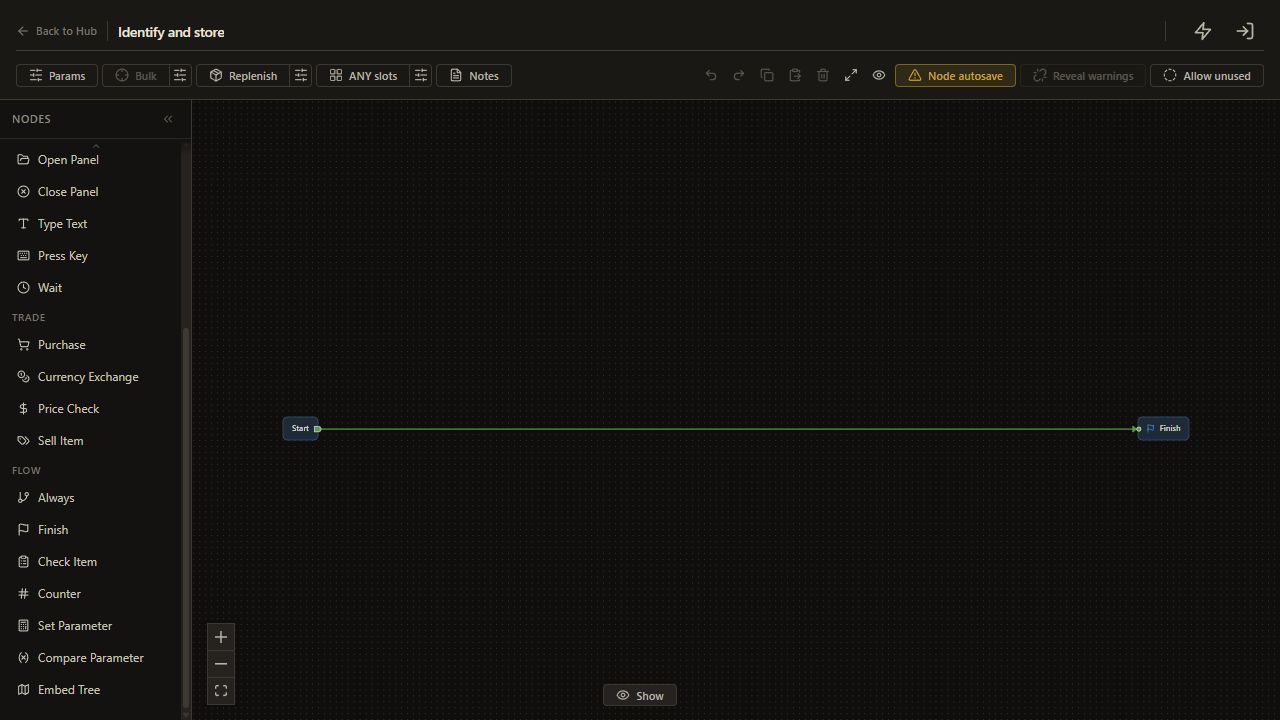
    6. Open the editor

    Choose Edit Tree.

    The production editor opens.

    Open full-size screenshot
  7. 1. Add the identification decision

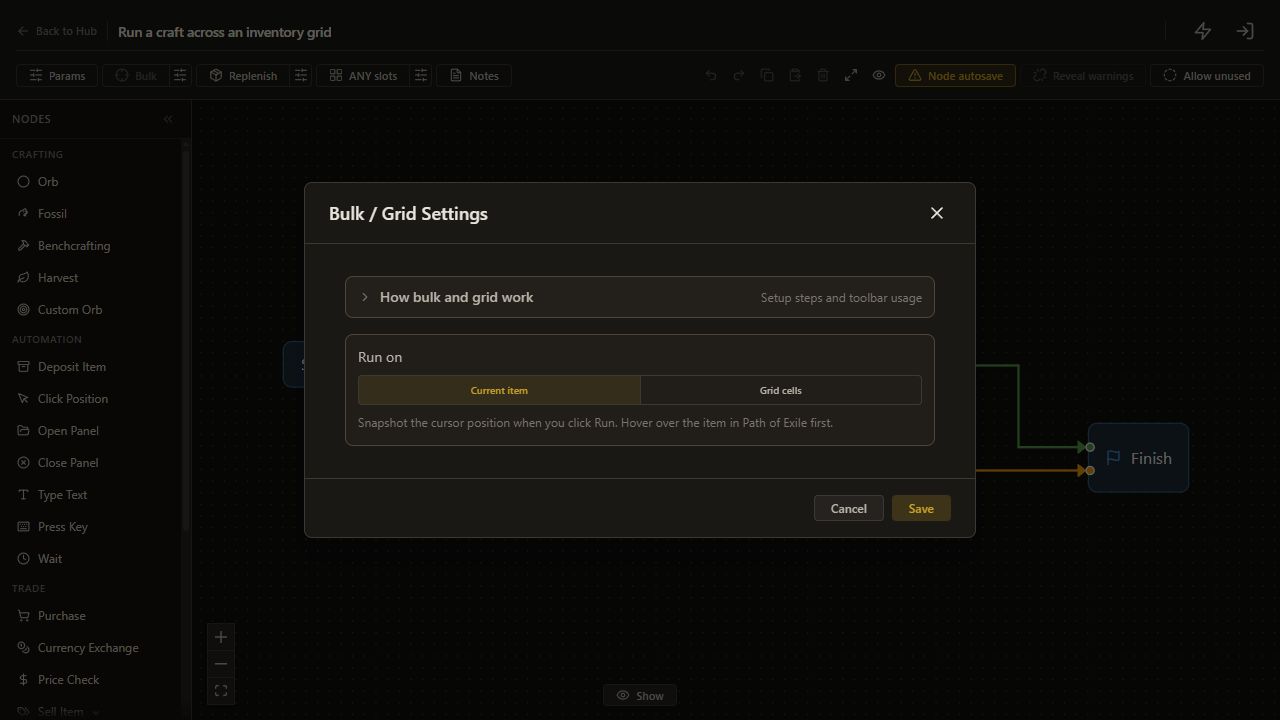
    7. Open Bulk settings

    Click the sliders button beside Bulk, labeled Configure bulk / grid settings.

    The Bulk settings dialog opens.

    Open full-size screenshot
  8. 1. Add the identification decision

    8. Use one item

    Click Current item in the Bulk settings dialog.

    Current item is selected in the dialog; click Save next.

    Open full-size screenshot
  9. 1. Add the identification decision

    9. Save one-item mode

    Click Save in the Bulk settings dialog.

    Current item is saved and the dialog closes.

    Open full-size screenshot
  10. 1. Add the identification decision

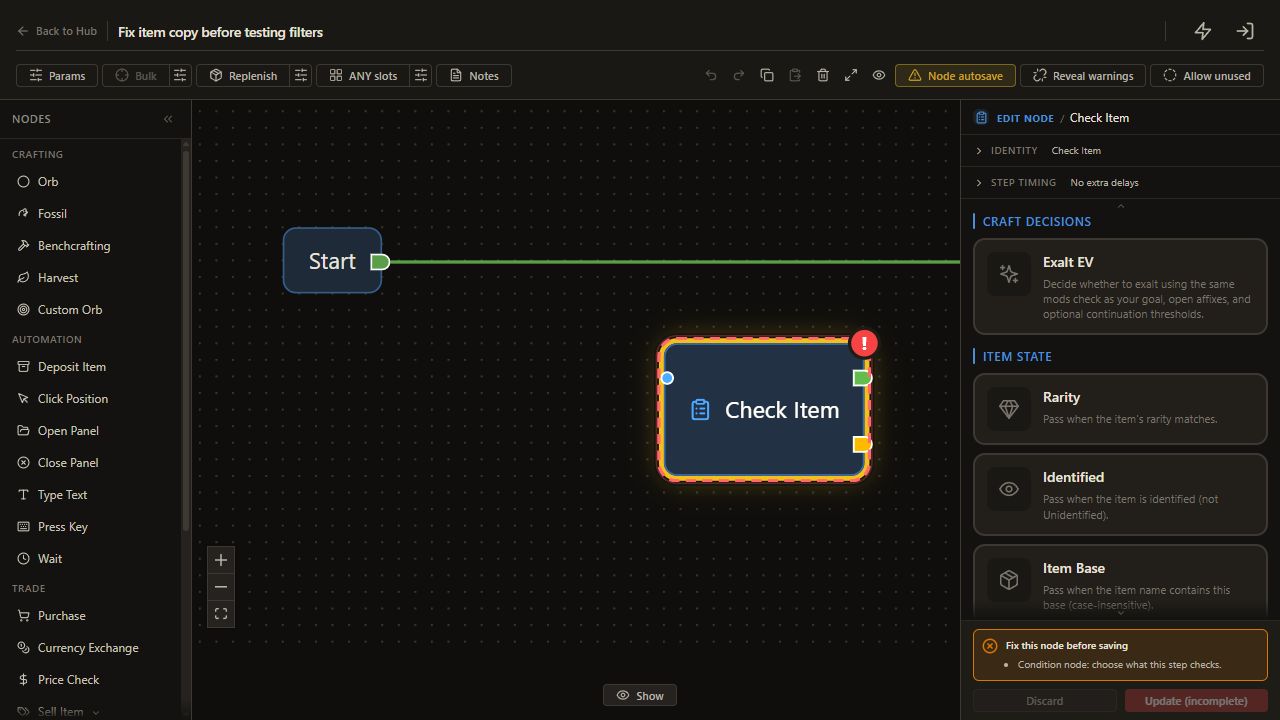
    10. Add Identified?

    Choose Check Item.

    The node appears on the canvas and its settings open.

    Open full-size screenshot
  11. 1. Add the identification decision

    11. Choose Identified

    Choose Identified.

    The Check Item template is Identified.

    Open full-size screenshot
  12. 1. Add the identification decision

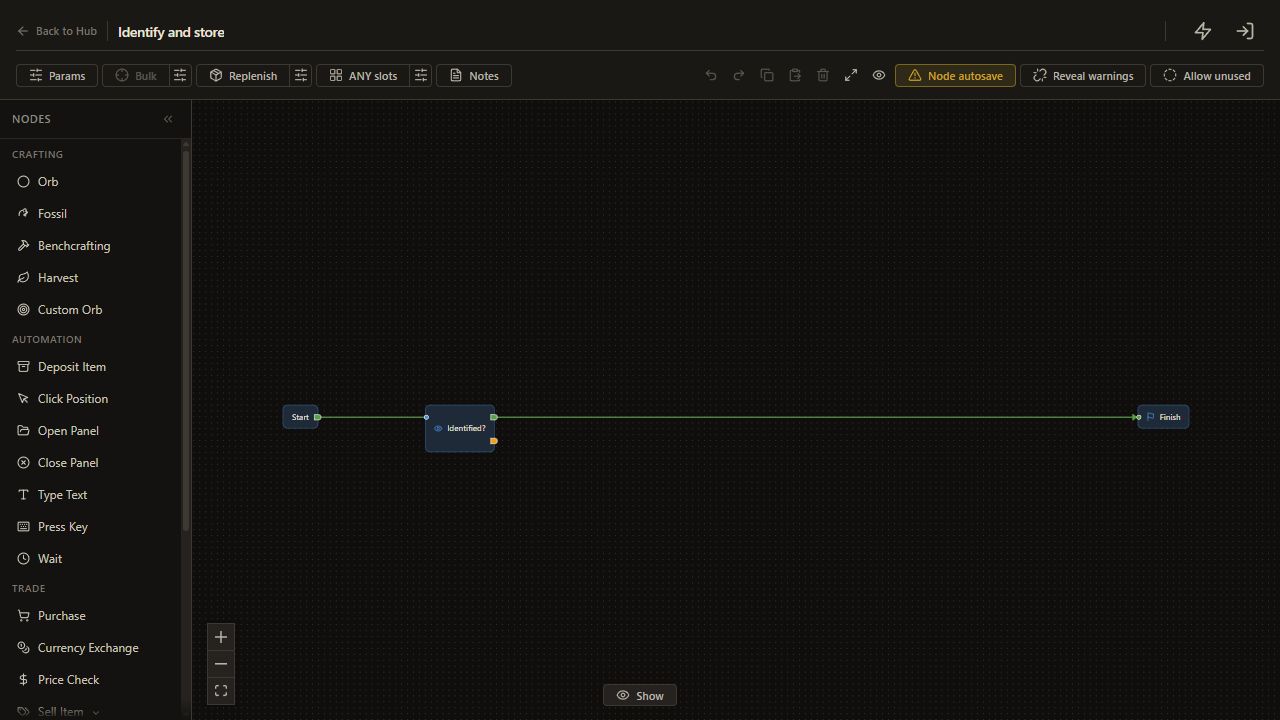
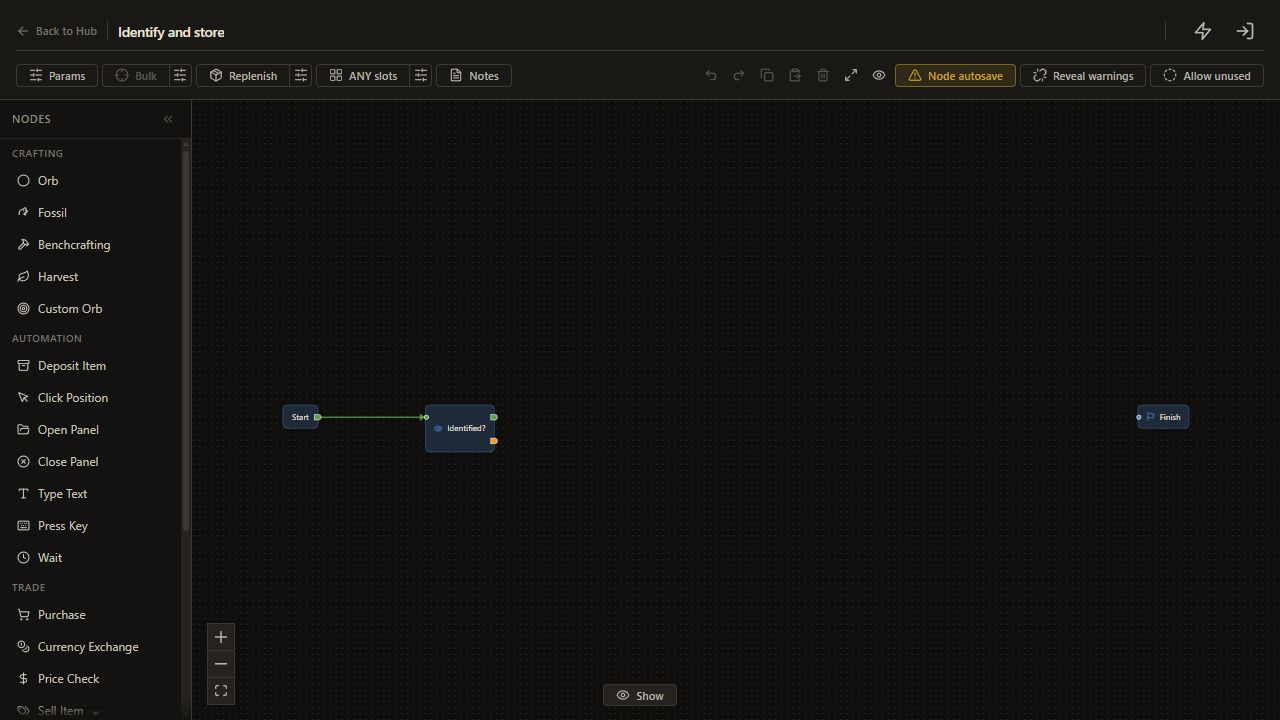
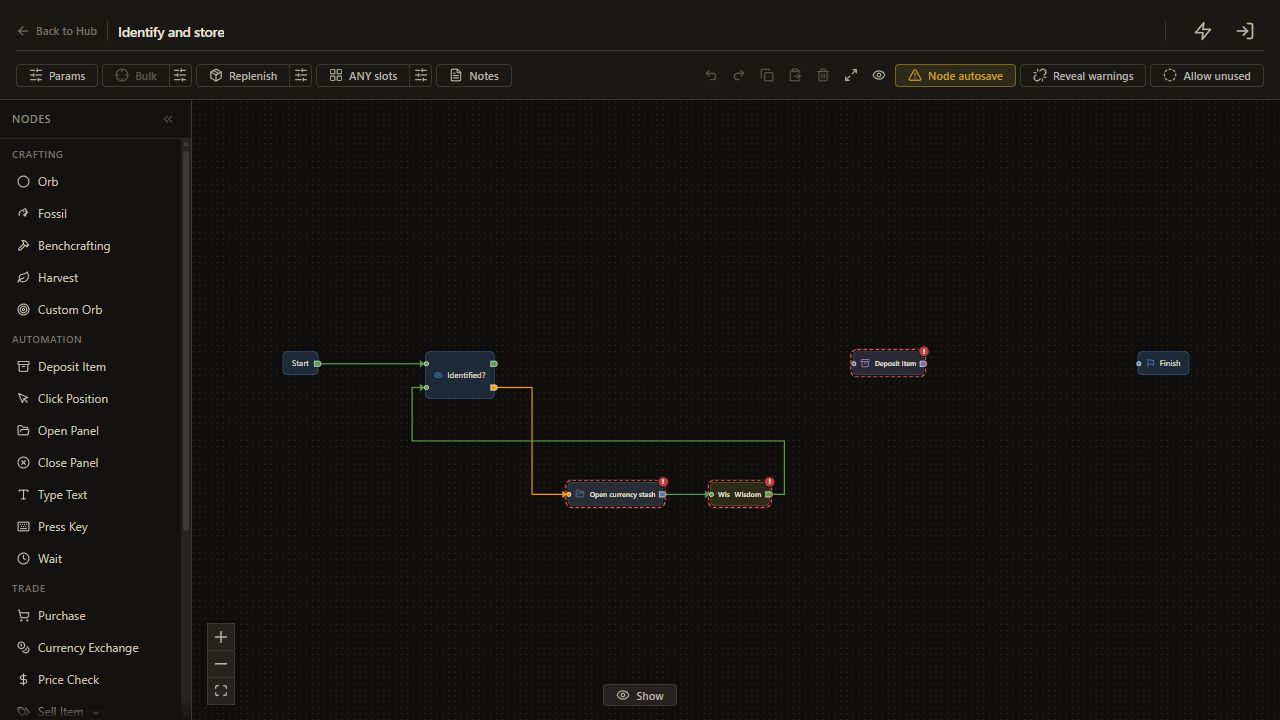
    12. Connect Start output to Identified?

    Drag from Start's unnamed output to an input on Identified?.

    The next route reaches Identified?. The former Start to Finish connection is replaced automatically.

    Open full-size screenshot
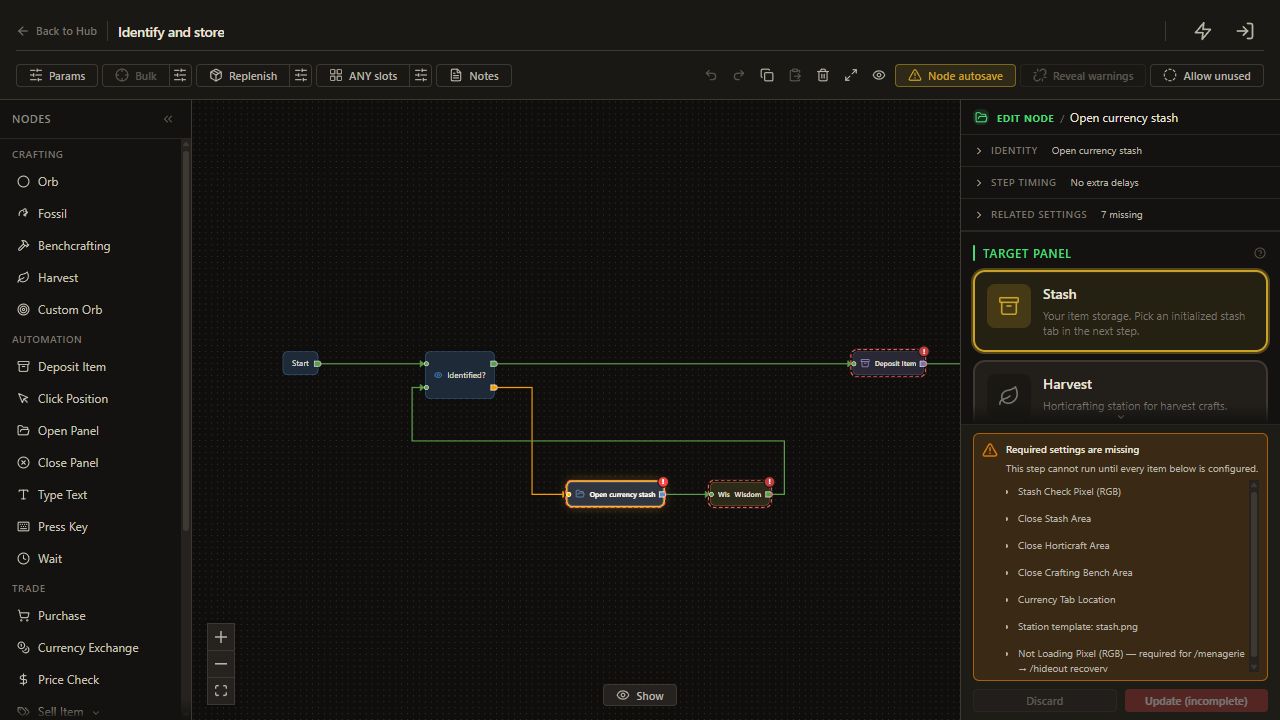
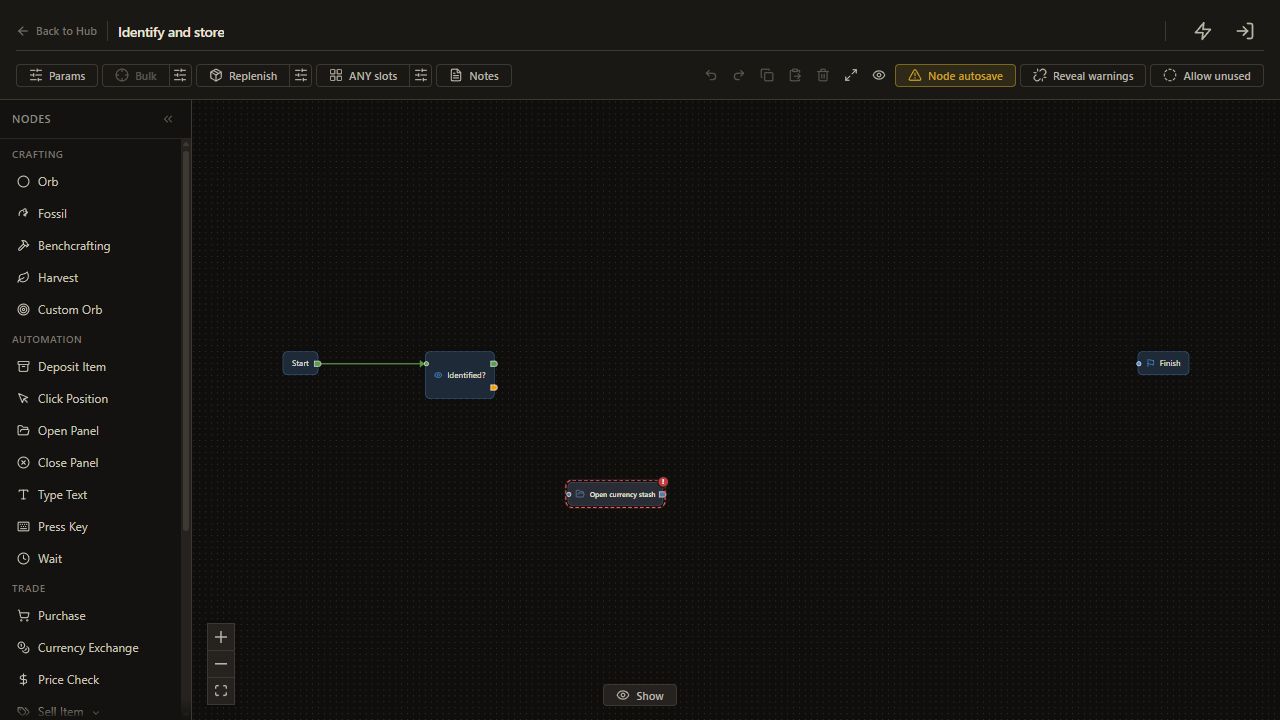
  13. 2. Open the currency stash when needed

    13. Add Open currency stash

    Choose Open Panel.

    The node appears on the canvas and its settings open.

    Open full-size screenshot
  14. 2. Open the currency stash when needed

    14. Open the stash

    Choose Stash.

    Open Panel targets the stash.

    Open full-size screenshot
  15. 2. Open the currency stash when needed

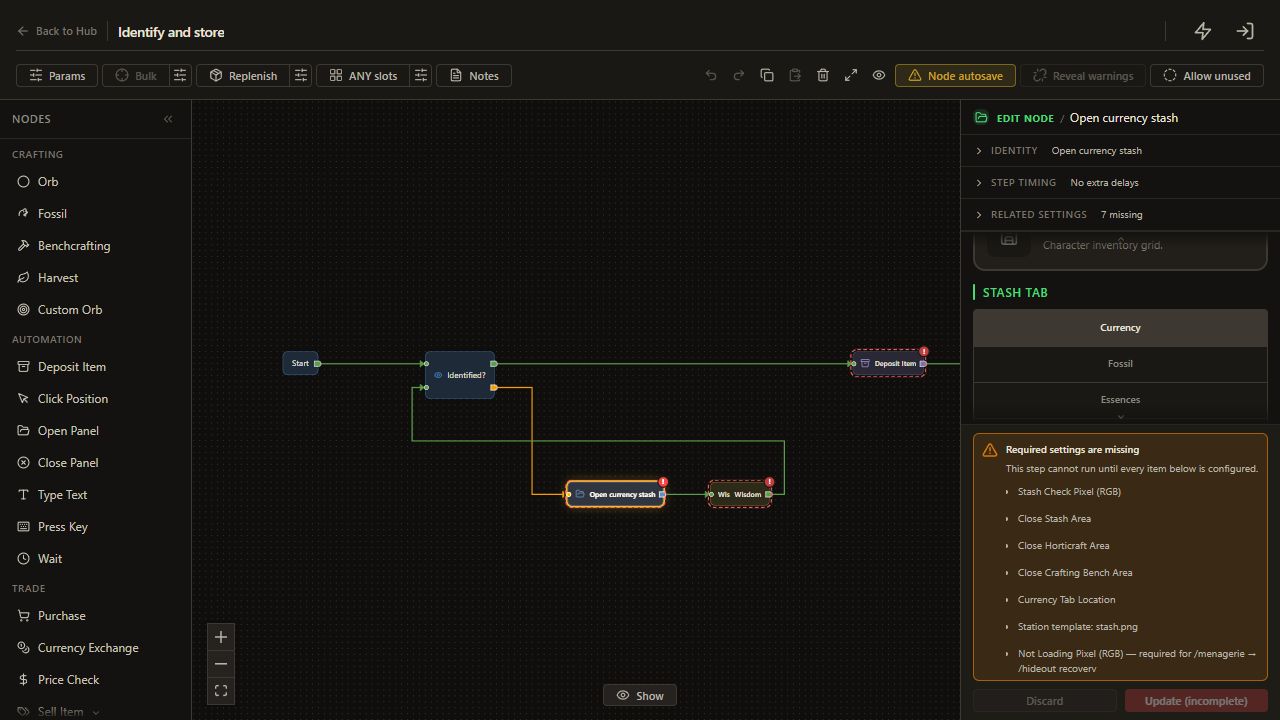
    15. Select the currency tab

    Choose Currency.

    The configured currency tab is selected.

    Open full-size screenshot
  16. 2. Open the currency stash when needed

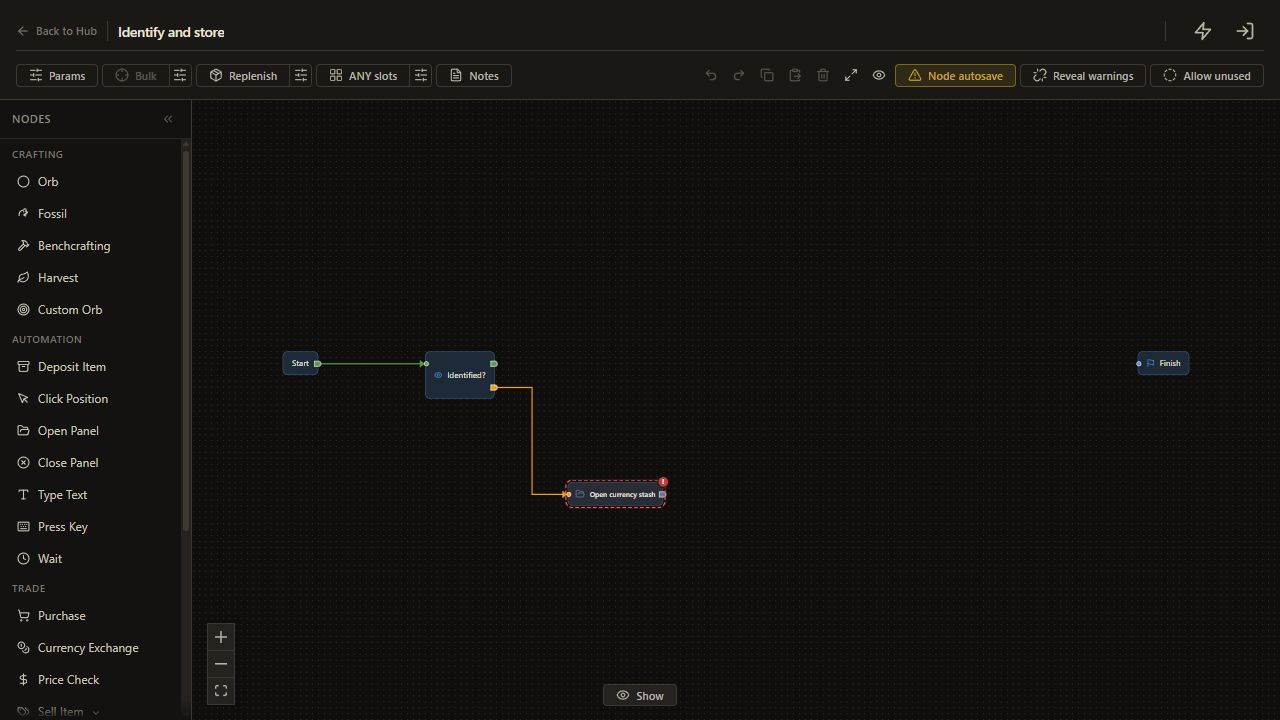
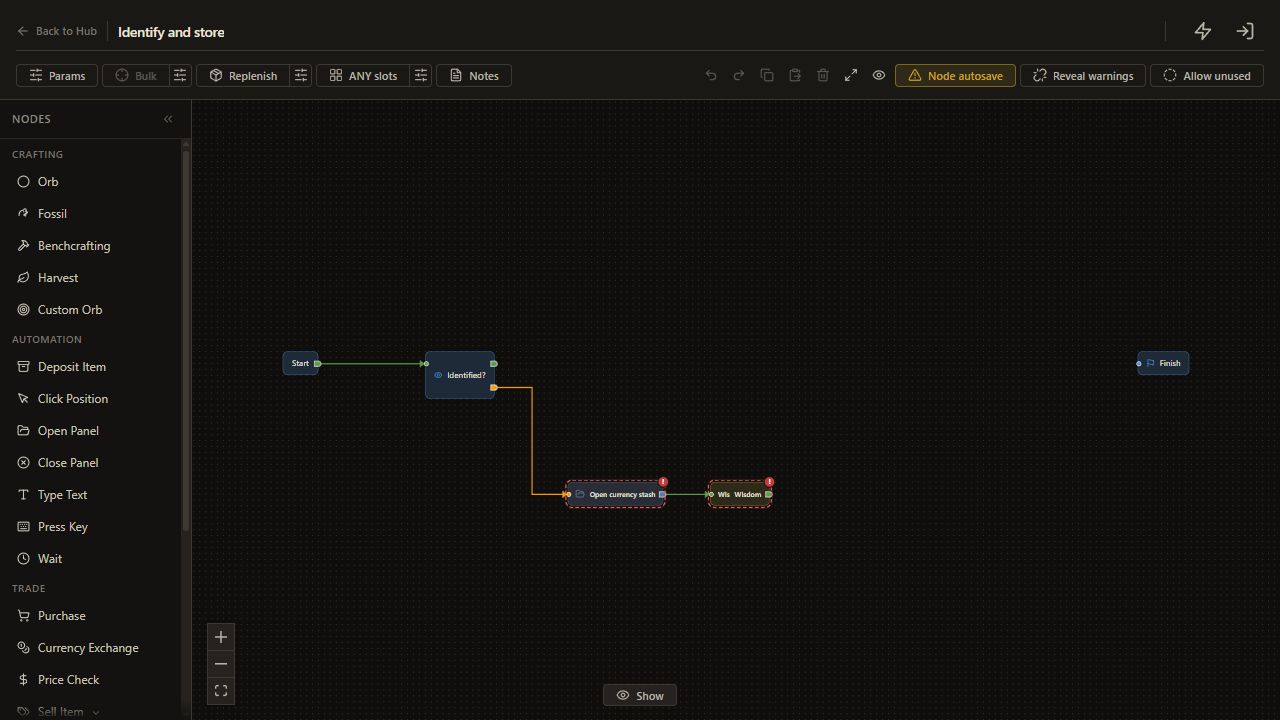
    16. Connect Identified? unmet to Open currency stash

    Drag from Identified?'s unmet output to an input on Open currency stash.

    The unmet route reaches Open currency stash.

    Open full-size screenshot
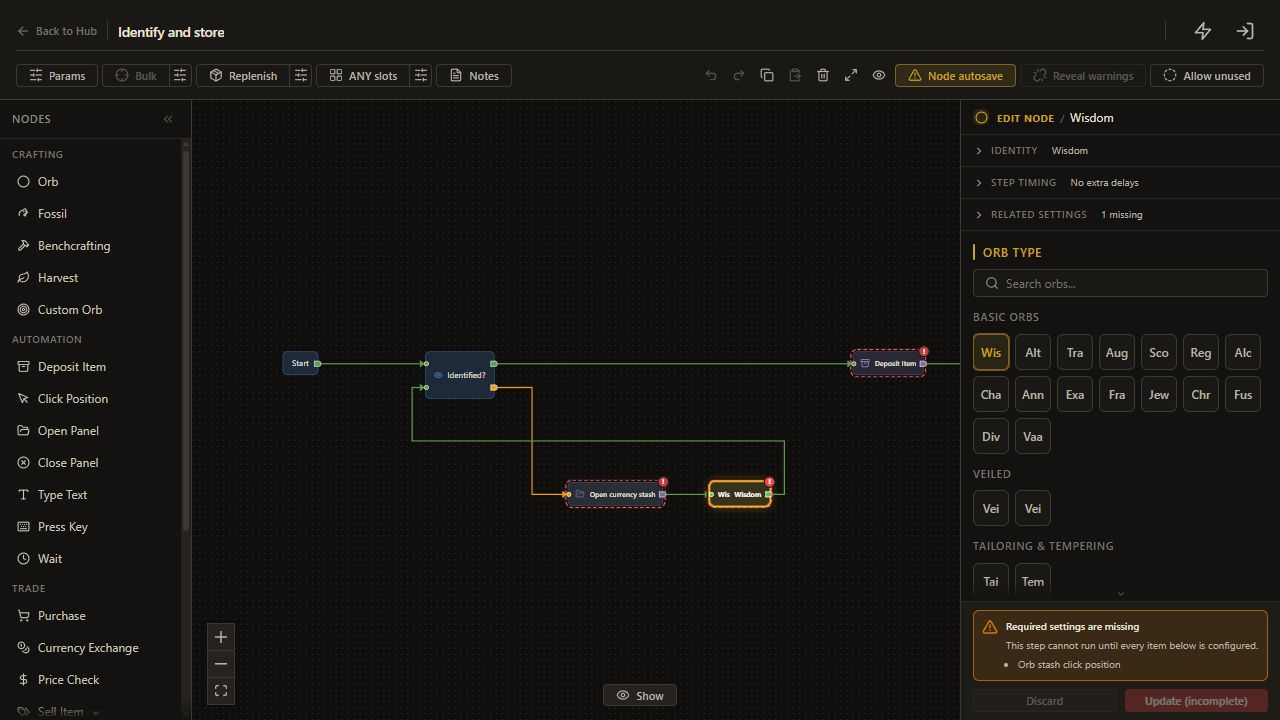
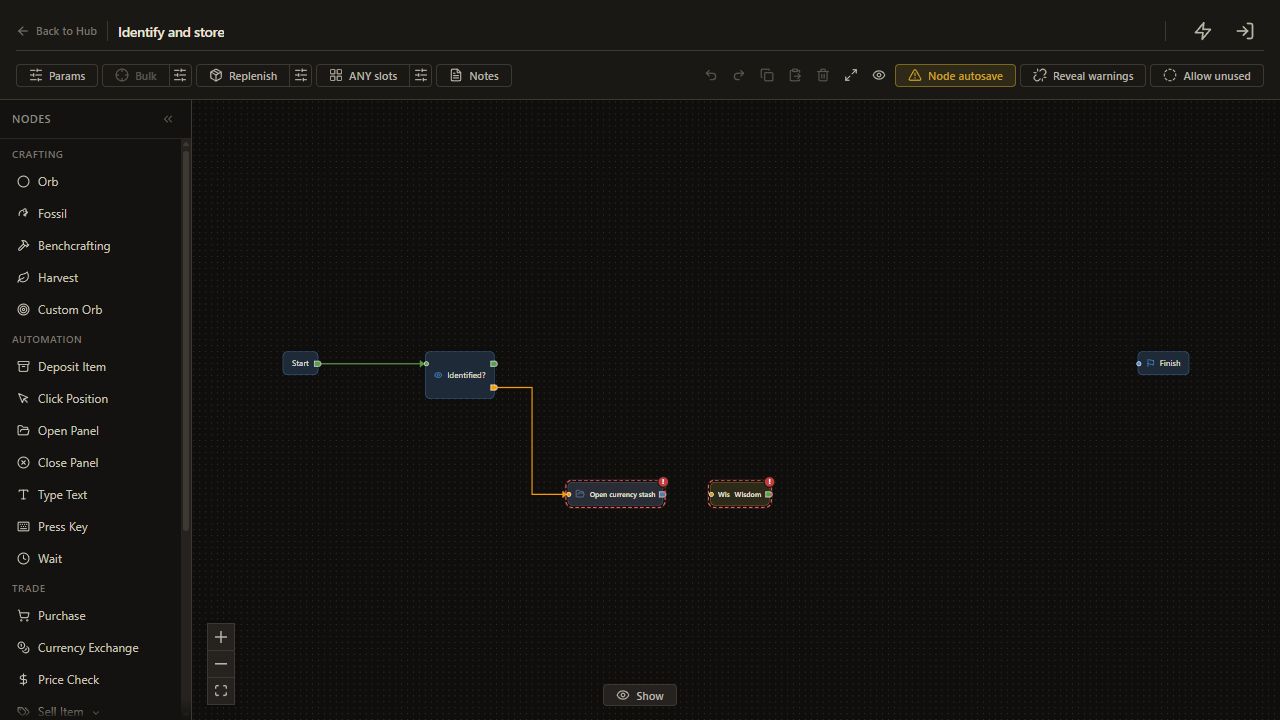
  17. 2. Open the currency stash when needed

    17. Add Wisdom

    Choose Orb.

    The node appears on the canvas and its settings open.

    Open full-size screenshot
  18. 2. Open the currency stash when needed

    18. Choose Wisdom

    Choose Wisdom.

    The Orb node uses Wisdom.

    Open full-size screenshot
  19. 2. Open the currency stash when needed

    19. Connect Open currency stash output to Wisdom

    Drag from Open currency stash's unnamed output to an input on Wisdom.

    The next route reaches Wisdom.

    Open full-size screenshot
  20. 2. Open the currency stash when needed

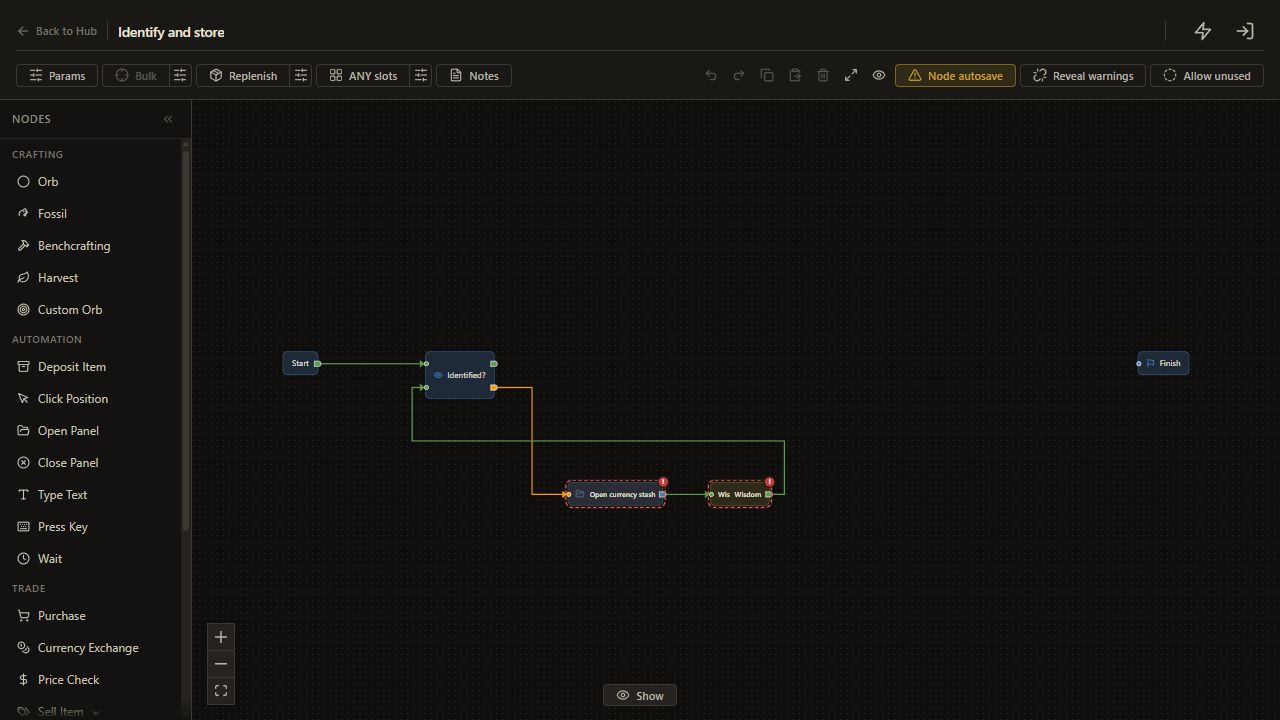
    20. Connect Wisdom output to Identified?

    Drag from Wisdom's unnamed output to an input on Identified?.

    The next route reaches Identified?.

    Open full-size screenshot
  21. 3. Choose the deposit destination explicitly

    21. Add Deposit Item

    Choose Deposit Item.

    The node appears on the canvas and its settings open.

    Open full-size screenshot
  22. 3. Choose the deposit destination explicitly

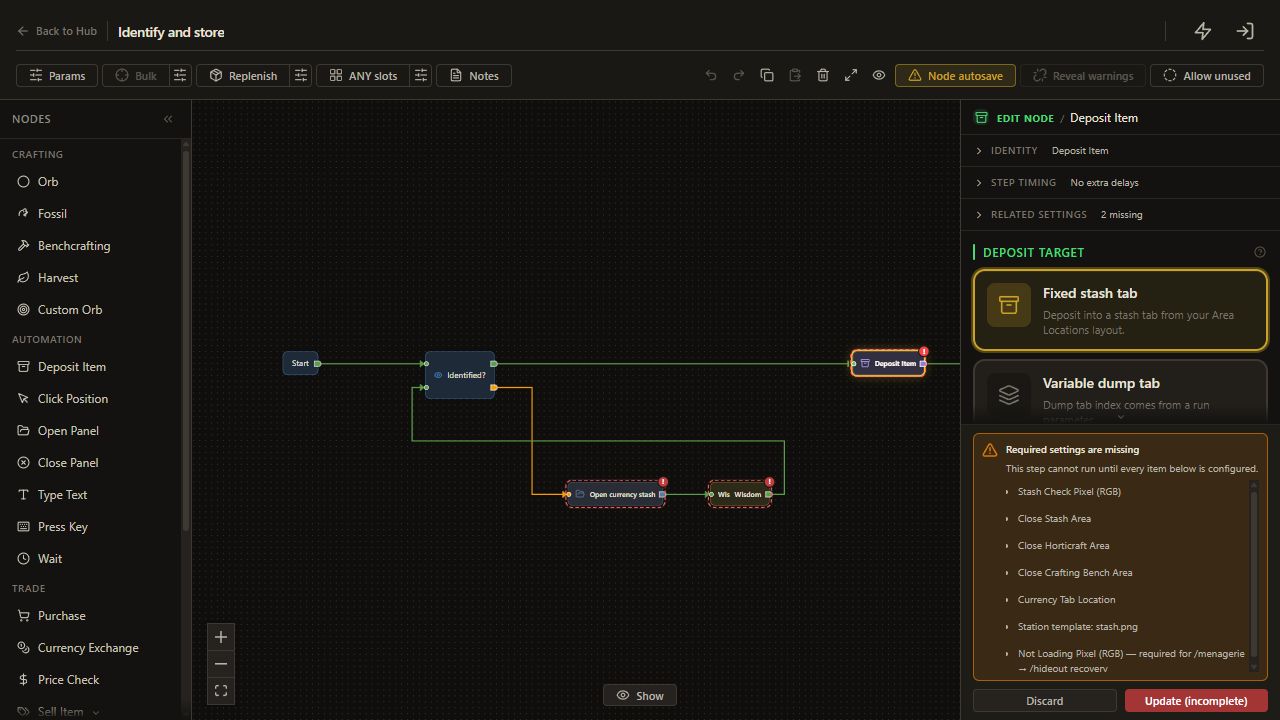
    22. Set a fixed destination

    Choose Fixed stash tab.

    The destination mode is explicit.

    Open full-size screenshot
  23. 3. Choose the deposit destination explicitly

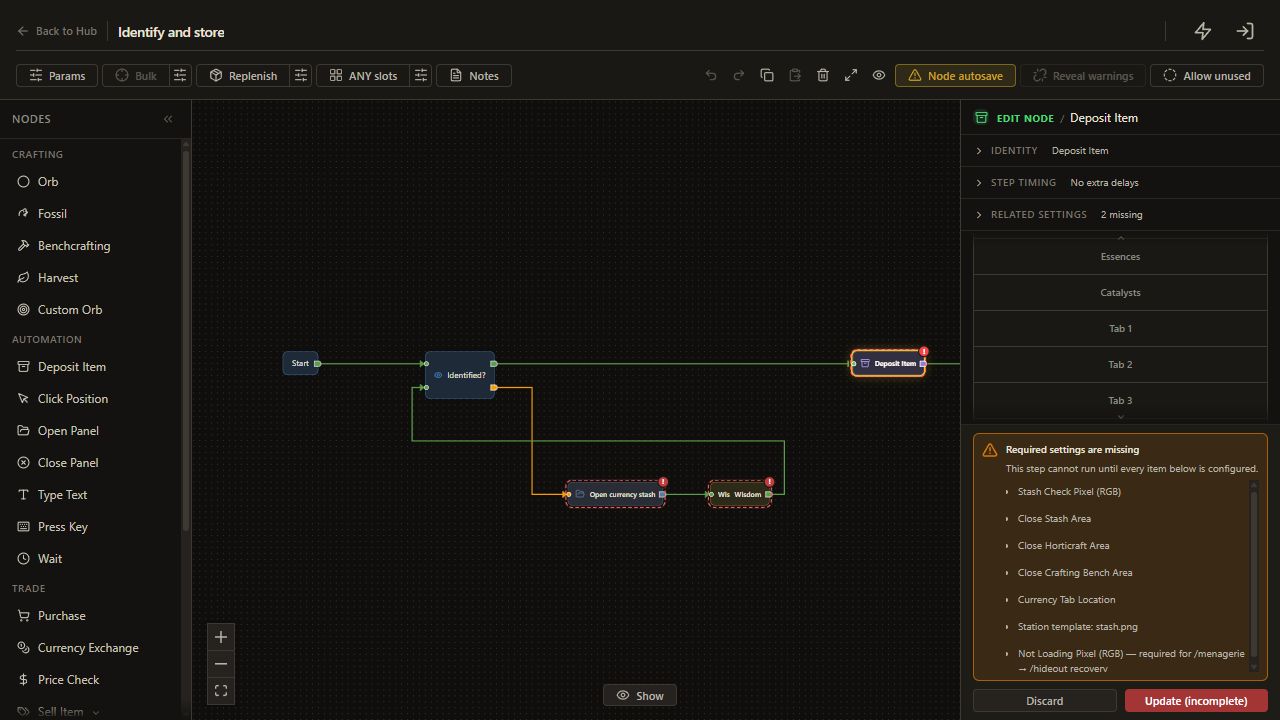
    23. Choose the dump tab

    Choose Tab 1 under Stash tab for this example. Use a general-purpose tab that you configured and left space in.

    Equipment goes to the chosen dump tab.

    Open full-size screenshot
  24. 4. Join identification to storage

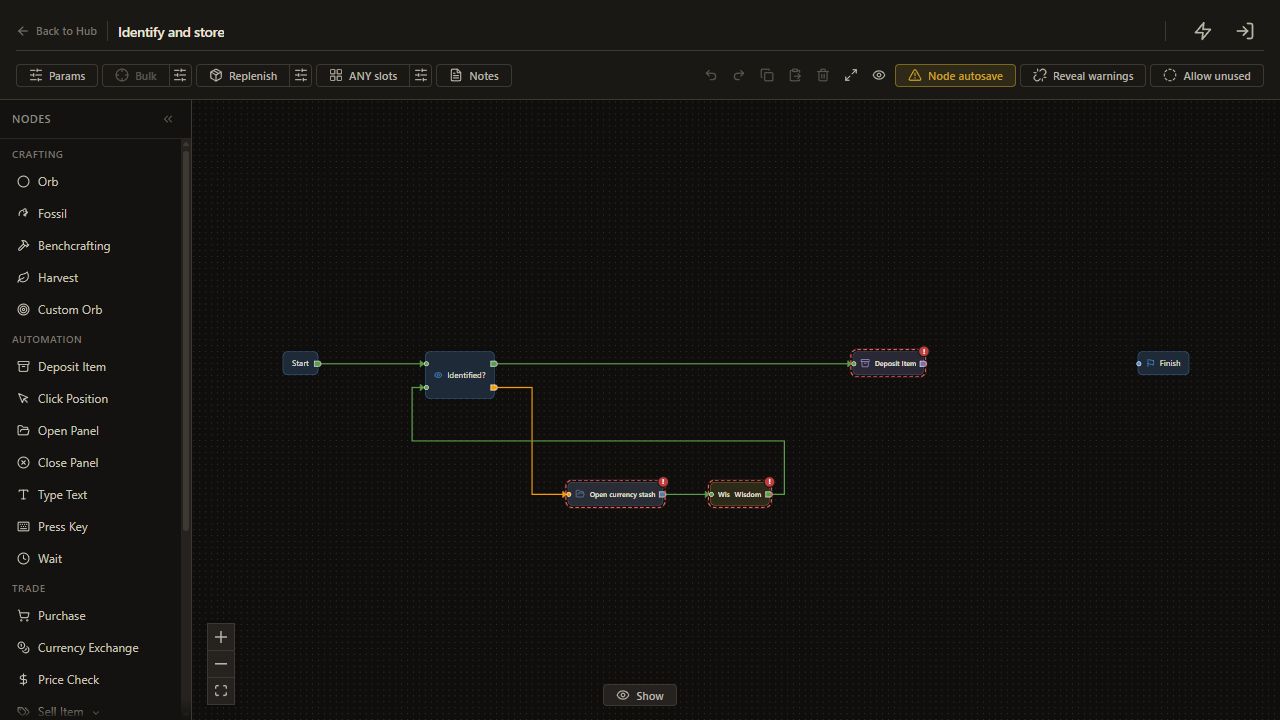
    24. Connect Identified? met to Deposit Item

    Drag from Identified?'s met output to an input on Deposit Item.

    The met route reaches Deposit Item.

    Open full-size screenshot
  25. 4. Join identification to storage

    25. Connect Deposit Item output to Finish

    Drag from Deposit Item's unnamed output to an input on Finish.

    The next route reaches Finish.

    Open full-size screenshot
  26. 5. Test one inventory item

    26. Check the node settings

    With Node autosave on, check the settings on the canvas. Switching nodes or using Back to Hub saves pending edits. If Node autosave is off, use Add to Tree for new nodes and Update for edits.

    The graph contains the configured nodes.

    Read and complete this step before continuing.

  27. 5. Test one inventory item

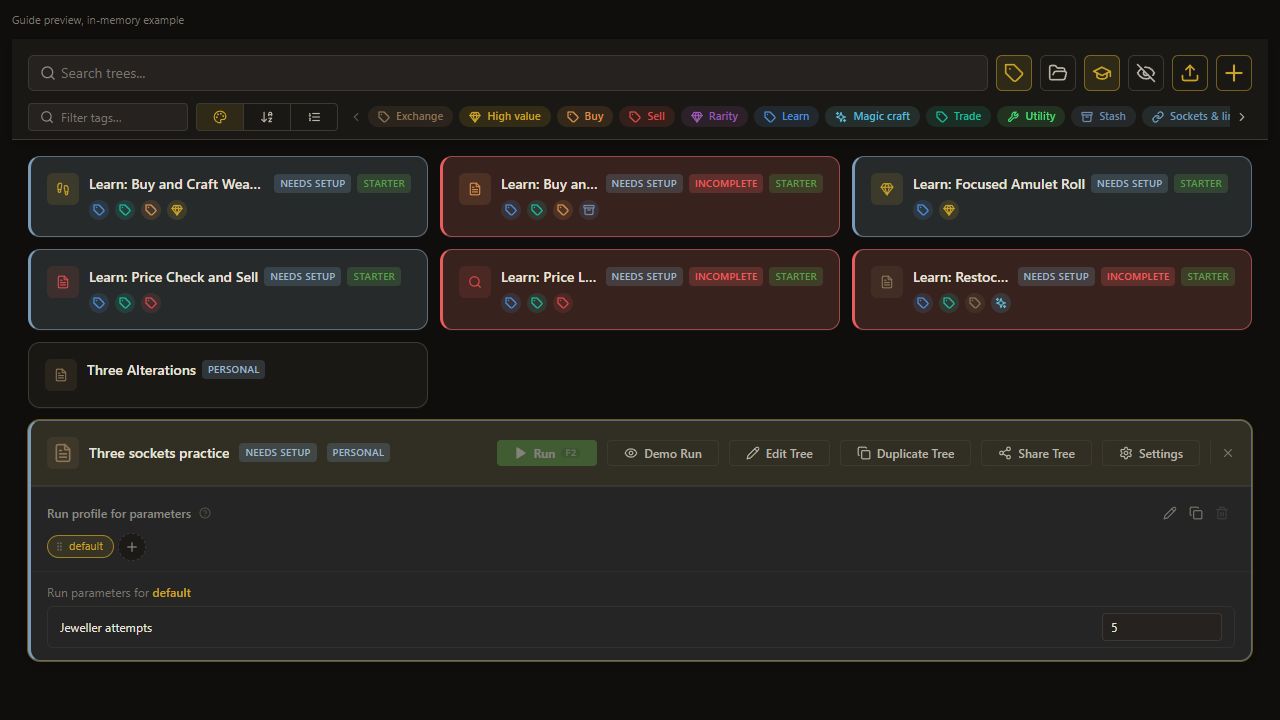
    27. Return to the Hub

    Choose Back to Hub.

    The personal tree is shown.

    Open full-size screenshot
  28. 5. Test one inventory item

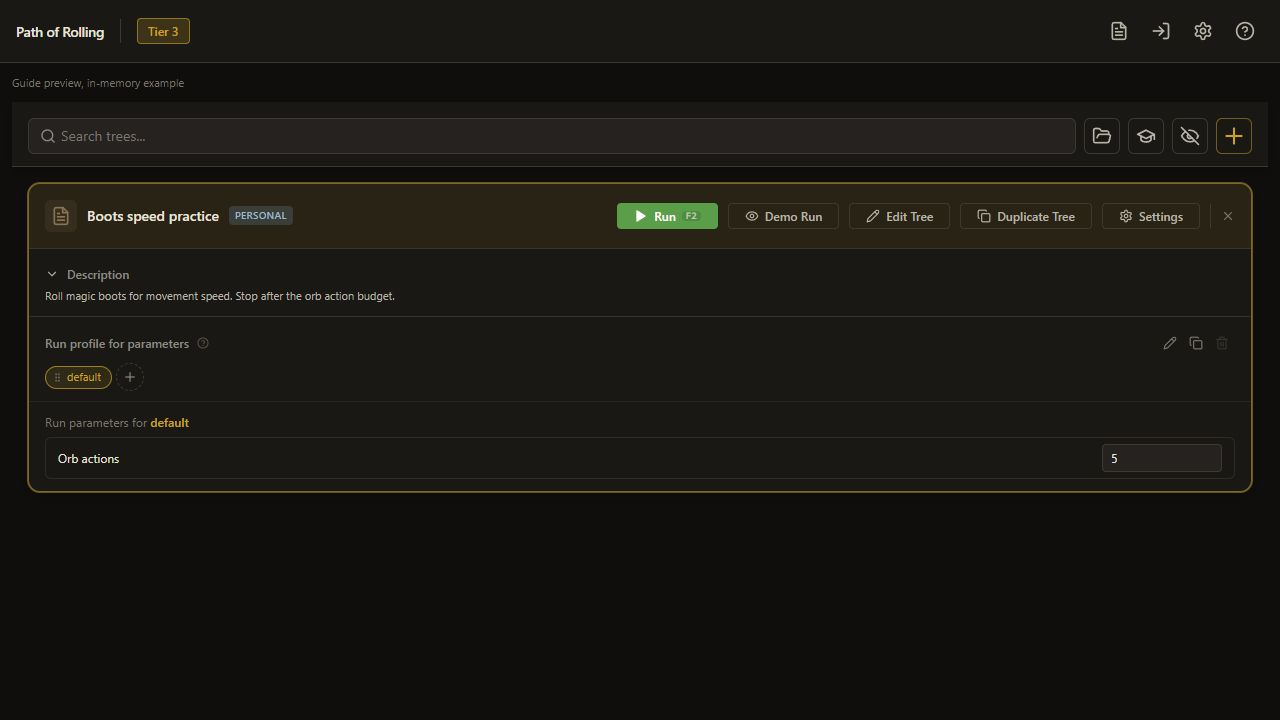
    28. Start the test

    On the selected Hub card, choose Run after checking the real setup.

    The configured run can begin on the prepared item.

    Open full-size screenshot
  29. 5. Test one inventory item

    29. Inspect the moved item

    Keep the mouse still during the run. Open the chosen dump tab afterward and inspect the former inventory slot.

    The item is identified and deposited.

    Complete and verify this step in the stated app or game.

  30. 5. Test one inventory item

    30. Read the storage steps

    Choose Logs.

    The identification and destination can be checked.

    Open full-size screenshot
  31. Check the result

    31. Open Logs

    Choose Logs.

    The actual sequence and exit can be inspected.

    Open full-size screenshot
  32. Check the result

    32. Inspect the actual result

    Confirm the item is identified, present in the selected dump tab and absent from its old inventory slot. Test an identified item separately.

    The second test skips Wisdom and still deposits.

    Complete and verify this step in the stated app or game.

  33. If it does not work

    33. Review if it does not work

    - The wrong tab opens: check the fixed destination control, not the node's display name. - Deposit reports no inventory grid: configure it through setup or the advanced Settings grid tab. - Wisdom repeats: stop and check the scroll pin and [item-copy shortcut](item-copy-troubleshooting.md).

    The section context and checks are preserved.

    Read and complete this step before continuing.

  34. Next guide

    34. Review next guide

    [Apply a verified single-item flow across a small inventory grid](bulk-loop.md).

    The section context and checks are preserved.

    Read and complete this step before continuing.

On this page

At a glance

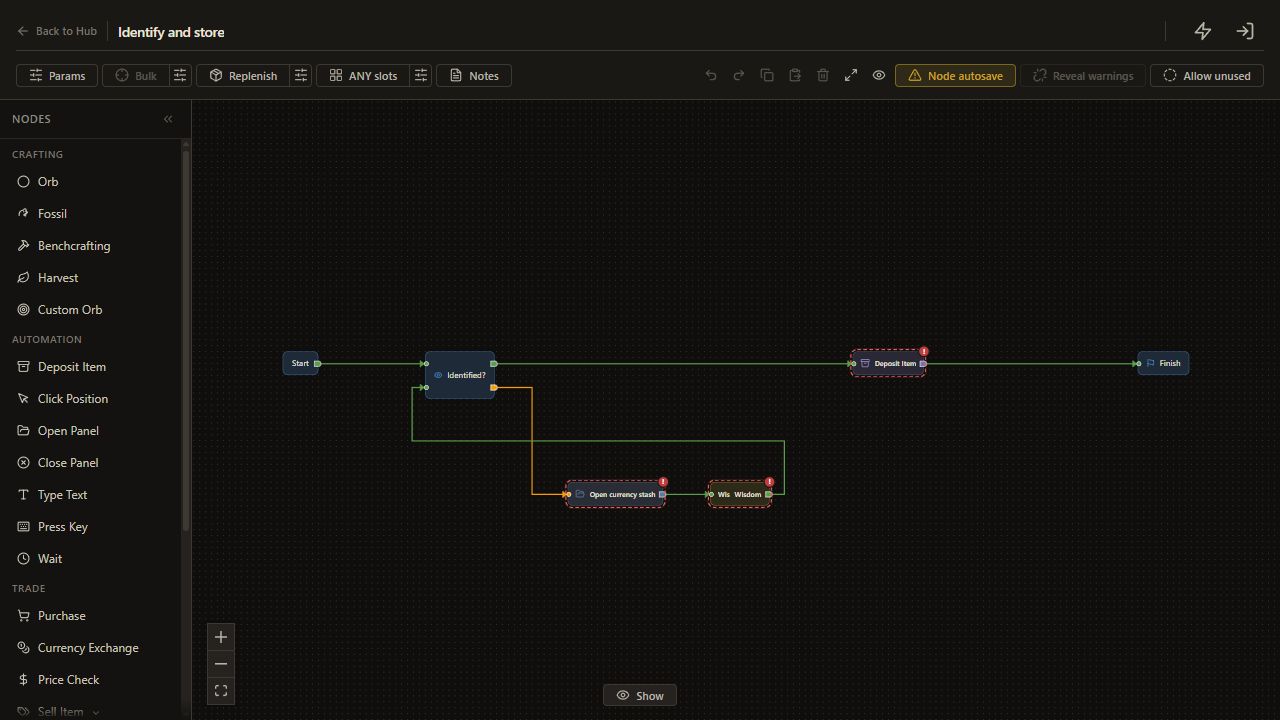
Two existing trees teach the pieces: IdentifyItem checks identification before using a Wisdom scroll, and Deposit to Stash opens the stash before depositing an item. Here you connect those actions into one single-item workflow.

The identification helper is internal. Build this personal version with + so every connection and destination is visible.

Before you start

Complete setup. Configure the inventory grid, stash opening detection, currency tab, Wisdom position and a general-purpose dump tab through setup and the relevant Settings location tabs. Leave space in that dump tab.

Use one unidentified equipment item in your inventory. Keep Current item selected. Use equipment for this example because depositing stackable currency uses a different transfer action.

1. Add the identification decision

Create Identify and store, then open Edit Tree.

Click the sliders button beside Bulk in the editor toolbar, labeled Configure bulk / grid settings. Choose Current item, then click Save. The dialog closes and the tree uses one item.

Add Check Item > Identified and connect Start to it.

Its met route means the item can proceed to storage. Its unmet route needs the Wisdom action first. An already identified item should bypass Wisdom.

2. Open the currency stash when needed

Add Open Panel, choose Stash, and choose the configured currency tab. Connect Identified's unmet output to this node.

Add Orb > Wisdom and connect Open Panel to it. Connect Wisdom back to Identified. This follows the saved helper's recheck pattern rather than assuming the scroll worked.

3. Choose the deposit destination explicitly

Add Deposit Item. Under Deposit target, choose Fixed stash tab. Under Stash tab, choose Tab 1 for this example, or the general-purpose tab you configured. Leave enough space in that tab.

Do this even if a saved node's display name mentions a tab number. The destination control determines where it goes. The old minimal sample has no explicit tab fields and resolves to the currency tab by default, which is unsuitable for this equipment example.

4. Join identification to storage

Connect Identified's met output to Deposit Item, then Deposit Item to Finish. Deposit Item opens the stash when needed and selects its fixed destination, so an additional Open Panel before it is optional.

Review the flow: unidentified equipment opens currency stash, receives Wisdom, and is checked again. Identified equipment goes directly to the chosen dump tab.

5. Test one inventory item

Save the tree, make the game ready, and start with the item at the current-item position. Keep your mouse still during execution.

After it finishes, open the chosen dump tab and inspect the item. It should be identified and absent from its old inventory slot. Read Logs for both the identification decision and deposit destination.

Check the result

One equipment item moves to the selected dump tab after identification. A separate test on an already identified item should skip Wisdom and still deposit.

If it does not work

  • The wrong tab opens: check the fixed destination control, not the node's display name.
  • Deposit reports no inventory grid: configure it through setup or the advanced Settings grid tab.
  • Wisdom repeats: stop and check the scroll pin and item-copy shortcut.

Next guide

Apply a verified single-item flow across a small inventory grid.

Keep learning

Browse all guides

For setup help, the installer or license keys, join the official Discord. Sales and key issues: DM PathOfRolling. Check the account before paying; watch for impostors.