Buy one normal weapon, make it magic and list it

Updated
Complete

Buy one normal weapon, make it magic and list it

Read the written guide

Follow each step in the app. Numbered markers show the real controls. To connect nodes, drag from output marker 1 to input marker 2. Connection maps show the completed route. Steps outside the app name where to continue.

  1. At a glance

    1. Read the scope

    Read the practice target and changes from the saved sample.

    The scope and limits are clear.

    Read and complete this step before continuing.

  2. 1. Create the single-item helper

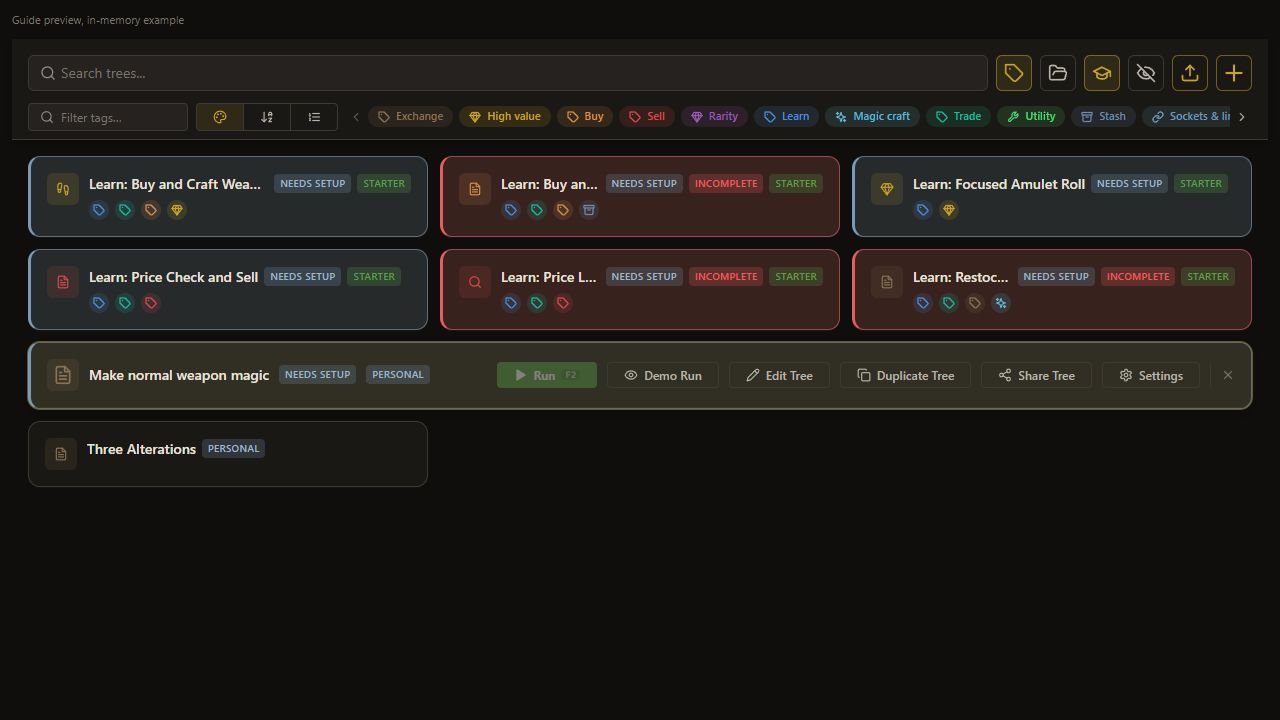
    2. Create a personal tree

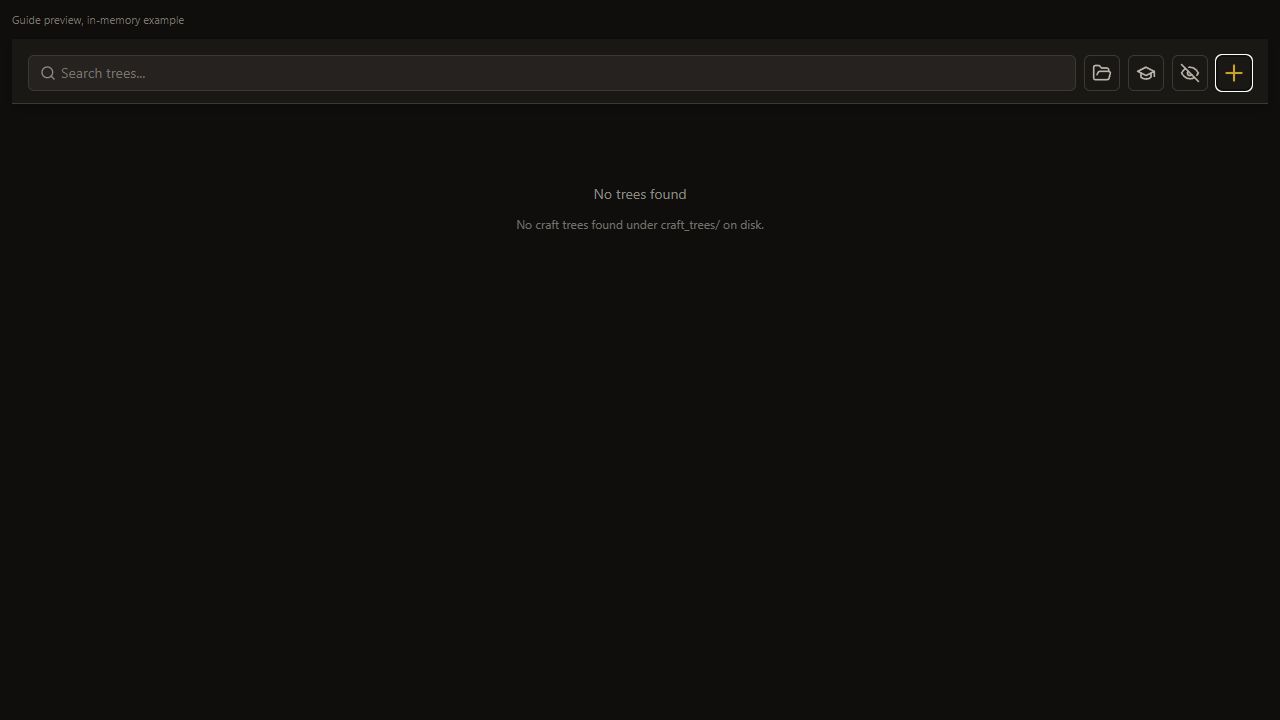
    Choose + on the Hub.

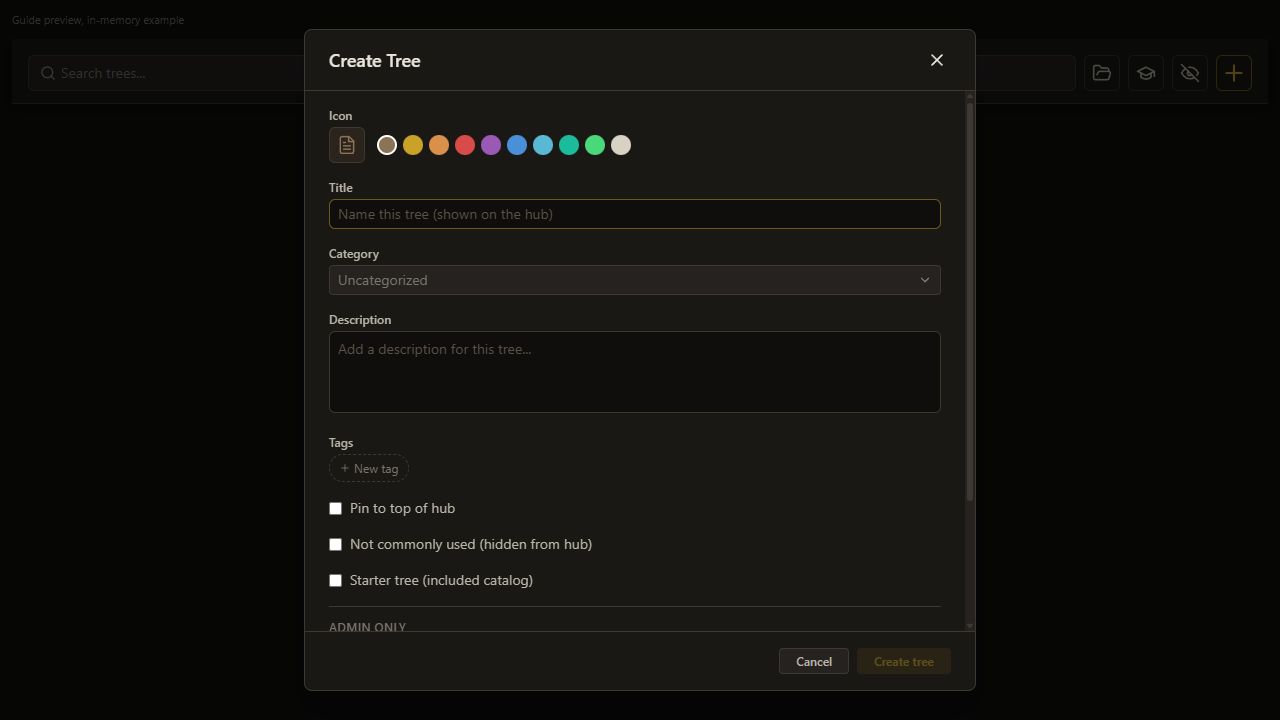
    Create Tree opens.

    Open full-size screenshot
  3. 1. Create the single-item helper

    3. Name the tree

    Set Name this tree (shown on the hub) to Make normal weapon magic.

    Name this tree (shown on the hub) keeps the selected value.

    Open full-size screenshot
  4. 1. Create the single-item helper

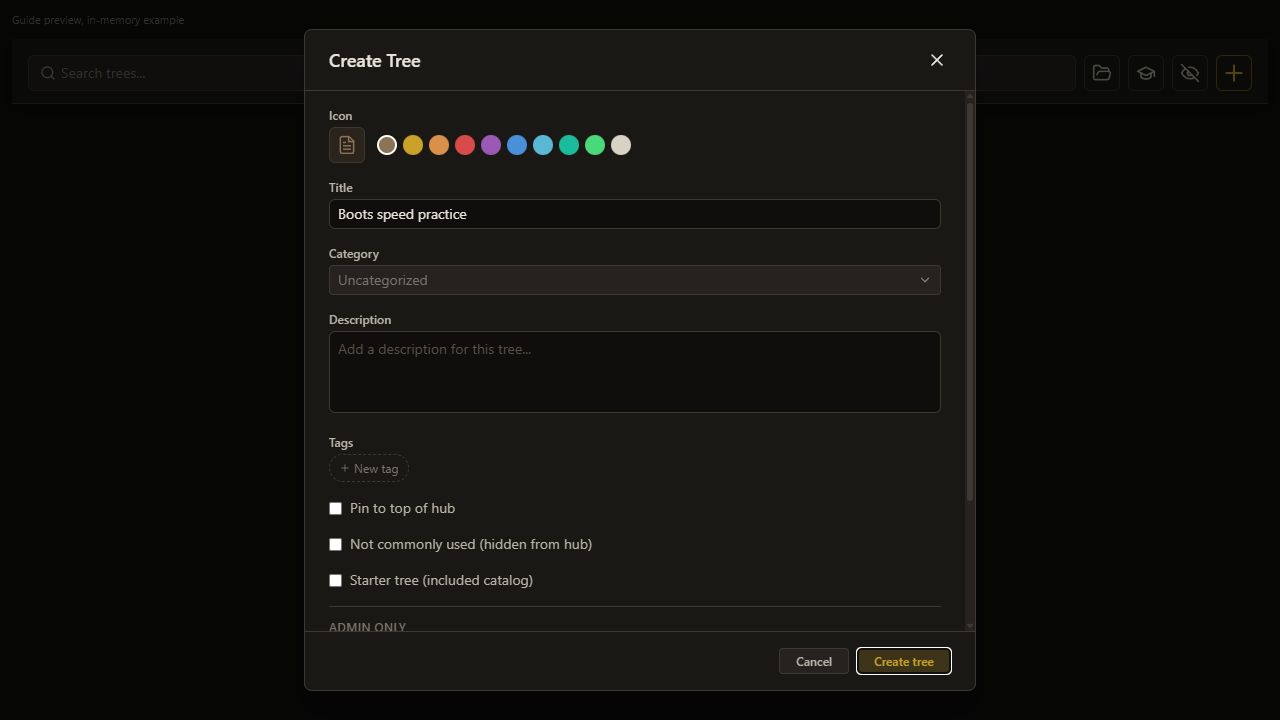
    4. Create the tree

    Choose Create tree.

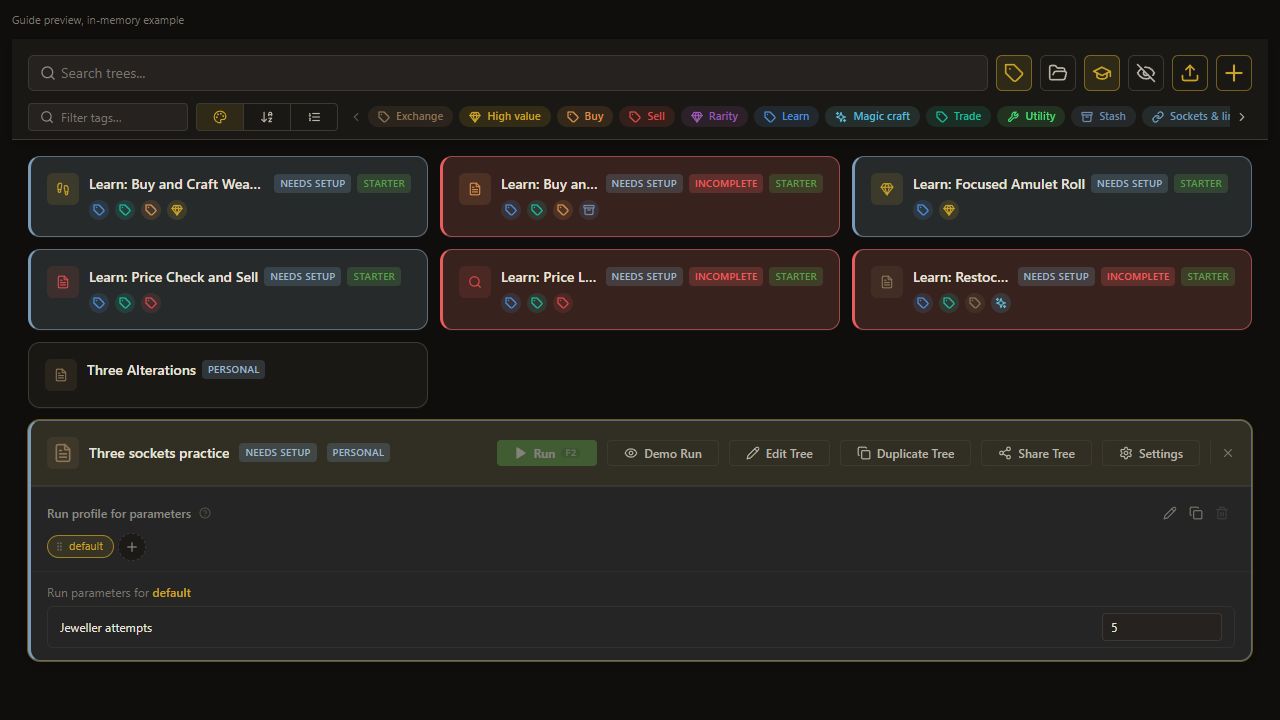
    The personal tree appears on the Hub.

    Open full-size screenshot
  5. 1. Create the single-item helper

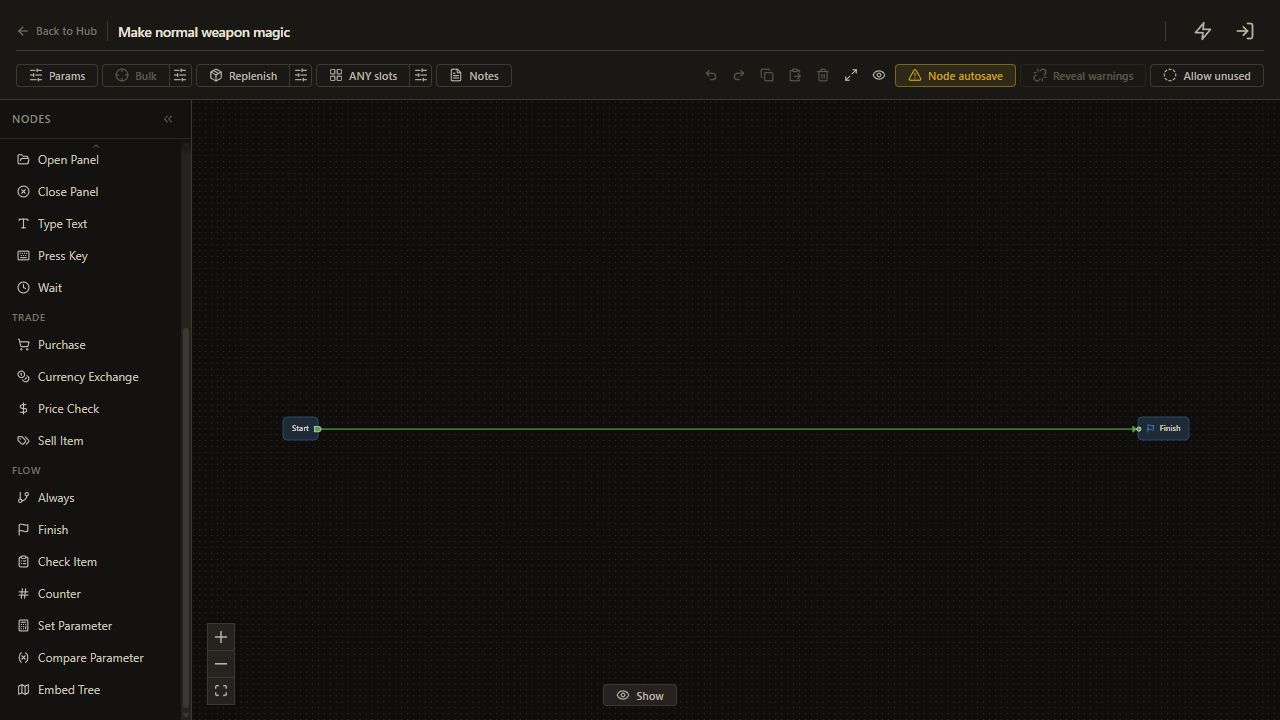
    5. Open the editor

    Choose Edit Tree.

    The production editor opens.

    Open full-size screenshot
  6. 1. Create the single-item helper

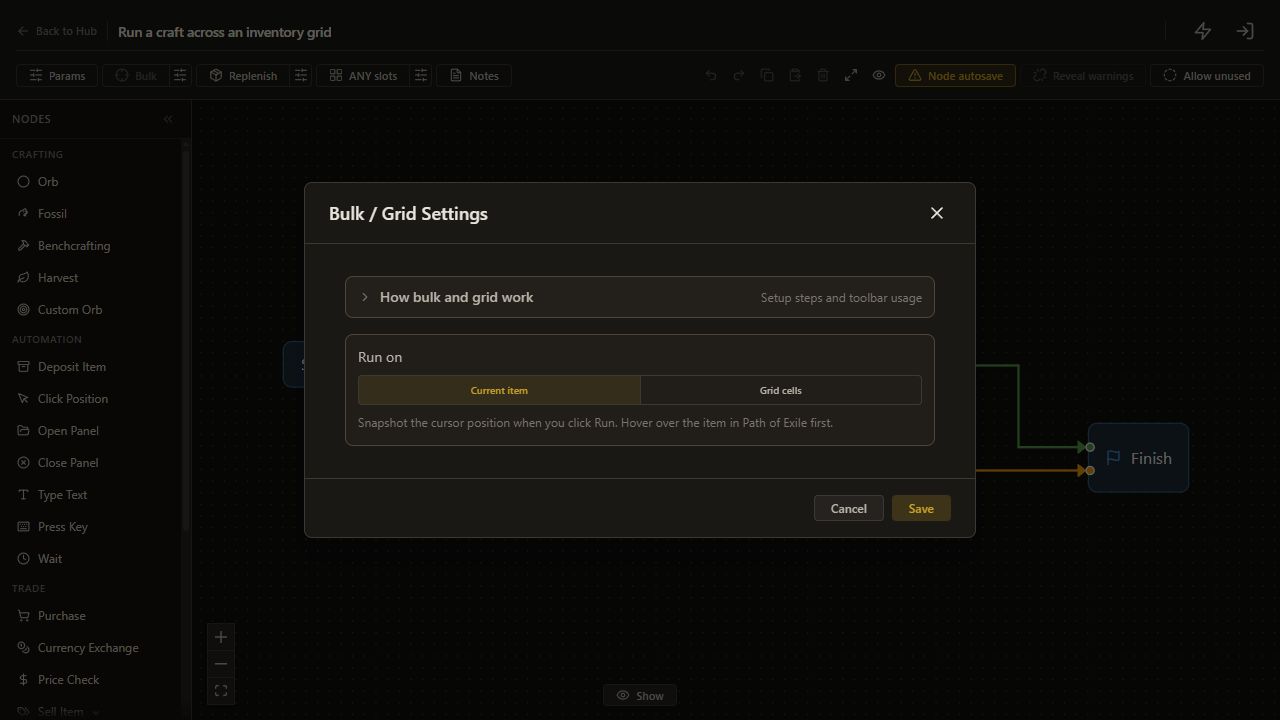
    6. Open Bulk settings

    Click the sliders button beside Bulk, labeled Configure bulk / grid settings.

    The Bulk settings dialog opens.

    Open full-size screenshot
  7. 1. Create the single-item helper

    7. Use one item

    Click Current item in the Bulk settings dialog.

    Current item is selected in the dialog; click Save next.

    Open full-size screenshot
  8. 1. Create the single-item helper

    8. Save one-item mode

    Click Save in the Bulk settings dialog.

    Current item is saved and the dialog closes.

    Open full-size screenshot
  9. 1. Create the single-item helper

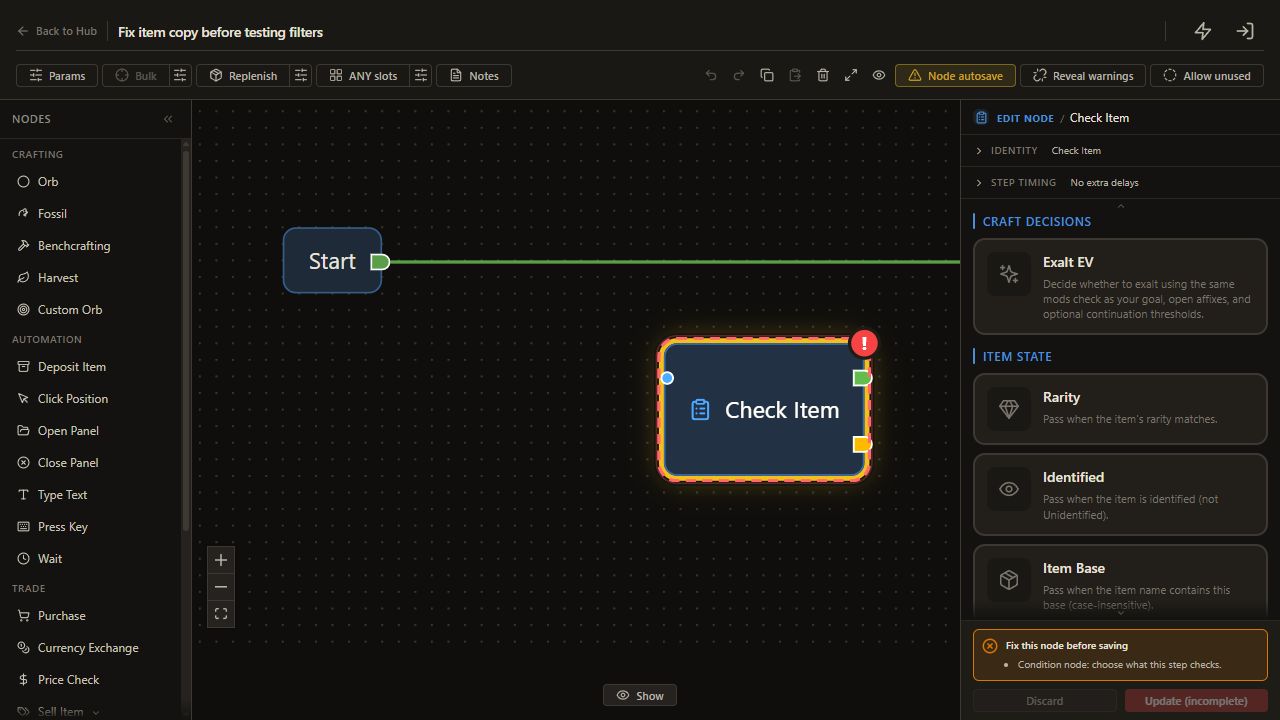
    9. Add Normal?

    Choose Check Item.

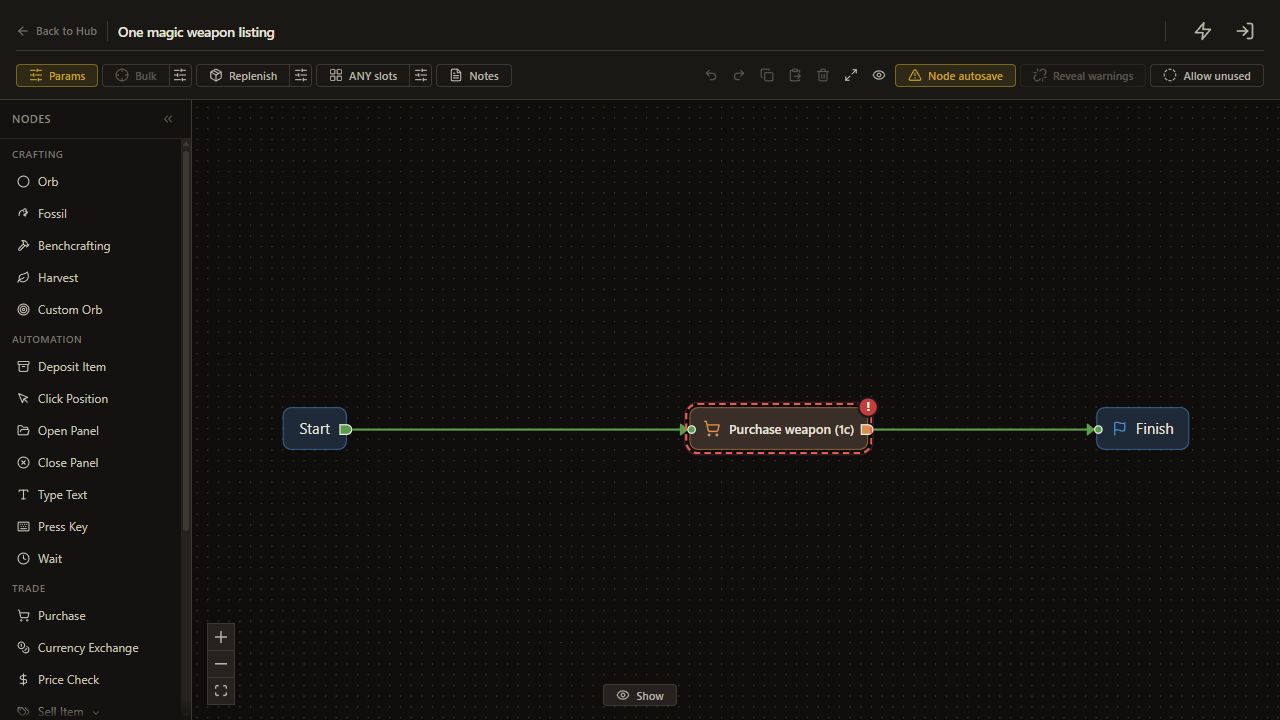
    The node appears on the canvas and its settings open.

    Open full-size screenshot
  10. 1. Create the single-item helper

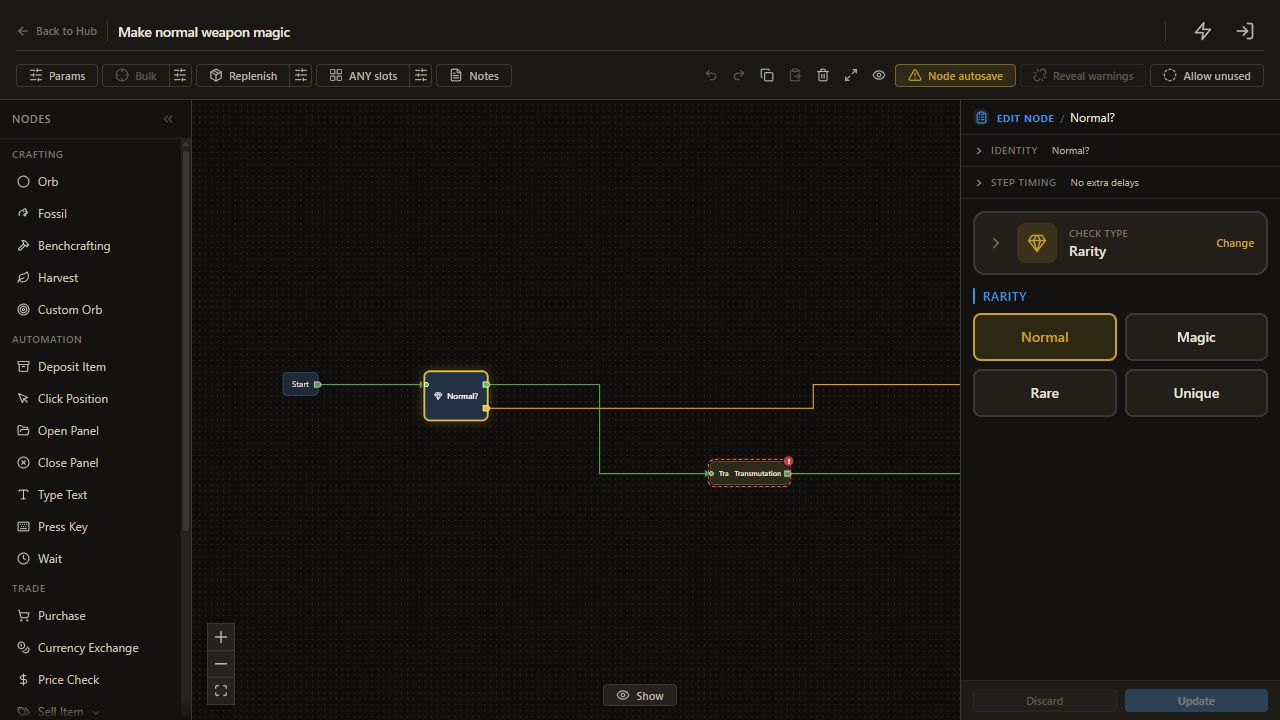
    10. Choose Rarity

    Choose Rarity.

    The Check Item template is Rarity.

    Open full-size screenshot
  11. 1. Create the single-item helper

    11. Select accepted rarities

    Select exactly Normal; deselect other rarities.

    The check accepts only Normal.

    Open full-size screenshot
  12. 1. Create the single-item helper

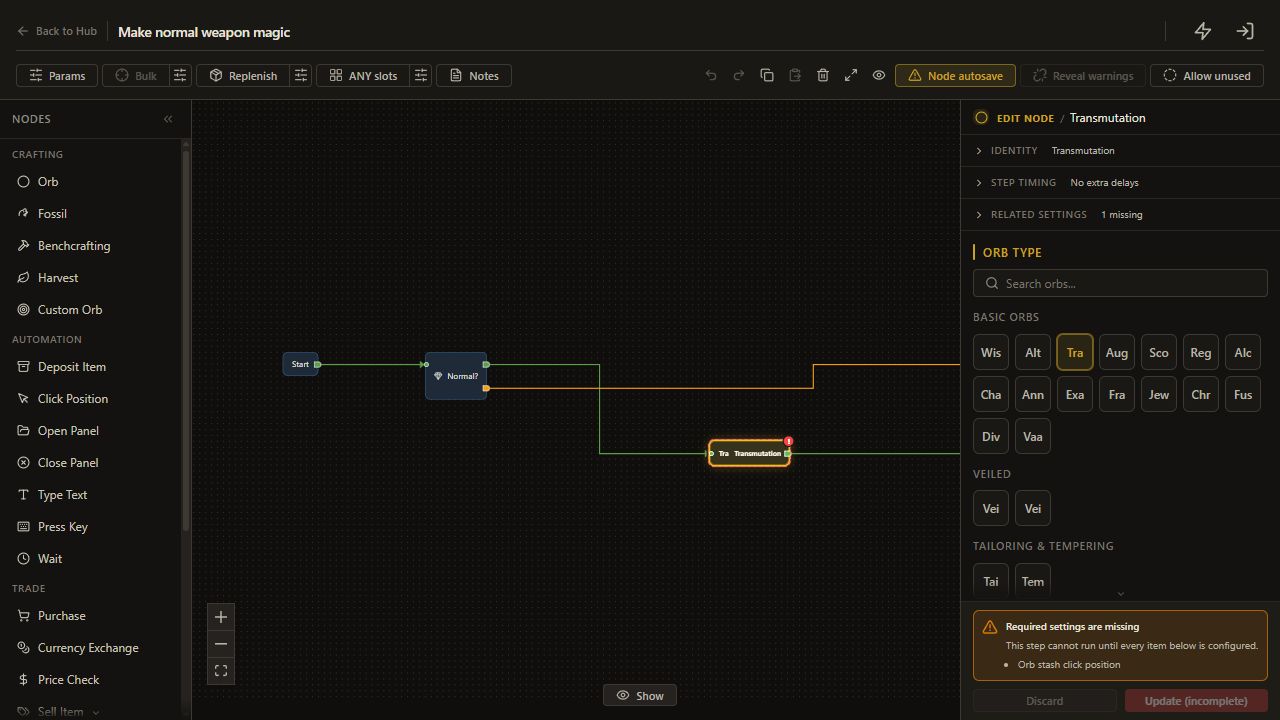
    12. Add Transmutation

    Choose Orb.

    The node appears on the canvas and its settings open.

    Open full-size screenshot
  13. 1. Create the single-item helper

    13. Choose Transmutation

    Choose Transmutation.

    The Orb node uses Transmutation.

    Open full-size screenshot
  14. 1. Create the single-item helper

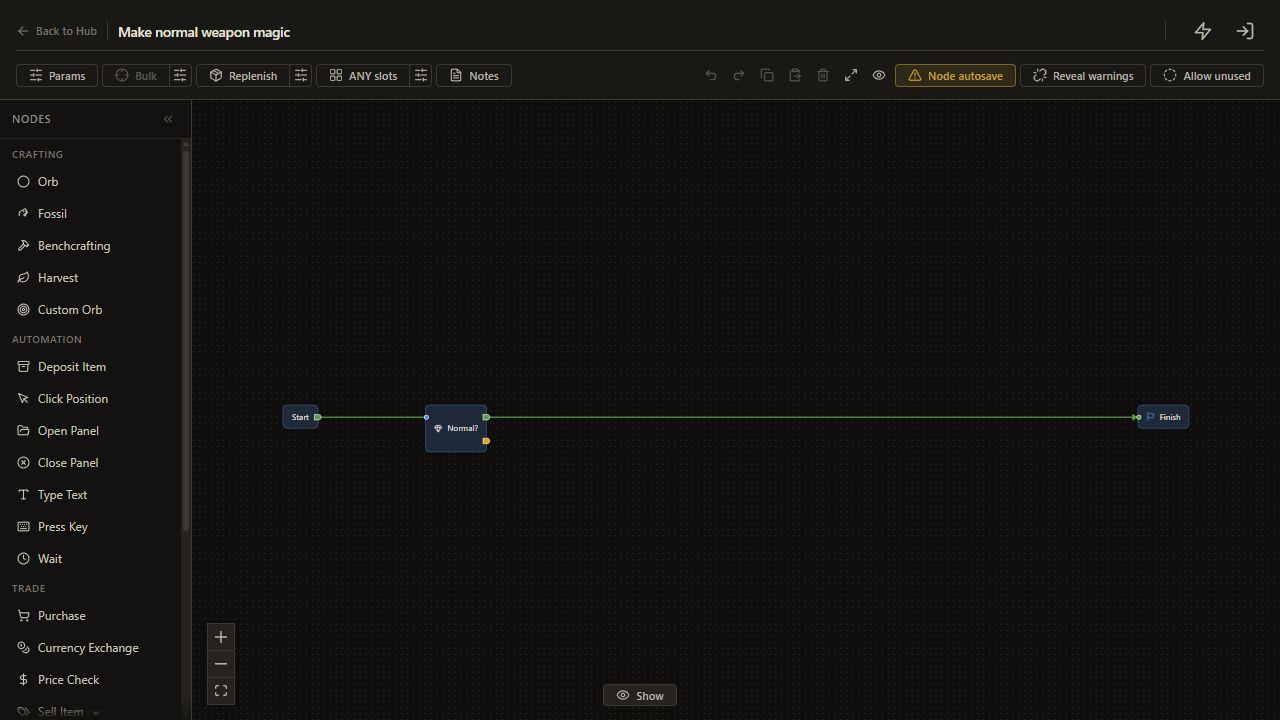
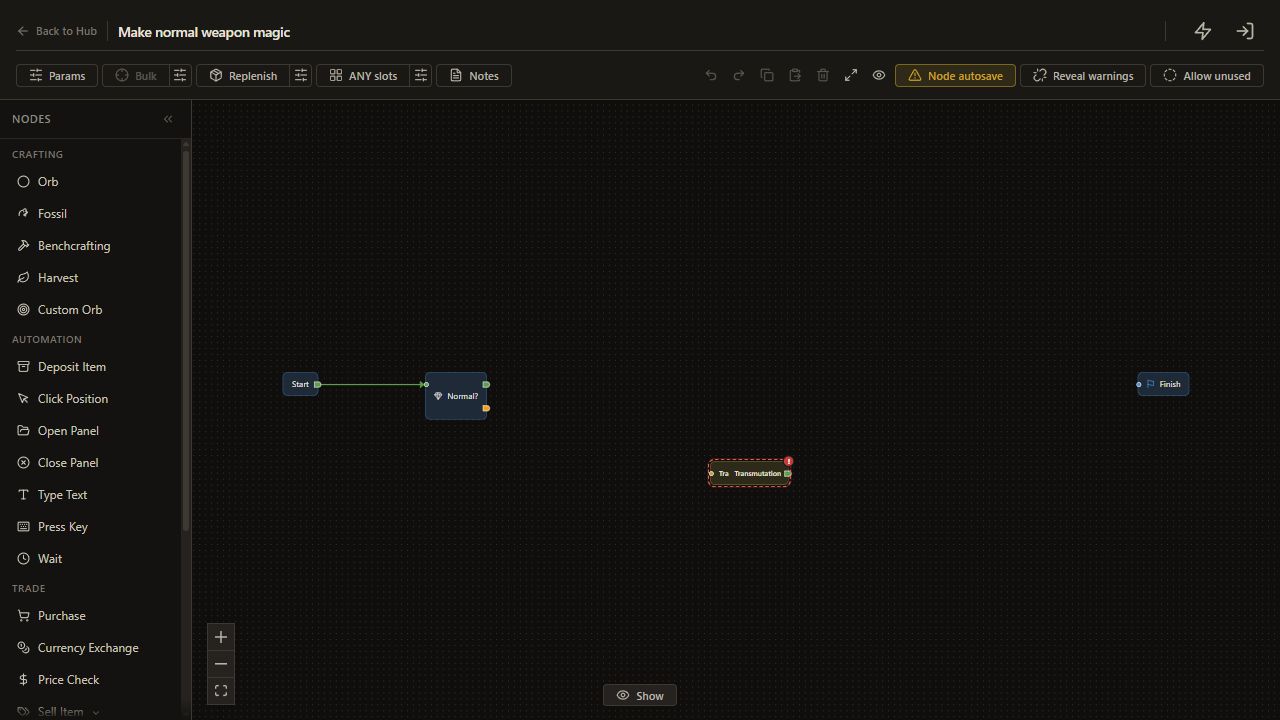
    14. Connect Start output to Normal?

    Drag from Start's unnamed output to an input on Normal?.

    The next route reaches Normal?. The former Start to Finish connection is replaced automatically.

    Open full-size screenshot
  15. 1. Create the single-item helper

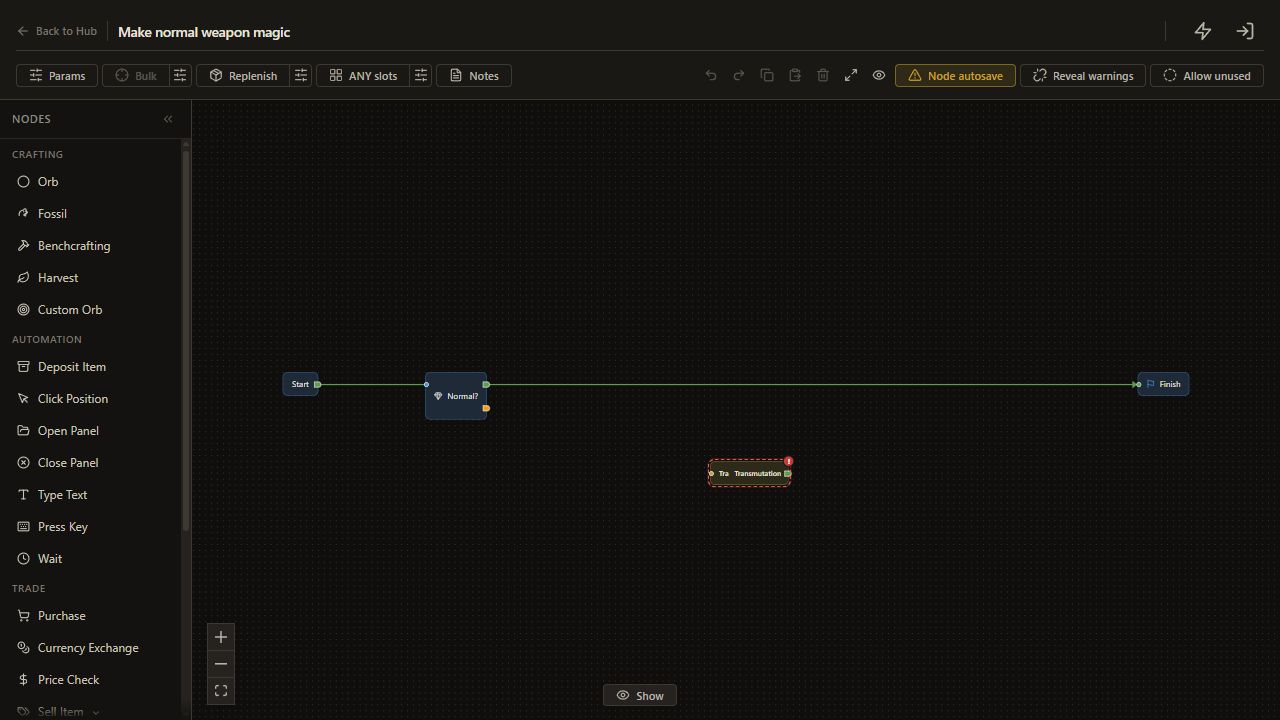
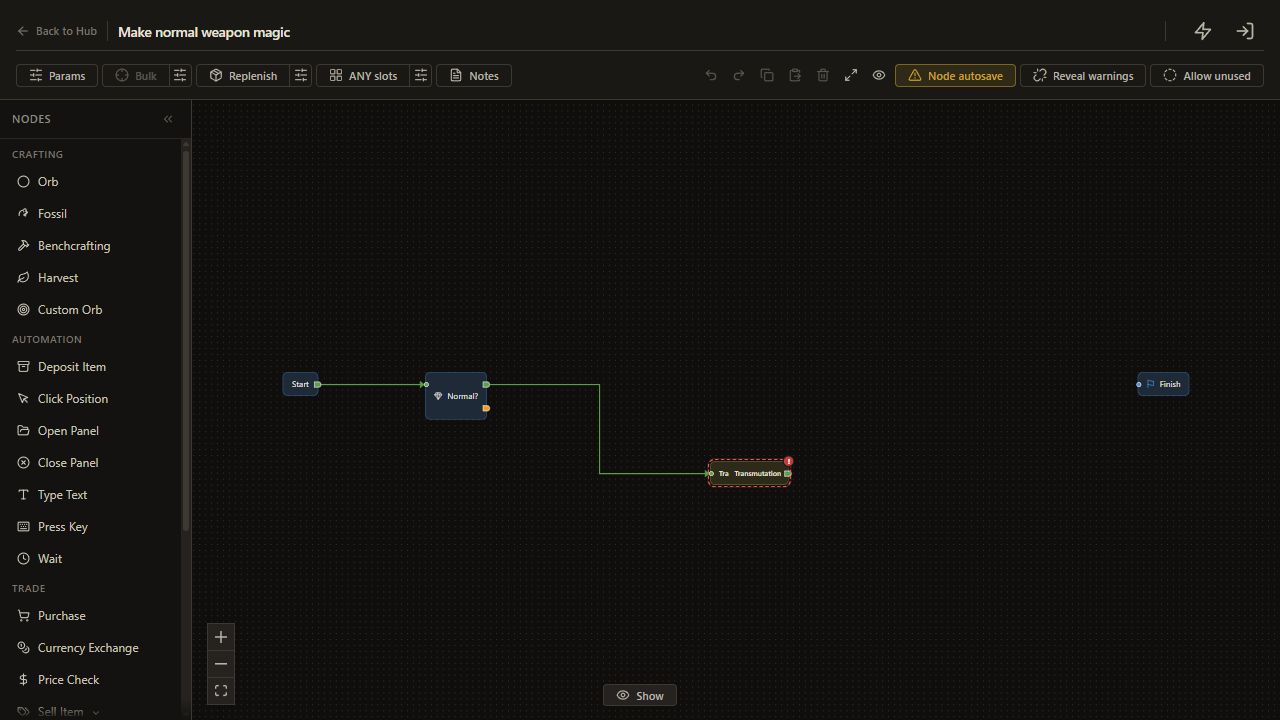
    15. Connect Normal? met to Transmutation

    Drag from Normal?'s met output to an input on Transmutation.

    The met route reaches Transmutation.

    Open full-size screenshot
  16. 1. Create the single-item helper

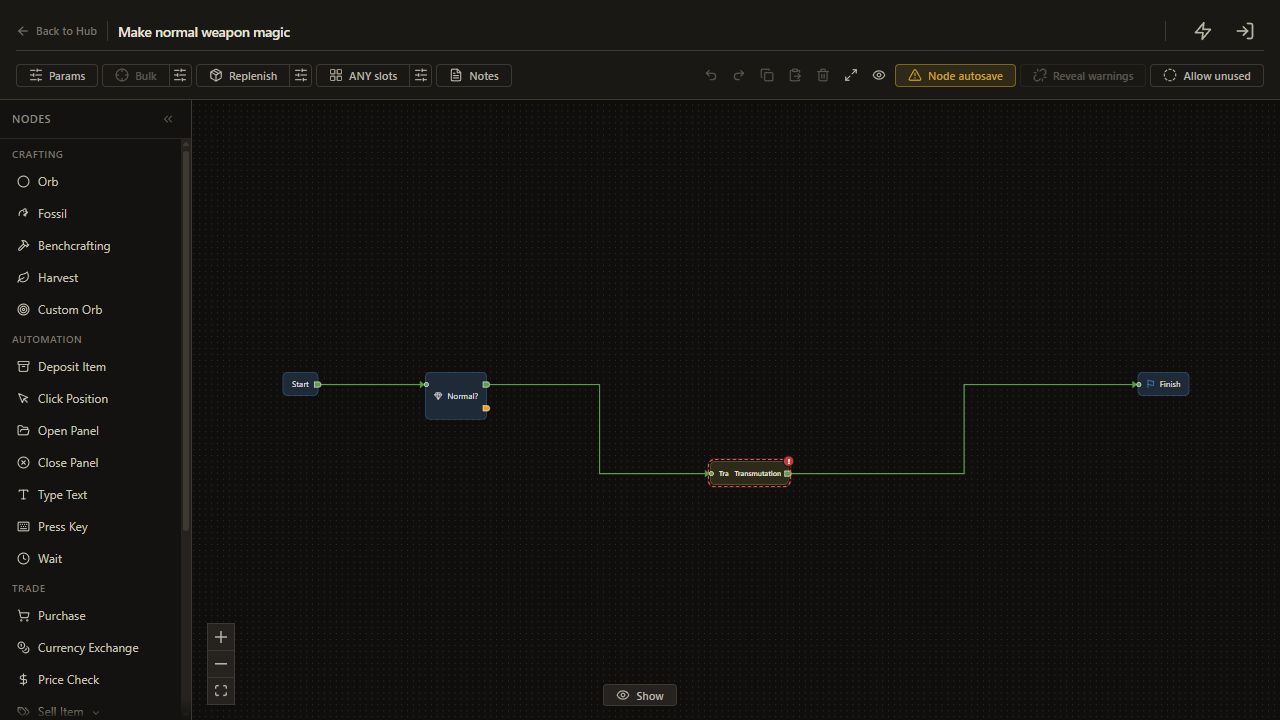
    16. Connect Transmutation output to Finish

    Drag from Transmutation's unnamed output to an input on Finish.

    The next route reaches Finish.

    Open full-size screenshot
  17. 1. Create the single-item helper

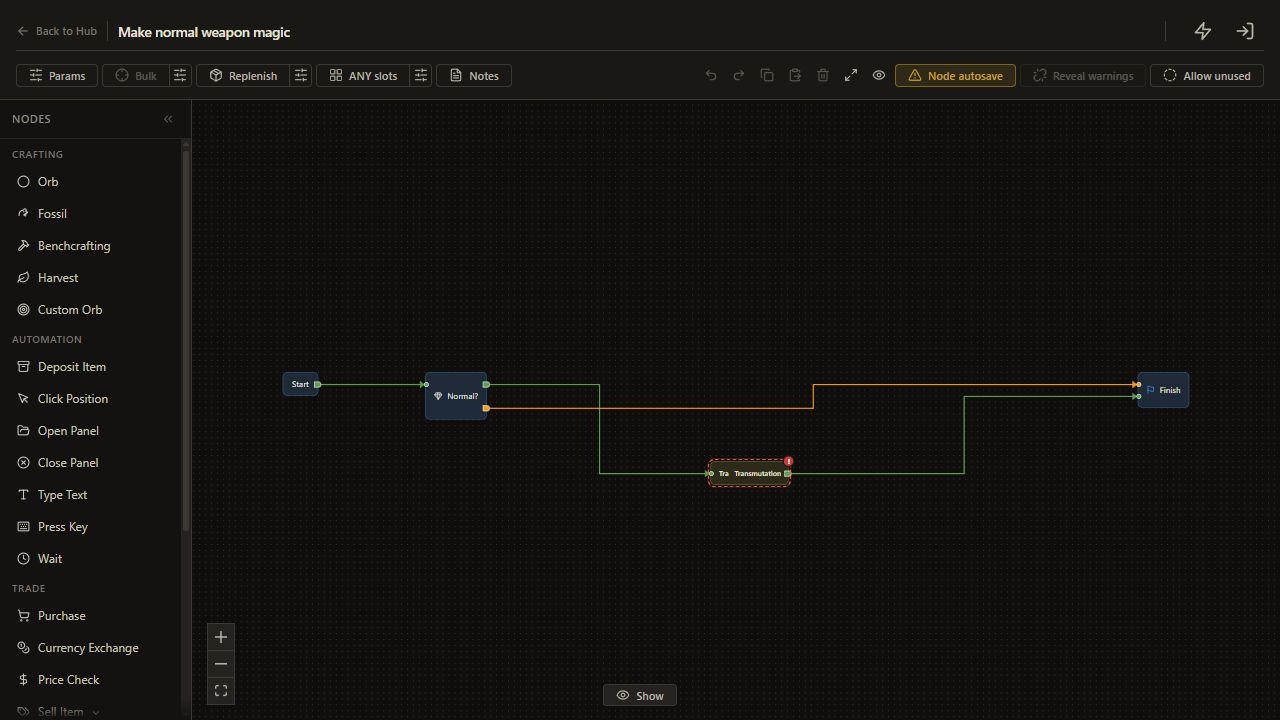
    17. Connect Normal? unmet to Finish

    Drag from Normal?'s unmet output to an input on Finish.

    The unmet route reaches Finish.

    Open full-size screenshot
  18. 2. Check the helper separately

    18. Check the node settings

    With Node autosave on, check the settings on the canvas. Switching nodes or using Back to Hub saves pending edits. If Node autosave is off, use Add to Tree for new nodes and Update for edits.

    The graph contains the configured nodes.

    Read and complete this step before continuing.

  19. 2. Check the helper separately

    19. Return to the Hub

    Choose Back to Hub.

    The personal tree is shown.

    Open full-size screenshot
  20. 2. Check the helper separately

    20. Start the test

    On the selected Hub card, choose Run after checking the real setup.

    The configured run can begin on the prepared item.

    Open full-size screenshot
  21. 2. Check the helper separately

    21. Test a normal weapon

    Run the helper alone on identified, uncorrupted normal practice equipment at the configured item location with Transmutation stocked and located. Inspect rarity and Logs.

    One Transmutation makes the weapon magic.

    Complete and verify this step in the stated app or game.

  22. 2. Check the helper separately

    22. Test the helper keep route

    Run the helper separately on a magic practice item and inspect Logs.

    Normal unmet finishes without currency.

    Complete and verify this step in the stated app or game.

  23. 3. Prepare the purchase copy

    23. Select the example

    Choose Learn: Buy and Craft Weapon.

    The intended Learn card is selected.

    Open full-size screenshot
  24. 3. Prepare the purchase copy

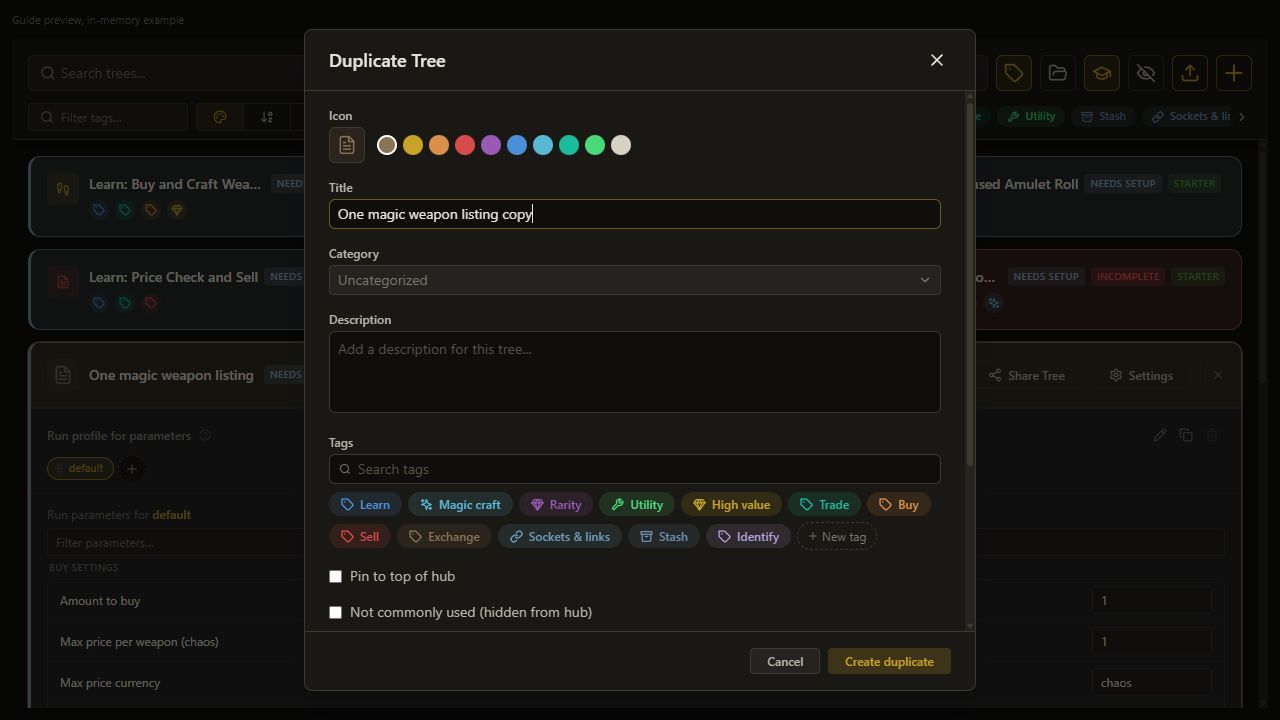
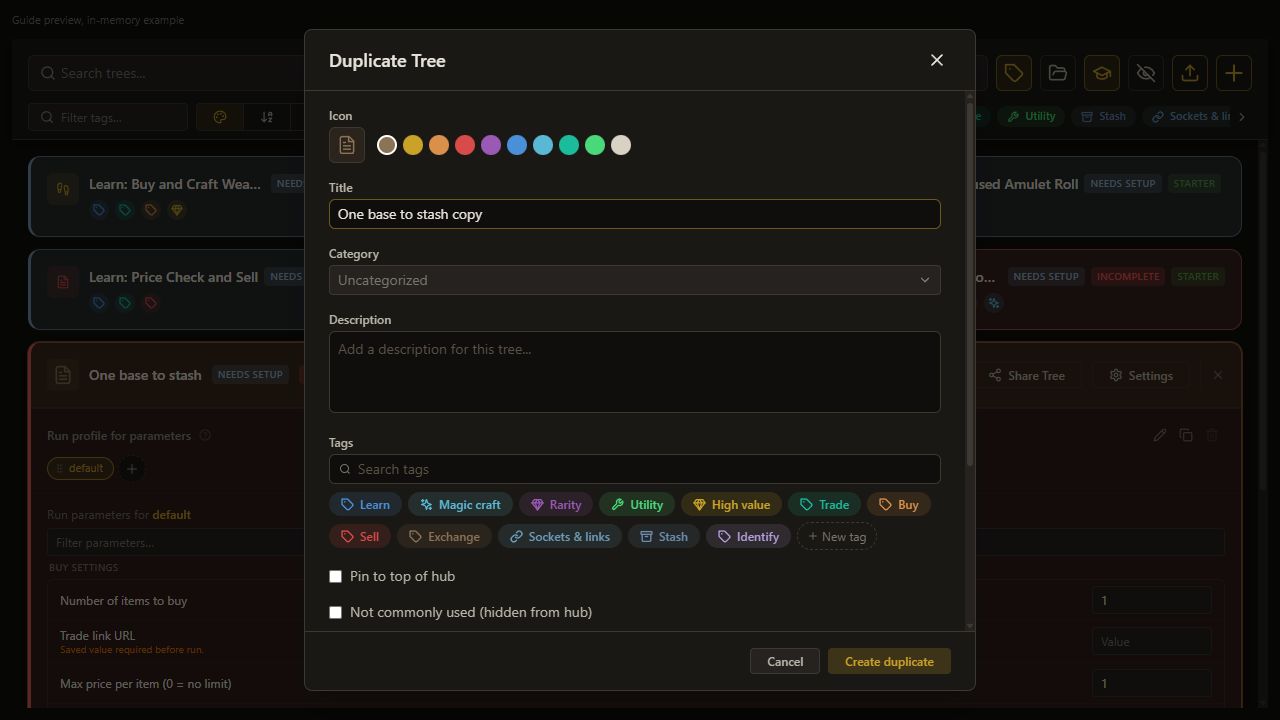
    24. Duplicate the example

    Choose Duplicate Tree.

    The copy dialog opens.

    Open full-size screenshot
  25. 3. Prepare the purchase copy

    25. Name the personal copy

    Set Name to One magic weapon listing.

    Name keeps the selected value.

    Open full-size screenshot
  26. 3. Prepare the purchase copy

    26. Create the copy

    Choose Create duplicate.

    The personal copy appears.

    Open full-size screenshot
  27. 3. Prepare the purchase copy

    27. Open the personal copy

    Choose Edit Tree.

    The copied production graph opens.

    Open full-size screenshot
  28. 3. Prepare the purchase copy

    28. Open Bulk settings

    Click the sliders button beside Bulk, labeled Configure bulk / grid settings.

    The Bulk settings dialog opens.

    Open full-size screenshot
  29. 3. Prepare the purchase copy

    29. Keep one-item mode

    Click Current item in the Bulk settings dialog.

    Current item is selected in the dialog; click Save next.

    Open full-size screenshot
  30. 3. Prepare the purchase copy

    30. Save one-item mode

    Click Save in the Bulk settings dialog.

    Current item is saved and the dialog closes.

    Open full-size screenshot
  31. 3. Prepare the purchase copy

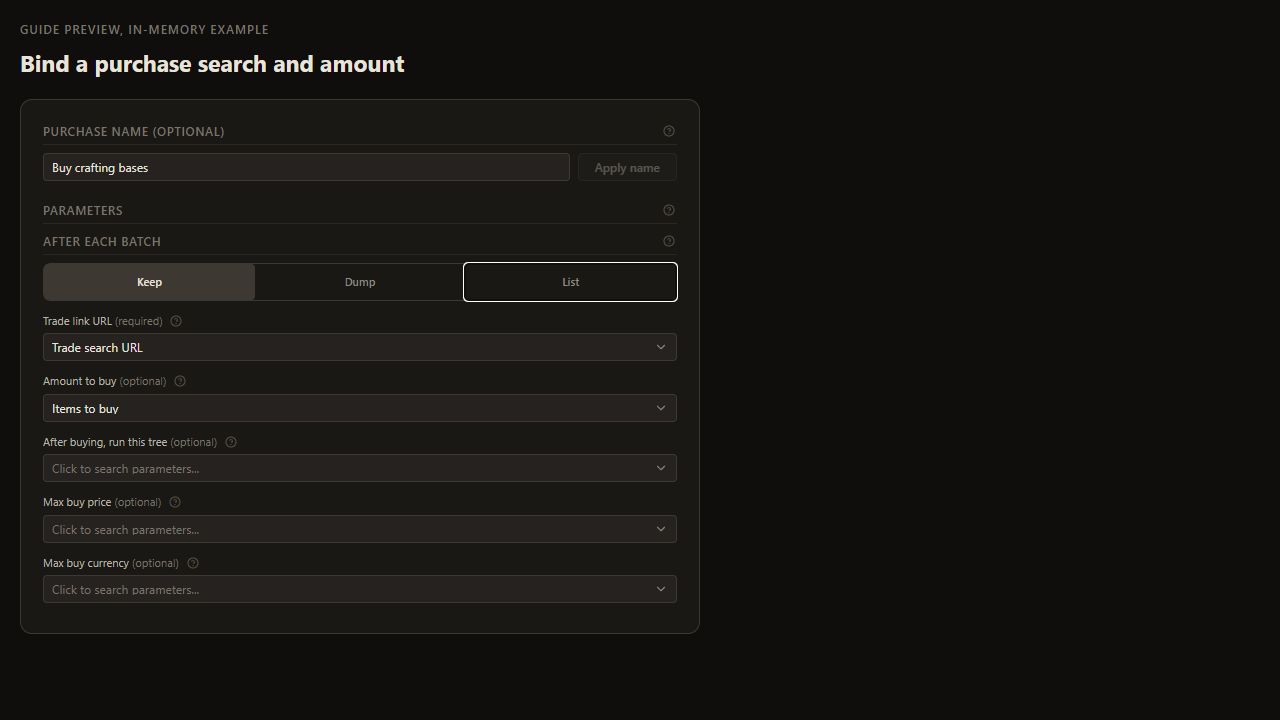
    31. Retain listing

    Choose List.

    Purchase will list the processed item.

    Open full-size screenshot
  32. 3. Prepare the purchase copy

    32. Inspect an official trade search

    Choose the correct league and an identified, uncorrupted normal weapon base compatible with the helper on the official PoE trade site. Inspect matching listings, then copy the full saved search URL.

    The purchase search is deliberate.

    Complete and verify this step in the stated app or game.

  33. 3. Prepare the purchase copy

    33. Save the search URL

    Set Trade link URL to the inspected official saved search URL.

    The copy uses the intended search.

    Open full-size screenshot
  34. 3. Prepare the purchase copy

    34. Find saved inputs

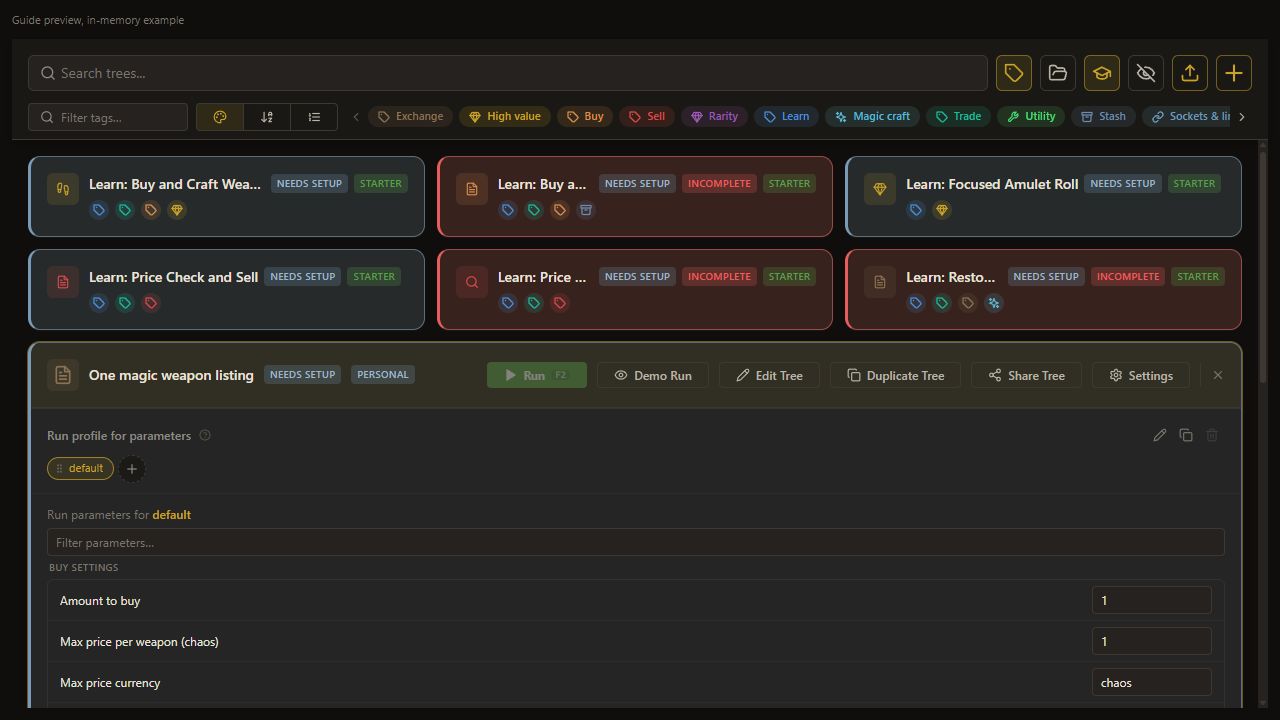
    Select the tree on the Hub and find its Run Parameters section.

    The copy's saved values appear.

    Read and complete this step before continuing.

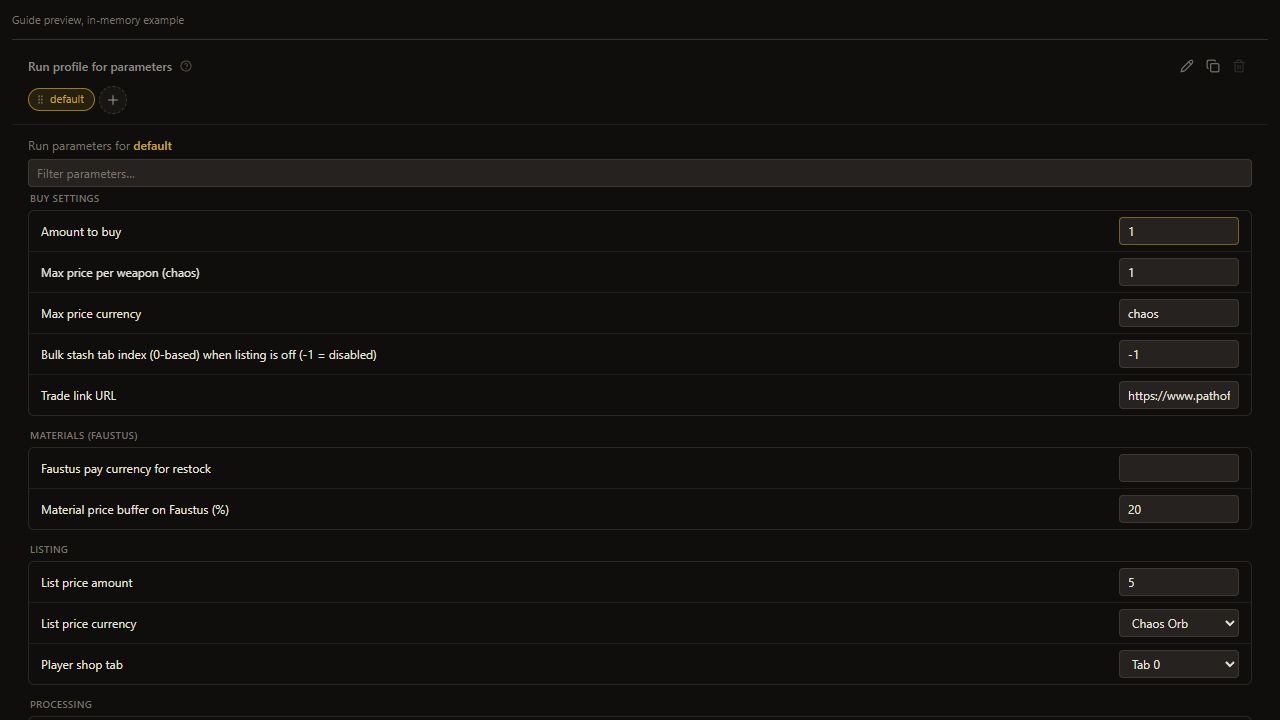
  35. 3. Prepare the purchase copy

    35. Set Amount to buy

    Set Amount to buy to 1.

    Amount to buy keeps the selected value.

    Open full-size screenshot
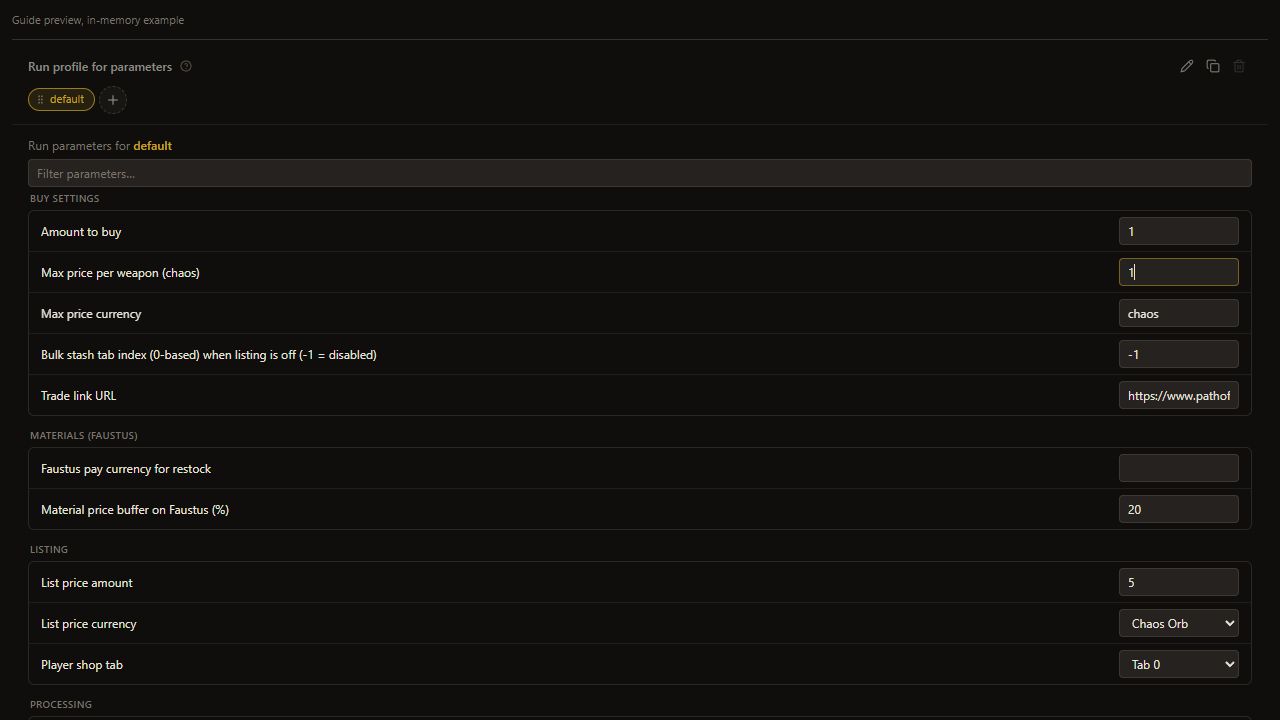
  36. 3. Prepare the purchase copy

    36. Set Max price per weapon (chaos)

    Set Max price per weapon (chaos) to 1.

    Max price per weapon (chaos) keeps the selected value.

    Open full-size screenshot
  37. 3. Prepare the purchase copy

    37. Set Max price currency

    Set Max price currency to chaos.

    Max price currency keeps the selected value.

    Open full-size screenshot
  38. 3. Prepare the purchase copy

    38. Wait for Saved

    Wait until the form shows Saved.

    The inputs are persisted.

    Read and complete this step before continuing.

  39. 4. Replace the helper and replenishment

    39. Find saved inputs

    Select the tree on the Hub and find its Run Parameters section.

    The copy's saved values appear.

    Read and complete this step before continuing.

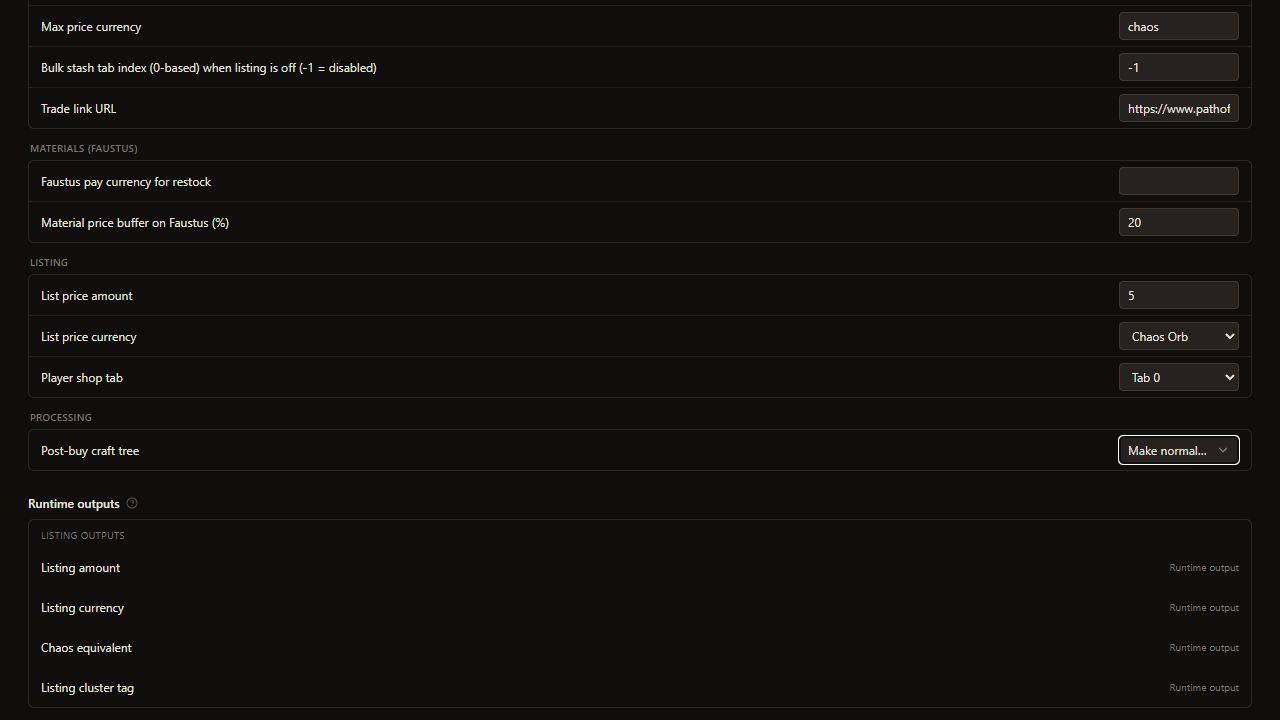
  40. 4. Replace the helper and replenishment

    40. Set Post-buy craft tree

    Set Post-buy craft tree to Make normal weapon magic.

    Post-buy craft tree keeps the selected value.

    Open full-size screenshot
  41. 4. Replace the helper and replenishment

    41. Wait for Saved

    Wait until the form shows Saved.

    The inputs are persisted.

    Read and complete this step before continuing.

  42. 4. Replace the helper and replenishment

    42. Disable replenishment

    Set Material Replenish to False.

    The separate automatic restock policy is off.

    Open full-size screenshot
  43. 5. Choose the listing deliberately

    43. Find saved inputs

    Select the tree on the Hub and find its Run Parameters section.

    The copy's saved values appear.

    Read and complete this step before continuing.

  44. 5. Choose the listing deliberately

    44. Set List price amount

    Set List price amount to 5.

    List price amount keeps the selected value.

    Open full-size screenshot
  45. 5. Choose the listing deliberately

    45. Set List price currency

    Set List price currency to chaos.

    List price currency keeps the selected value.

    Open full-size screenshot
  46. 5. Choose the listing deliberately

    46. Set Player shop tab

    Set Player shop tab to 0.

    Player shop tab keeps the selected value.

    Open full-size screenshot
  47. 5. Choose the listing deliberately

    47. Wait for Saved

    Wait until the form shows Saved.

    The inputs are persisted.

    Read and complete this step before continuing.

  48. 5. Choose the listing deliberately

    48. Prepare Player Shop

    Complete Player Shop capture and tab locations; keep bulk disabled and review all values.

    The first shop tab is ready.

    Read and complete this step before continuing.

  49. 5. Choose the listing deliberately

    49. Inspect Start output to Purchase weapon (1c)

    Trace the saved connection from Start's unnamed output to an input on Purchase weapon (1c).

    The next route reaches Purchase weapon (1c).

    Open full-size screenshot
  50. 5. Choose the listing deliberately

    50. Inspect Purchase weapon (1c) output to Finish

    Trace the saved connection from Purchase weapon (1c)'s unnamed output to an input on Finish.

    The next route reaches Finish.

    Open full-size screenshot
  51. Check the result

    51. Check the node settings

    With Node autosave on, check the settings on the canvas. Switching nodes or using Back to Hub saves pending edits. If Node autosave is off, use Add to Tree for new nodes and Update for edits.

    The graph contains the configured nodes.

    Read and complete this step before continuing.

  52. Check the result

    52. Return to the Hub

    Choose Back to Hub.

    The personal tree is shown.

    Open full-size screenshot
  53. Check the result

    53. Start the test

    On the selected Hub card, choose Run after checking the real setup.

    The configured run can begin on the prepared item.

    Open full-size screenshot
  54. Check the result

    54. Open Logs

    Choose Logs.

    The actual sequence and exit can be inspected.

    Open full-size screenshot
  55. Check the result

    55. Inspect the actual result

    Inspect the bought weapon's magic rarity and actual shop amount, currency and tab.

    The chosen asking-price listing is checked; it does not prove a sale.

    Complete and verify this step in the stated app or game.

  56. If it does not work

    56. Review if it does not work

    If crafting fails, check the helper selection, item rarity and currency location. If listing fails, inspect Purchase's price, currency and shop-tab bindings and **Logs** before buying another item.

    The section context and checks are preserved.

    Read and complete this step before continuing.

  57. Next guide

    57. Review next guide

    [List an item at a fixed price](selling-items.md).

    The section context and checks are preserved.

    Read and complete this step before continuing.

On this page

At a glance

Learn > Trade Buy > Buy and Craft Weapon connects Start > Purchase weapon (1c) > Finish. Purchase handles the batch, calls a helper for each item, then lists it. The source defaults buy four items and list at five Divines; replace those values before use.

The supplied Craft Weapon One Item helper needs correction before general use. Its normal route reaches Alchemy after Transmutation and Augmentation, and its rare route can reach Alteration. This guide substitutes a small personal helper.

1. Create the single-item helper

Press + and create Make normal weapon magic. In Edit Tree, add a Check Item rarity check for Normal, an Orb of Transmutation, and Finish.

Open Edit Tree. Click the sliders button beside Bulk in the editor toolbar, labeled Configure bulk / grid settings. Choose Current item, then click Save. The dialog closes and the tree uses one item.

Connect Start > Normal?. Connect its met output to Transmutation, then Finish. Connect its unmet output directly to Finish. Keep bulk off. This helper spends one Transmutation on a normal item and leaves other rarities unchanged.

2. Check the helper separately

Use an identified, uncorrupted normal practice weapon at your configured item location. Make the currency stash available and confirm the Transmutation position is configured.

Run the helper alone. Check the weapon becomes magic and the log reaches Finish. Verify its unmet route with a magic practice item before putting it into a purchase flow. The helper has no Sell Item node; Purchase will handle listing.

3. Prepare the purchase copy

On the Hub, duplicate Learn: Buy and Craft Weapon and name it One magic weapon listing. Open Purchase and retain List as its destination.

Open Edit Tree. Click the sliders button beside Bulk in the editor toolbar, labeled Configure bulk / grid settings. Choose Current item, then click Save. The dialog closes and the tree uses one item.

Replace the saved Standard search with your own official trade search for an identified, uncorrupted normal weapon base in the correct league. Check that the search matches the helper's input. Set Amount to buy to 1 and an acceptable Max price per weapon (chaos), such as 1, with currency chaos.

4. Replace the helper and replenishment

Set Post-buy craft tree to Make normal weapon magic. Do not leave the bundled helper selected.

For this example, turn off the copy's tree-level Material Replenish and supply a Transmutation yourself. The preset enables Faustus replenishment for several materials, which would introduce separate Currency Exchange actions and setup requirements.

5. Choose the listing deliberately

Set List price amount to your chosen practice listing, for example 5, and List price currency to chaos. This example is an asking price, not a valuation or profit claim.

Set Player shop tab to 0 for the first configured shop tab. Keep bulk disabled. The bulk dump setting is not this List destination. Finish Player Shop capture and tab-location setup, then review all saved values before starting.

Check the result

Run once. Confirm the bought weapon became magic, then inspect the actual Player Shop listing and its amount, currency and tab. A listing does not establish a sale.

If it does not work

If crafting fails, check the helper selection, item rarity and currency location. If listing fails, inspect Purchase's price, currency and shop-tab bindings and Logs before buying another item.

Next guide

List an item at a fixed price.

Keep learning

Browse all guides

For setup help, the installer or license keys, join the official Discord. Sales and key issues: DM PathOfRolling. Check the account before paying; watch for impostors.