Exchange for Alterations, then run a one-item craft

Updated
Complete

Exchange for Alterations, then run a one-item craft

Read the written guide

Follow each step in the app. Numbered markers show the real controls. To connect nodes, drag from output marker 1 to input marker 2. Connection maps show the completed route. Steps outside the app name where to continue.

  1. At a glance

    1. Read the scope

    Read the practice target and changes from the saved sample.

    The scope and limits are clear.

    Read and complete this step before continuing.

  2. 1. Prepare a personal copy

    2. Select the example

    Choose Learn: Restock, Exchange, Craft.

    The intended Learn card is selected.

    Open full-size screenshot
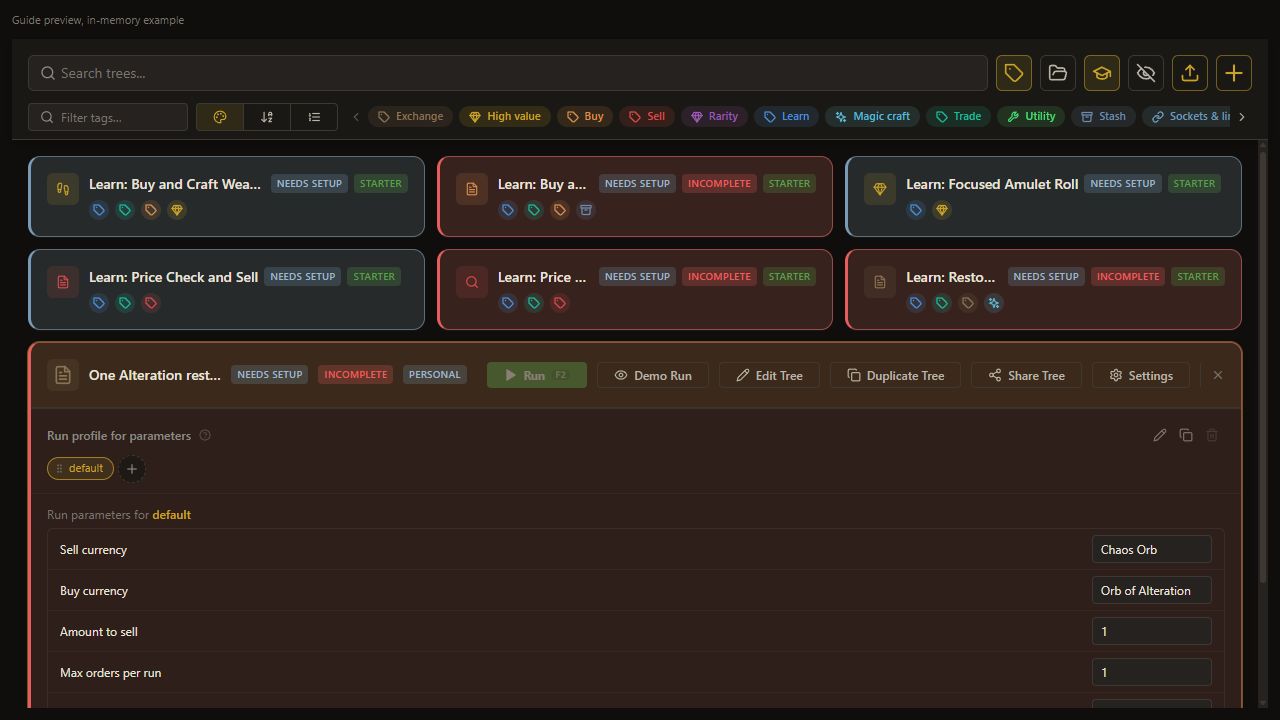
  3. 1. Prepare a personal copy

    3. Duplicate the example

    Choose Duplicate Tree.

    The copy dialog opens.

    Open full-size screenshot
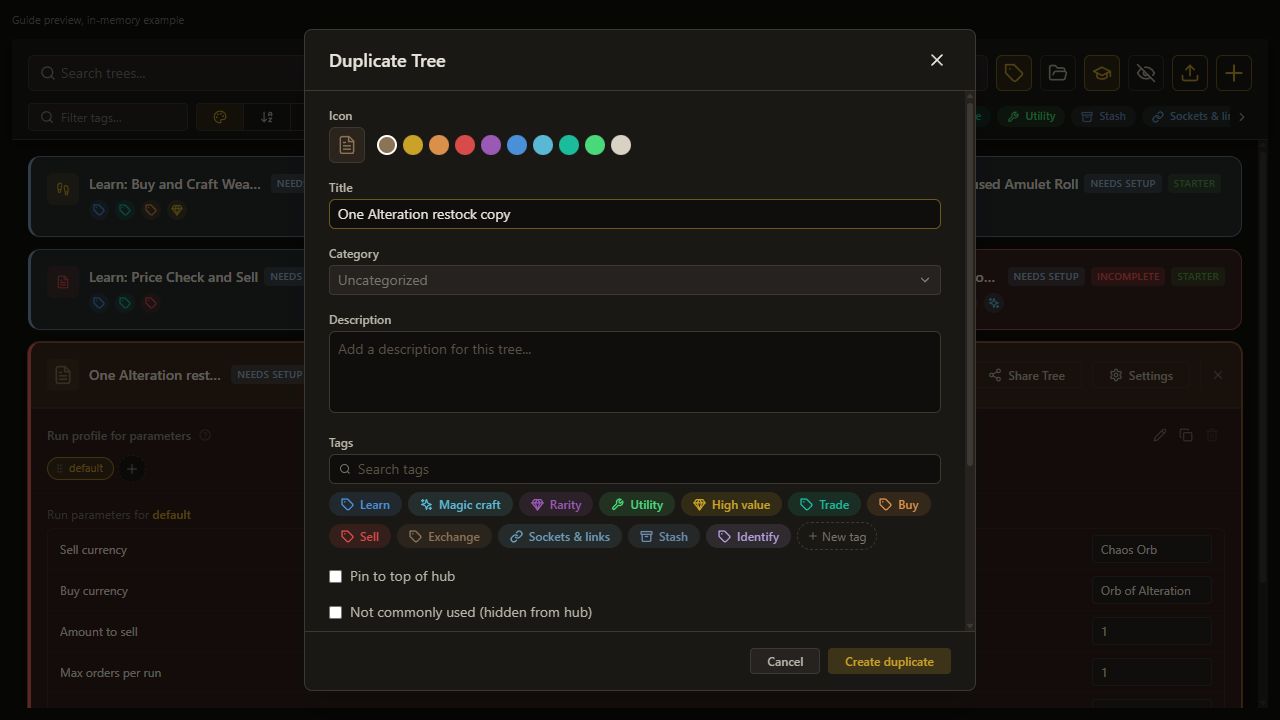
  4. 1. Prepare a personal copy

    4. Name the personal copy

    Set Name to One Alteration restock.

    Name keeps the selected value.

    Open full-size screenshot
  5. 1. Prepare a personal copy

    5. Create the copy

    Choose Create duplicate.

    The personal copy appears.

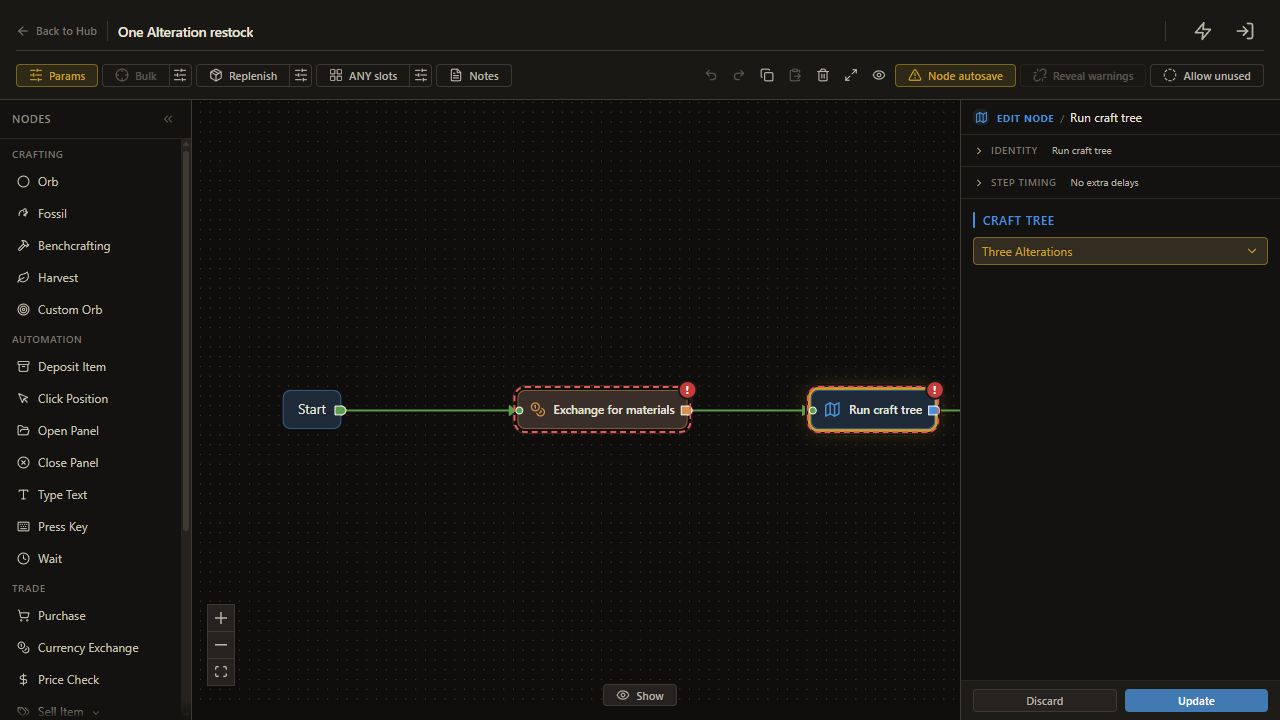
    Open full-size screenshot
  6. 1. Prepare a personal copy

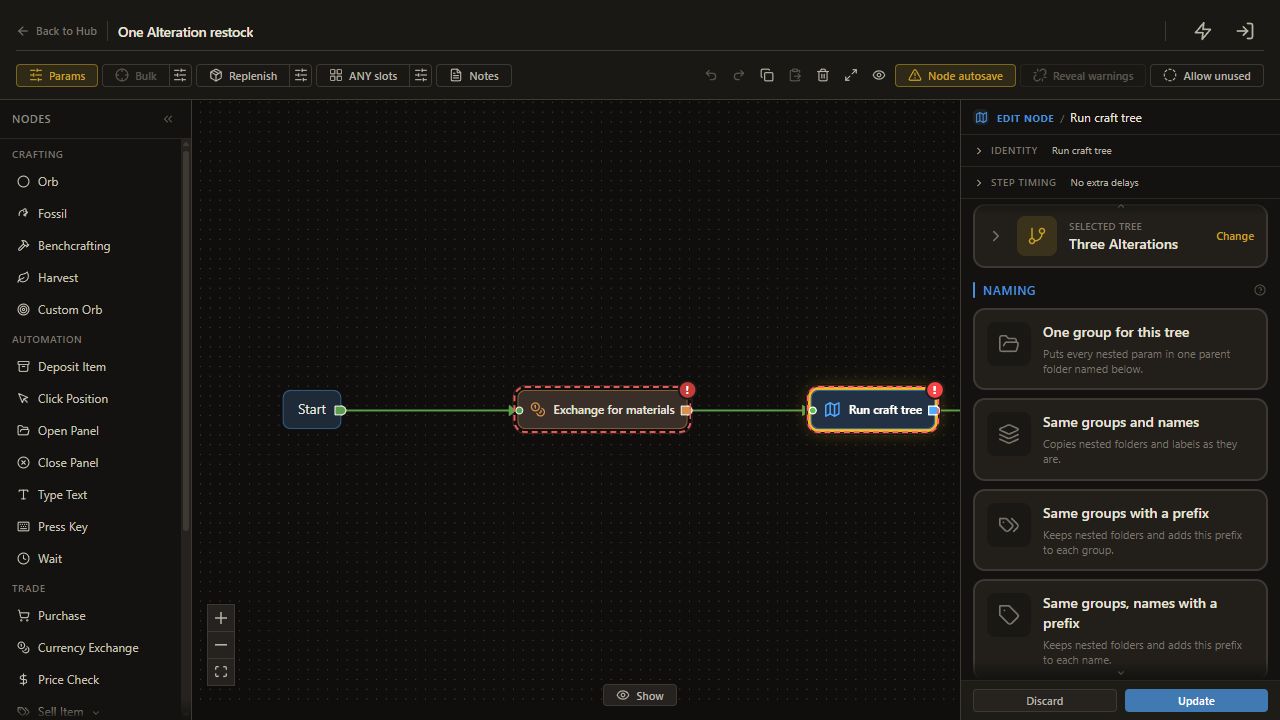
    6. Open the personal copy

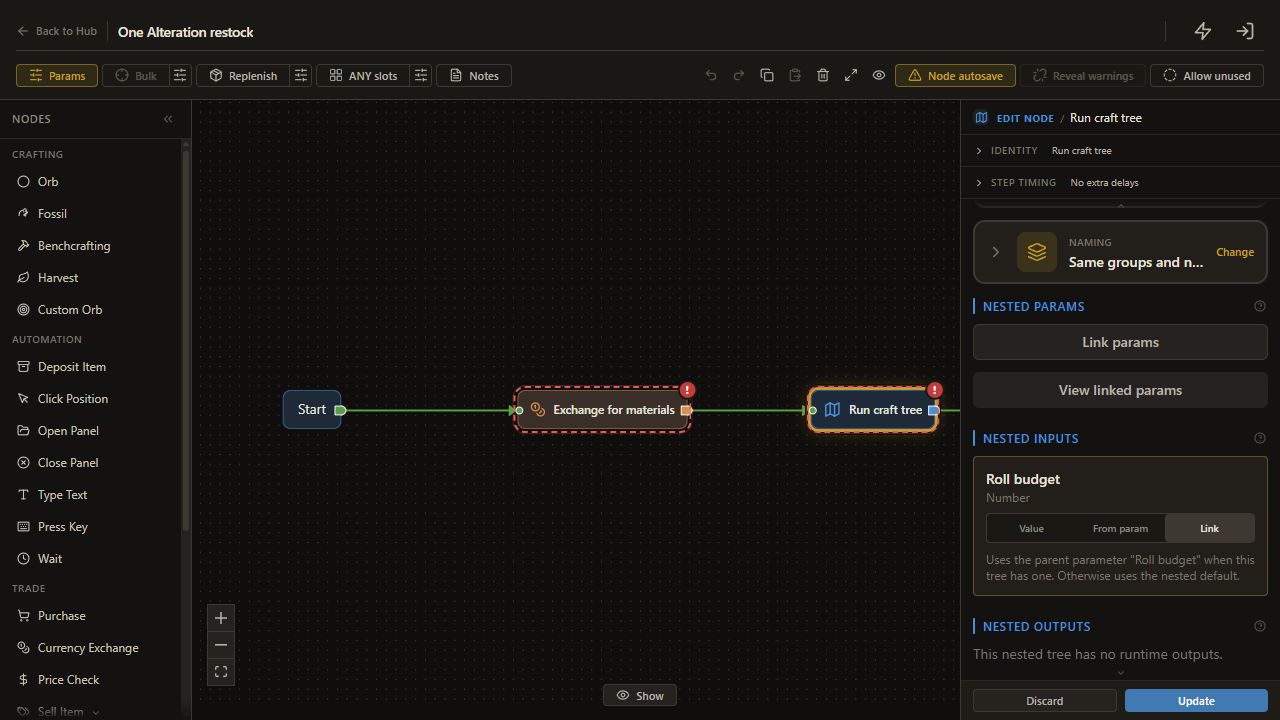
    Choose Edit Tree.

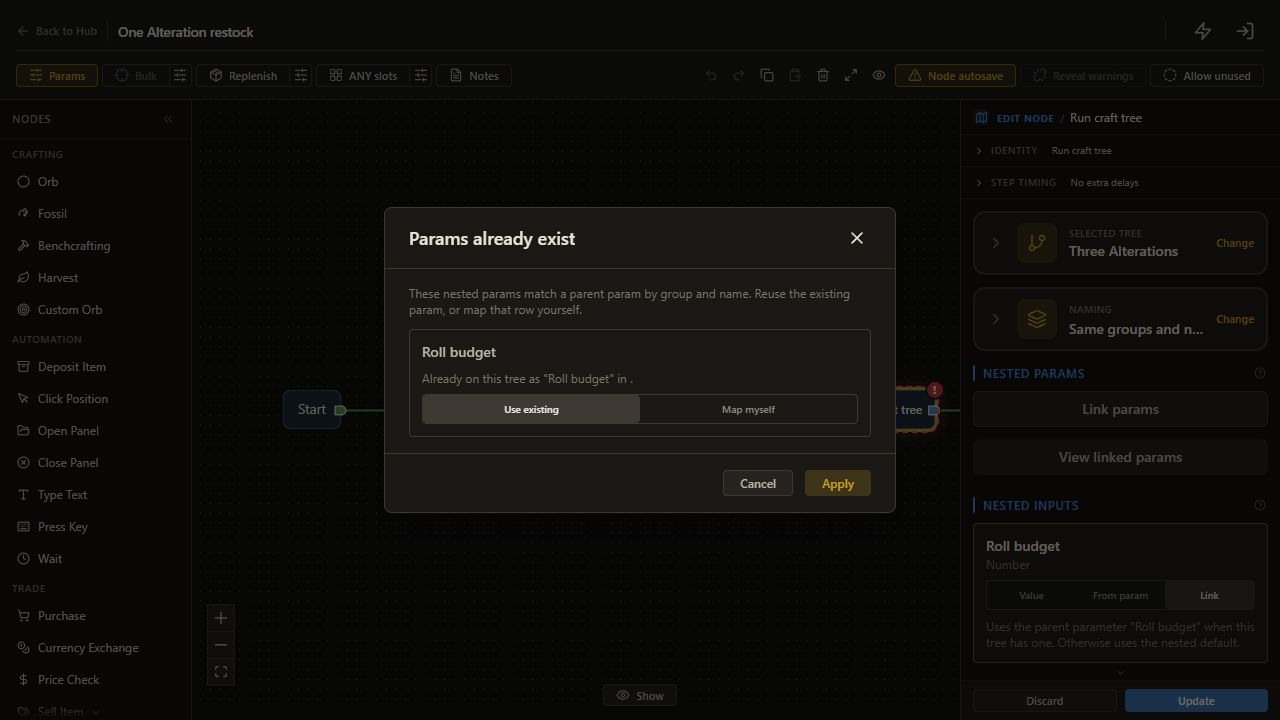
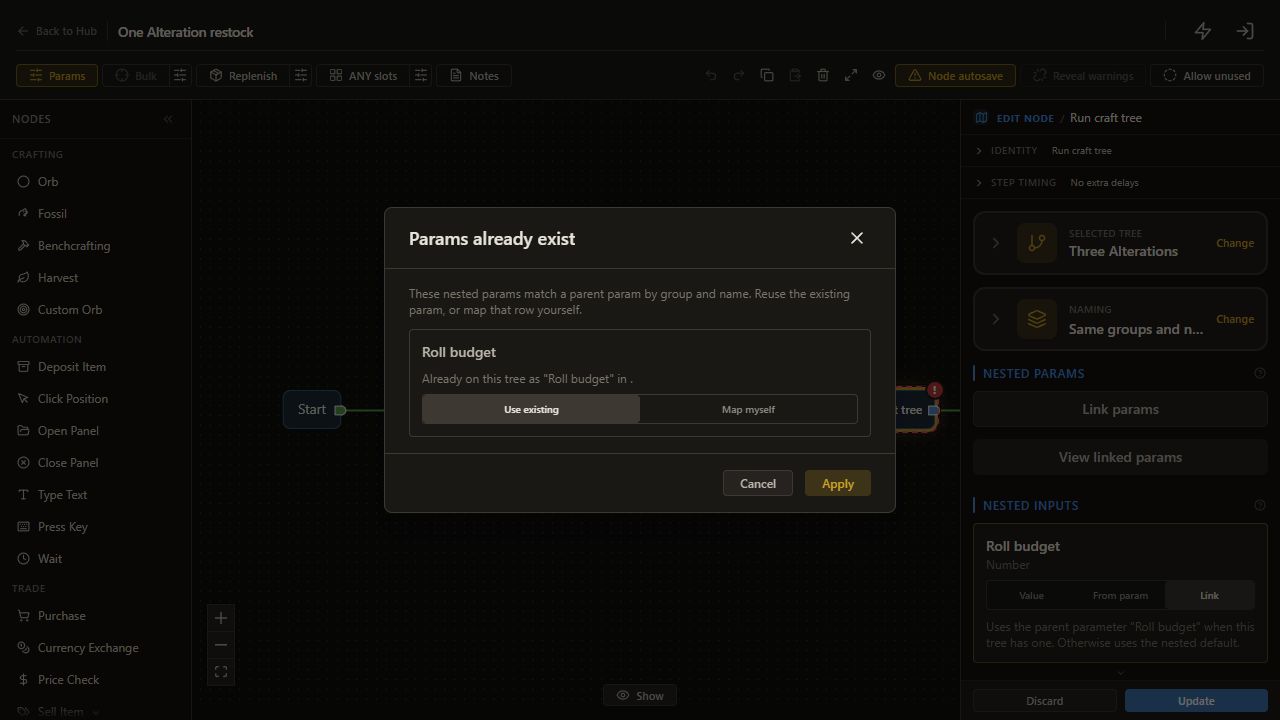
    The copied production graph opens.

    Open full-size screenshot
  7. 1. Prepare a personal copy

    7. Open Bulk settings

    Click the sliders button beside Bulk, labeled Configure bulk / grid settings.

    The Bulk settings dialog opens.

    Open full-size screenshot
  8. 1. Prepare a personal copy

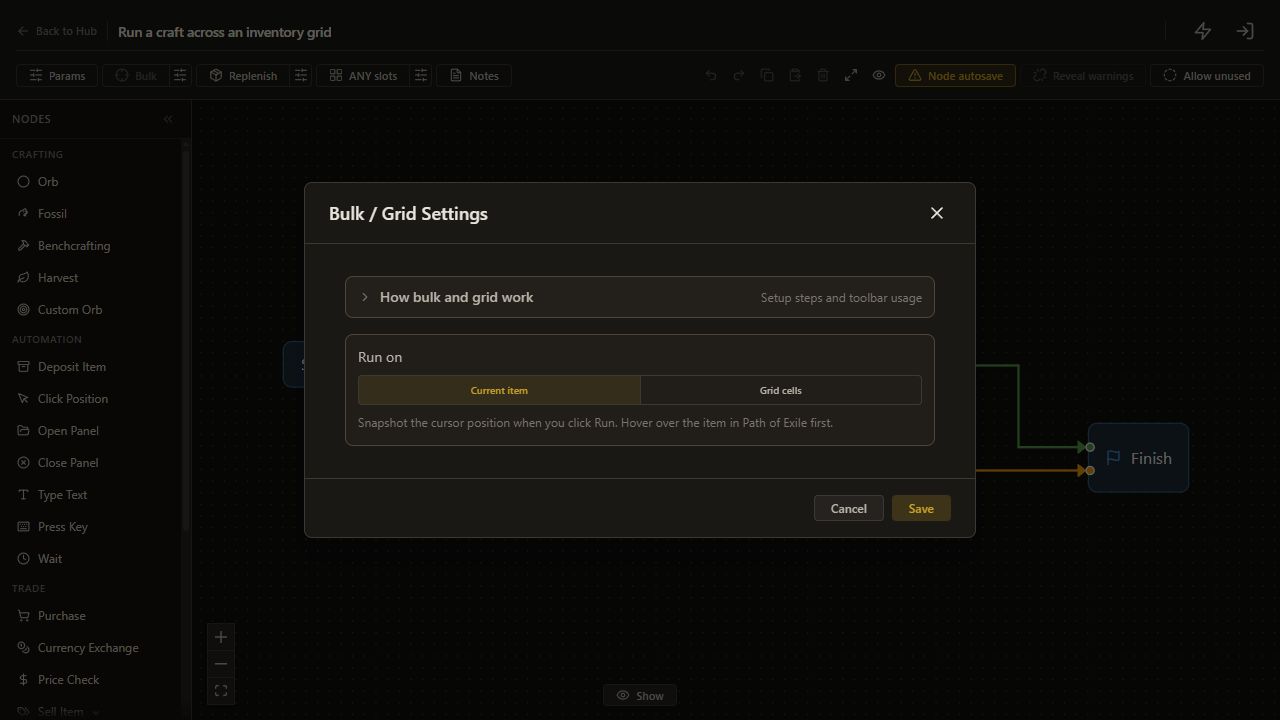
    8. Keep one-item mode

    Click Current item in the Bulk settings dialog.

    Current item is selected in the dialog; click Save next.

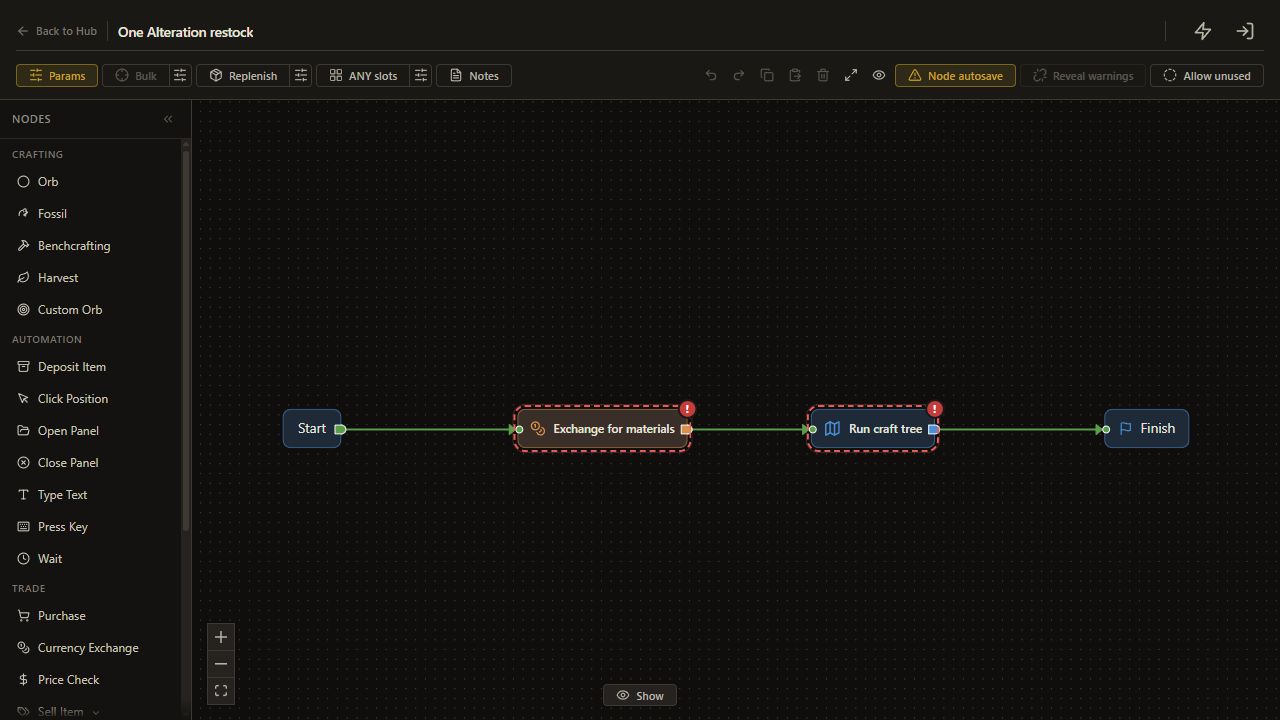
    Open full-size screenshot
  9. 1. Prepare a personal copy

    9. Save one-item mode

    Click Save in the Bulk settings dialog.

    Current item is saved and the dialog closes.

    Open full-size screenshot
  10. 1. Prepare a personal copy

    10. Prepare the exchange

    Complete Currency Exchange capture, Inventory Grid, currency/gold setup and Must-dos. Clear unfinished orders and leave inventory space.

    The exchange prerequisites are ready.

    Read and complete this step before continuing.

  11. 1. Prepare a personal copy

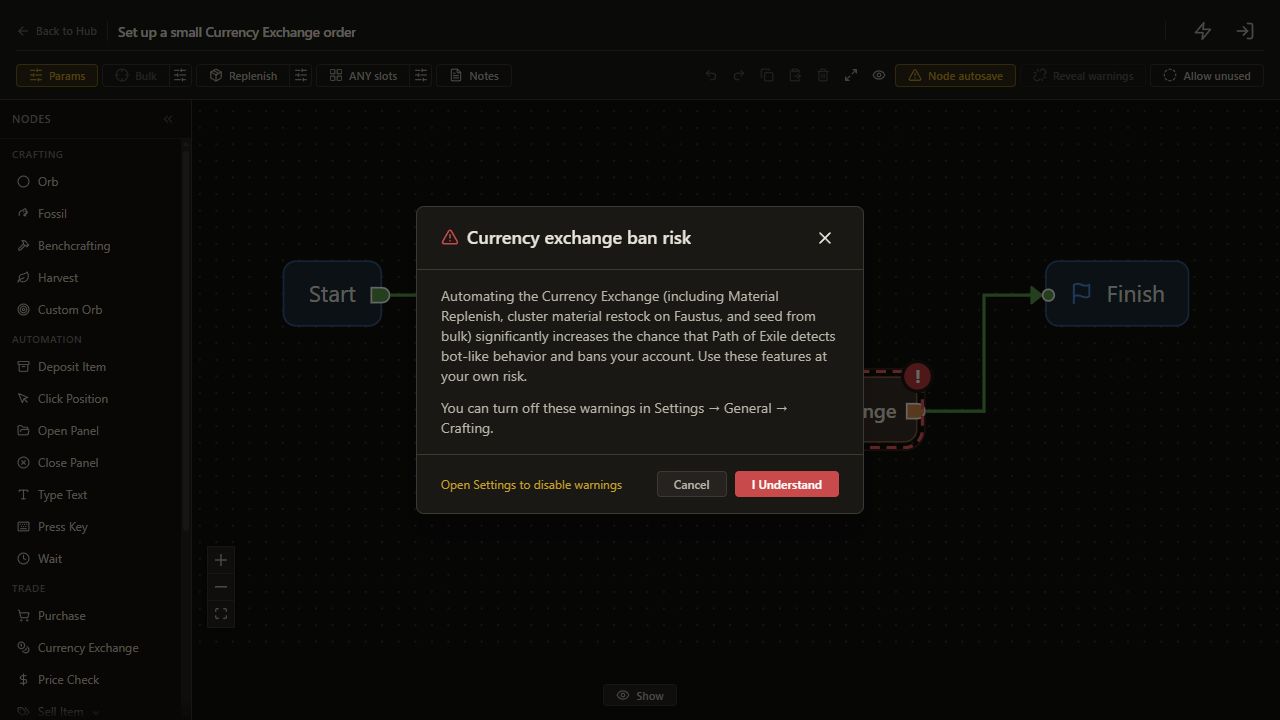
    11. Read the CX acknowledgment

    Read the CX automation acknowledgment before choosing I Understand.

    The acknowledgment applies specifically to this exchange.

    Open full-size screenshot
  12. 2. Bind the missing order inputs

    12. Open the exchange step

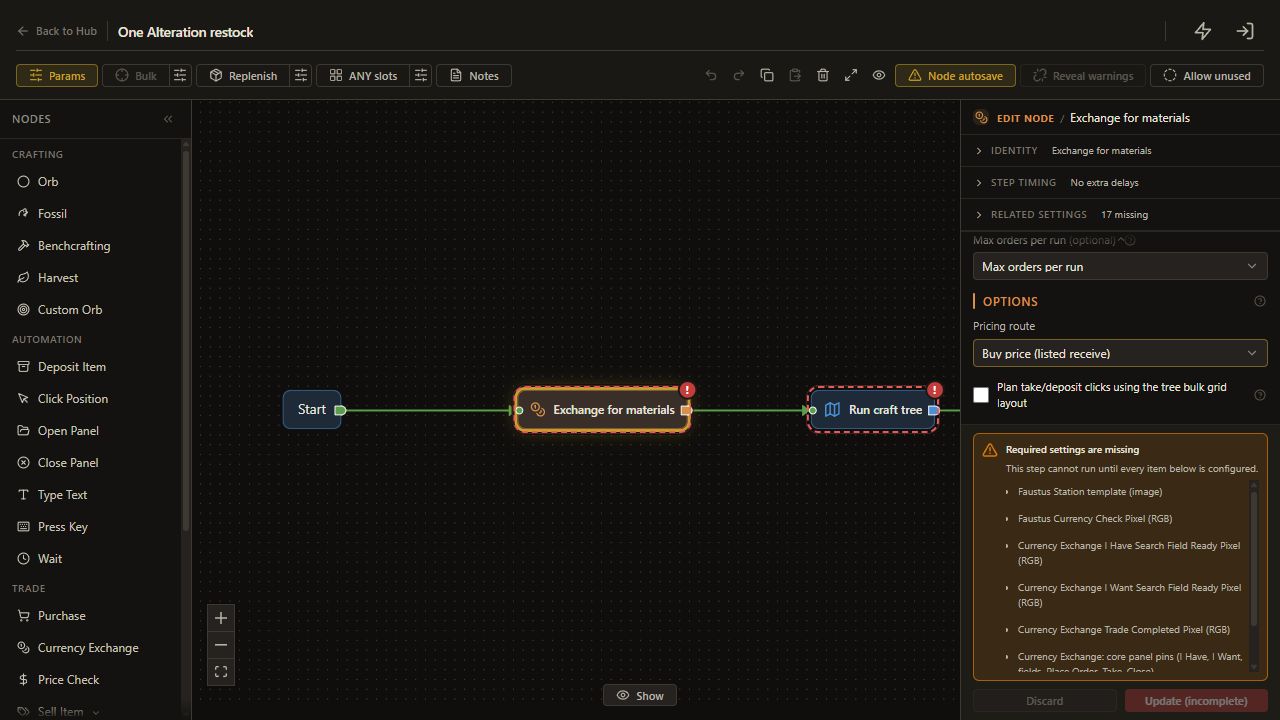
    Choose Exchange for materials.

    The copied node opens.

    Open full-size screenshot
  13. 2. Bind the missing order inputs

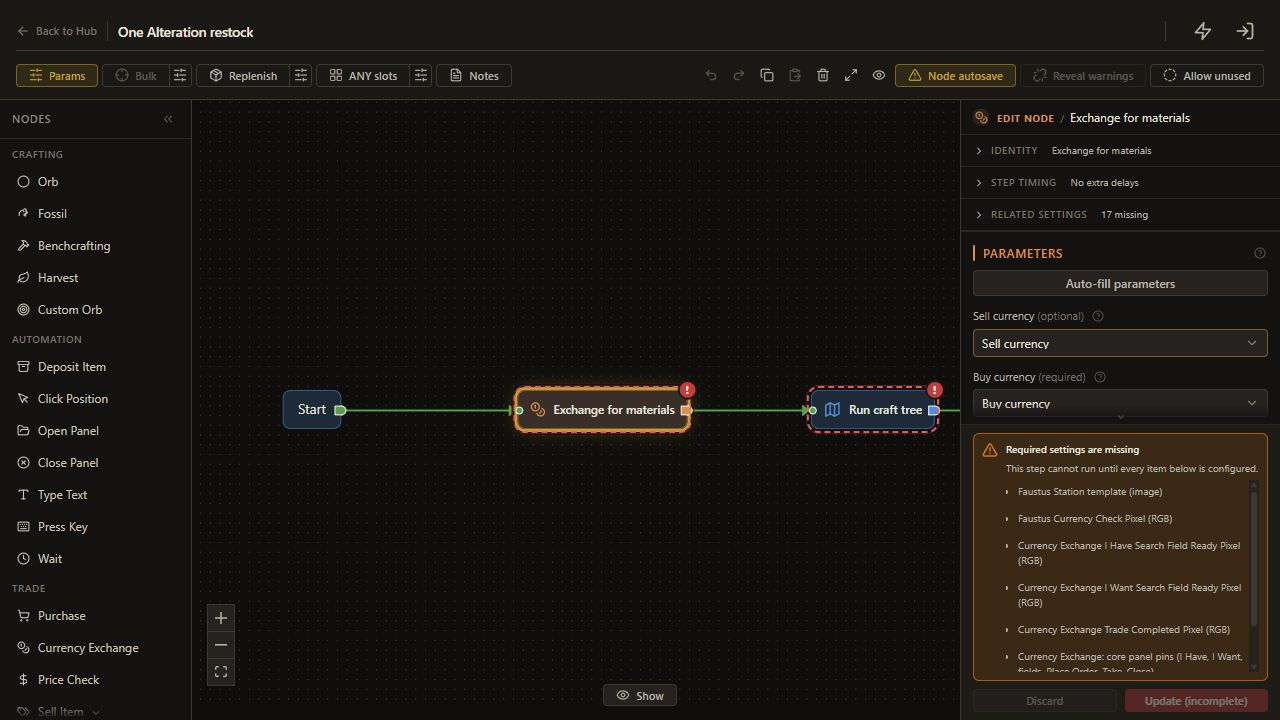
    13. Inspect bindings

    Inspect the Parameters section.

    The order binding fields are visible.

    Open full-size screenshot
  14. 2. Bind the missing order inputs

    14. Create missing bindings

    Choose Auto-fill parameters.

    Inputs have parameter bindings.

    Open full-size screenshot
  15. 2. Bind the missing order inputs

    15. Return to Hub

    Choose Back to Hub to set the order values.

    The selected copy appears on the Hub.

    Open full-size screenshot
  16. 2. Bind the missing order inputs

    16. Set Sell currency

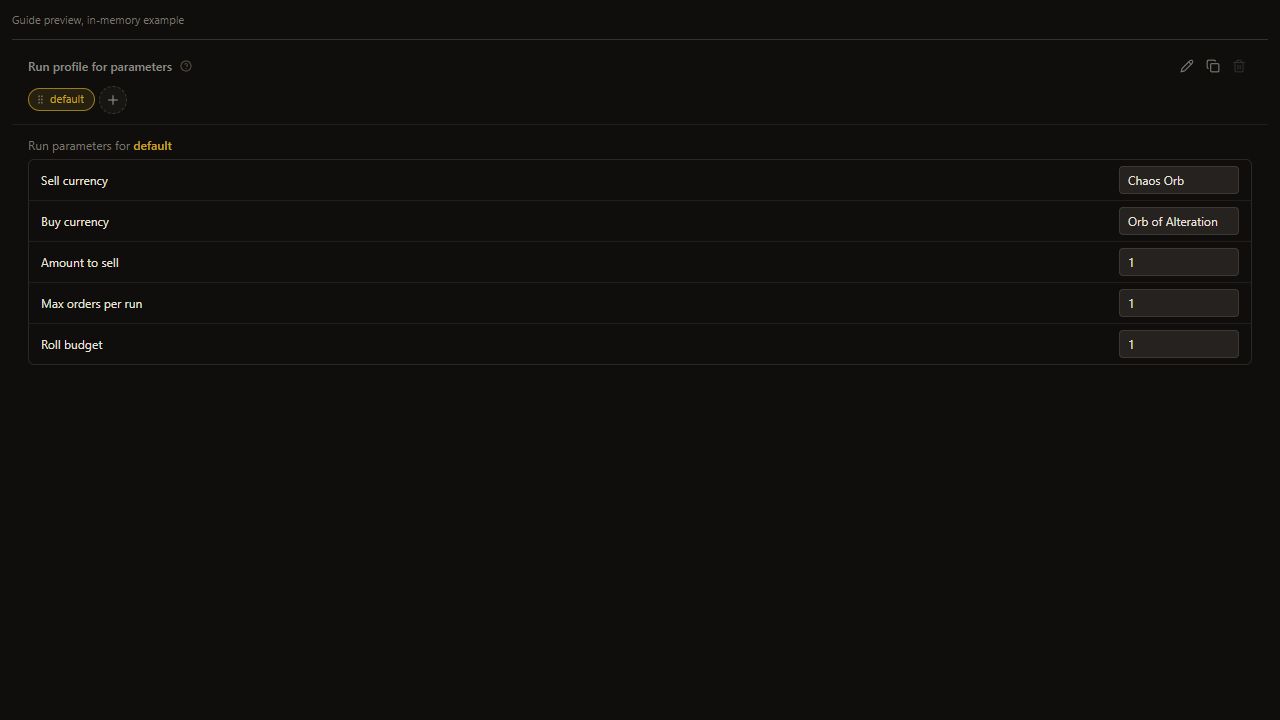
    In Run Parameters, set Sell currency to Chaos Orb.

    The saved run setting supplies Chaos Orb.

    Open full-size screenshot
  17. 2. Bind the missing order inputs

    17. Set Buy currency

    In Run Parameters, set Buy currency to Orb of Alteration.

    The saved run setting supplies Orb of Alteration.

    Open full-size screenshot
  18. 2. Bind the missing order inputs

    18. Set Amount to sell

    In Run Parameters, set Amount to sell to 1.

    The saved run setting supplies 1.

    Open full-size screenshot
  19. 2. Bind the missing order inputs

    19. Set Max orders per run

    In Run Parameters, set Max orders per run to 1.

    The saved run setting supplies 1.

    Open full-size screenshot
  20. 2. Bind the missing order inputs

    20. Wait for Saved

    Wait until the form shows Saved.

    The order inputs are persisted.

    Read and complete this step before continuing.

  21. 2. Bind the missing order inputs

    21. Return to the editor

    Choose Edit Tree to continue.

    The requested view opens.

    Open full-size screenshot
  22. 2. Bind the missing order inputs

    22. Verify the node settings

    Review the order bindings and saved Hub values.

    The maximum is one, replacing ten.

    Read and complete this step before continuing.

  23. 3. Keep the intended pricing route

    23. Open the pricing route

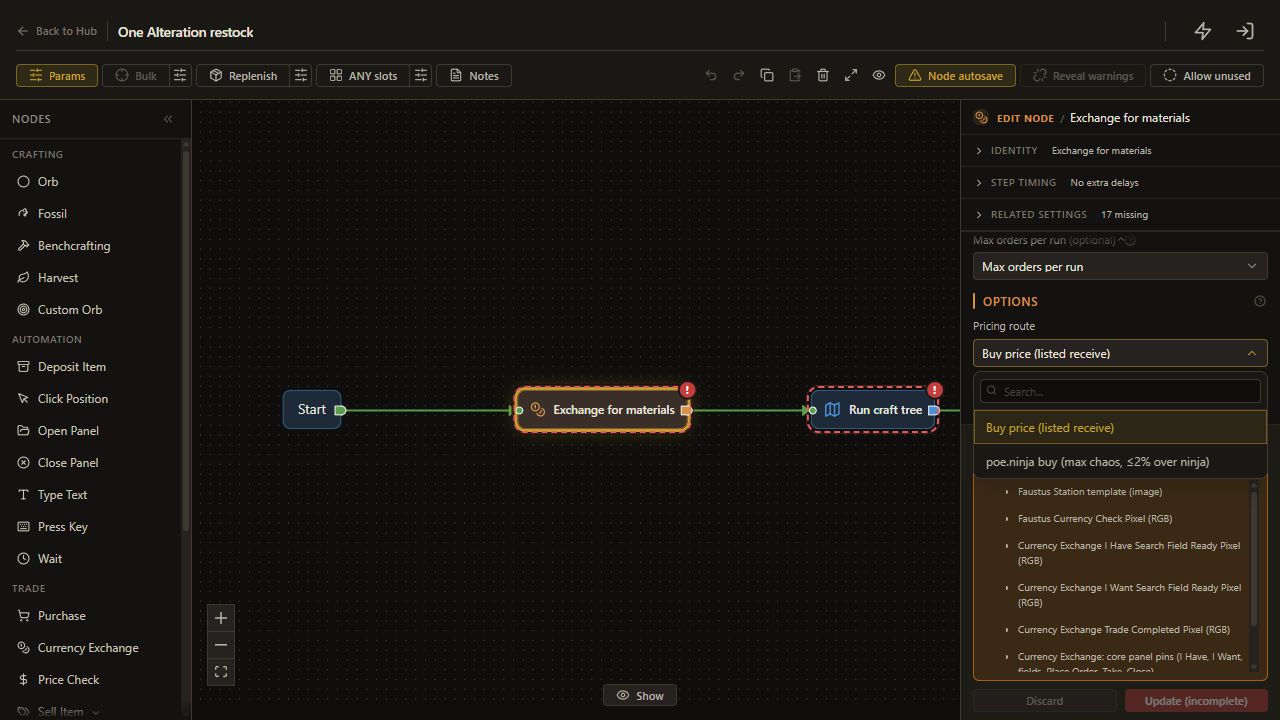
    Open the Pricing route selector. The saved example starts on Buy price (listed receive).

    The available pricing routes are shown.

    Open full-size screenshot
  24. 3. Keep the intended pricing route

    24. Choose the listed receive route

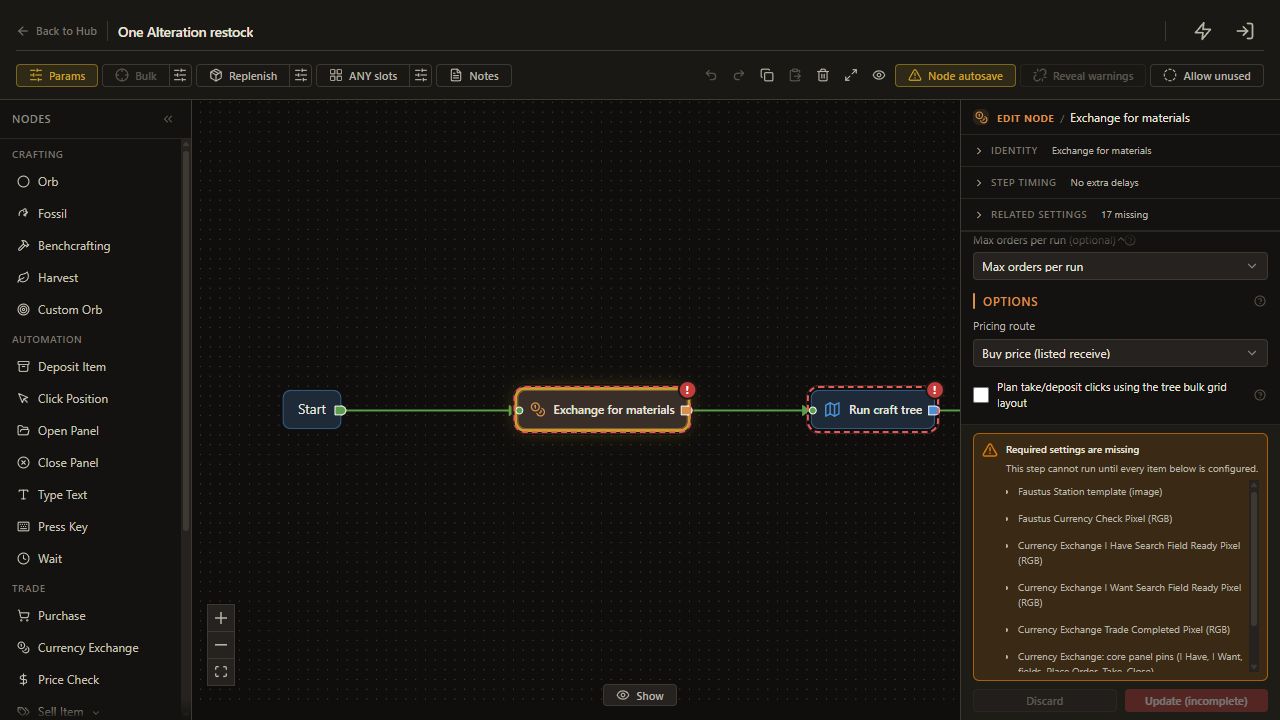
    Click Buy price (listed receive).

    The order uses the listed receive-side route.

    Open full-size screenshot
  25. 3. Keep the intended pricing route

    25. Keep bulk planning off

    Set Plan take/deposit clicks using the tree bulk grid layout to False.

    Plan take/deposit clicks using the tree bulk grid layout keeps the selected value.

    Open full-size screenshot
  26. 3. Keep the intended pricing route

    26. Read the real quote

    Inspect the actual in-game quote. Amount to sell is offered per order. The listed receive route differs from poe.ninja buy.

    The accepted spend uses the actual quote.

    Complete and verify this step in the stated app or game.

  27. 4. Turn off the separate replenishment policy

    27. Disable separate replenishment

    Set Material Replenish to False.

    The 50-to-200 Alteration replenishment policy is disabled.

    Open full-size screenshot
  28. 4. Turn off the separate replenishment policy

    28. Supply other materials

    Supply the child's other materials yourself. The visible order buys only Alterations.

    The child does not rely on a separate restock.

    Read and complete this step before continuing.

  29. 5. Select a tested single-item child

    29. Test a bounded child

    Complete first-craft-tree, save Roll budget as 1 and test it alone on an identified magic practice item.

    A one-action child is ready.

    Read and complete this step before continuing.

  30. 5. Select a tested single-item child

    30. Open the embed

    Choose Run craft tree.

    Embed Tree settings open.

    Open full-size screenshot
  31. 5. Select a tested single-item child

    31. Choose the tested child

    Set Craft tree to the tested bounded Alteration tree.

    Craft tree keeps the selected value.

    Open full-size screenshot
  32. 5. Select a tested single-item child

    32. Choose parameter naming

    Choose Same groups and names.

    The child parameter keeps its name in the parent.

    Open full-size screenshot
  33. 5. Select a tested single-item child

    33. Link the budget

    If Link params is shown, choose it. If the budget is already linked, continue to View linked params.

    The child inputs are linked or the existing budget mapping is ready to inspect.

    Open full-size screenshot
  34. 5. Select a tested single-item child

    34. Reuse the existing budget

    If Params already exist appears, choose Use existing for Roll budget.

    The existing parent Roll budget is selected for the child input.

    Open full-size screenshot
  35. 5. Select a tested single-item child

    35. Apply the budget mapping

    If the parameter conflict dialog is open, choose Apply.

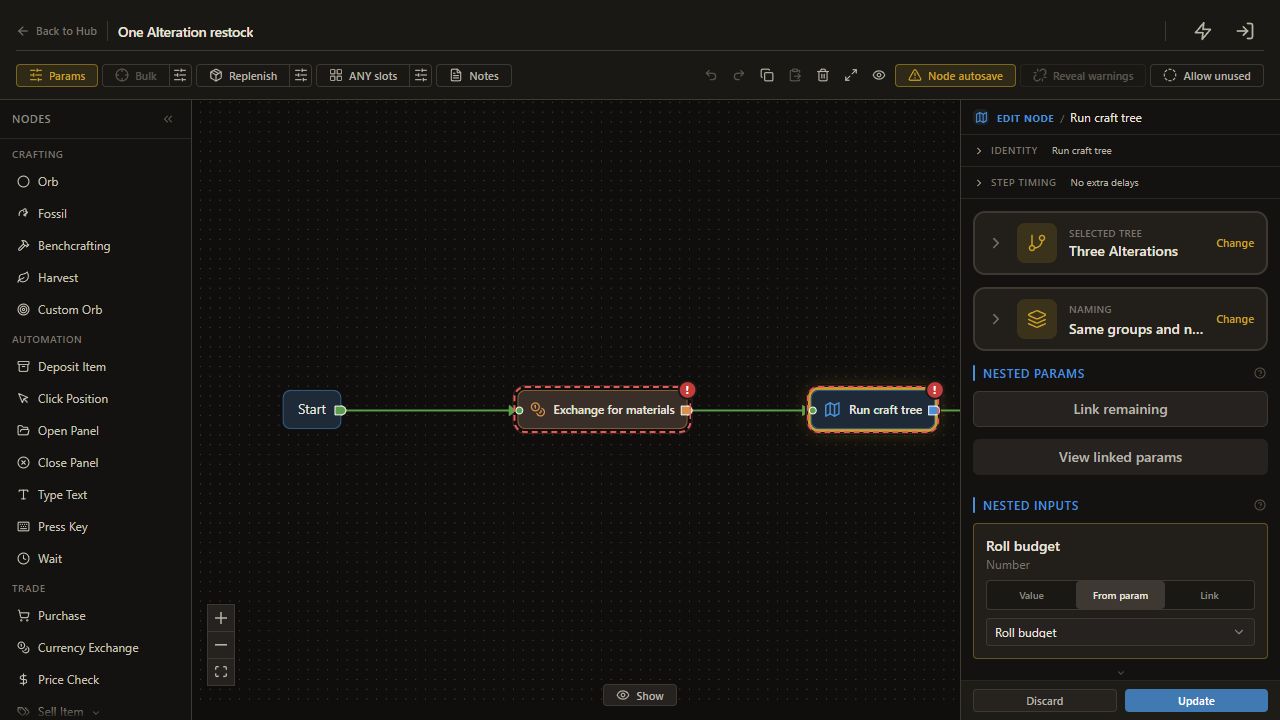
    The dialog closes and the Roll budget mapping is linked.

    Open full-size screenshot
  36. 5. Select a tested single-item child

    36. Read the budget mapping

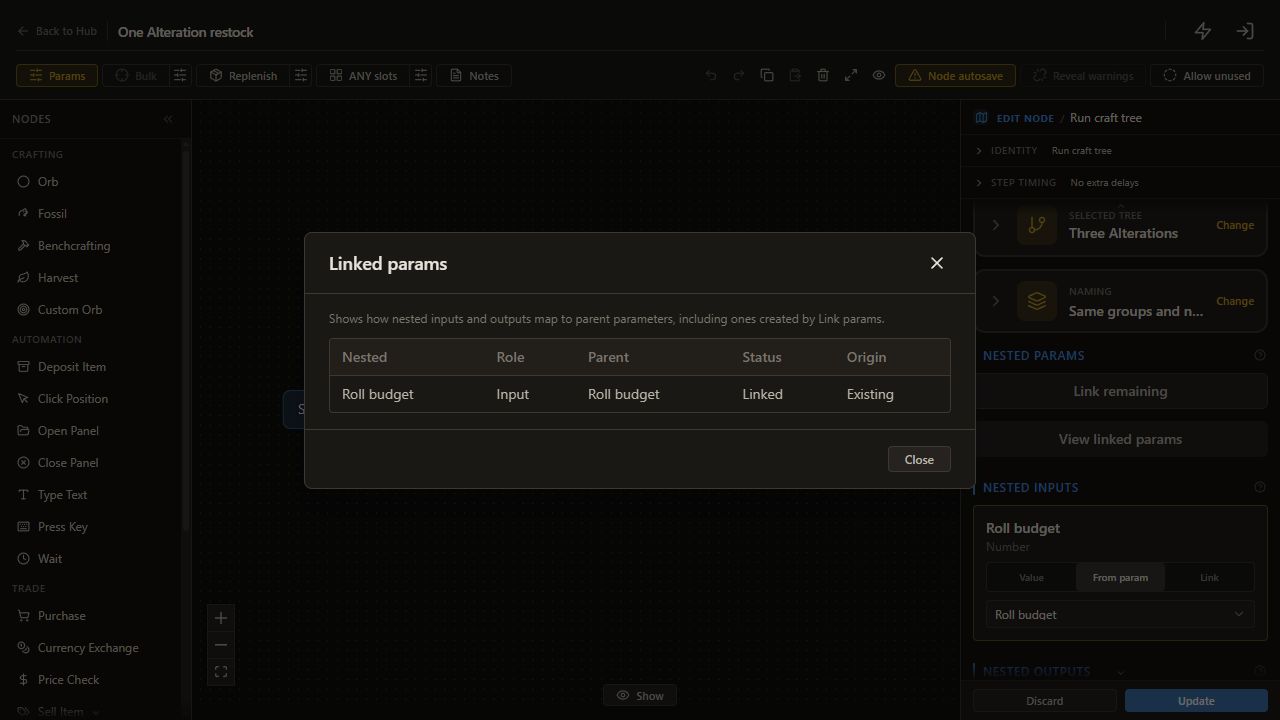
    Choose View linked params.

    The linked Roll budget is visible.

    Open full-size screenshot
  37. 5. Select a tested single-item child

    37. Close the mapping table

    Choose Close in View linked params.

    The embed controls are visible.

    Open full-size screenshot
  38. 5. Select a tested single-item child

    38. Return to Hub

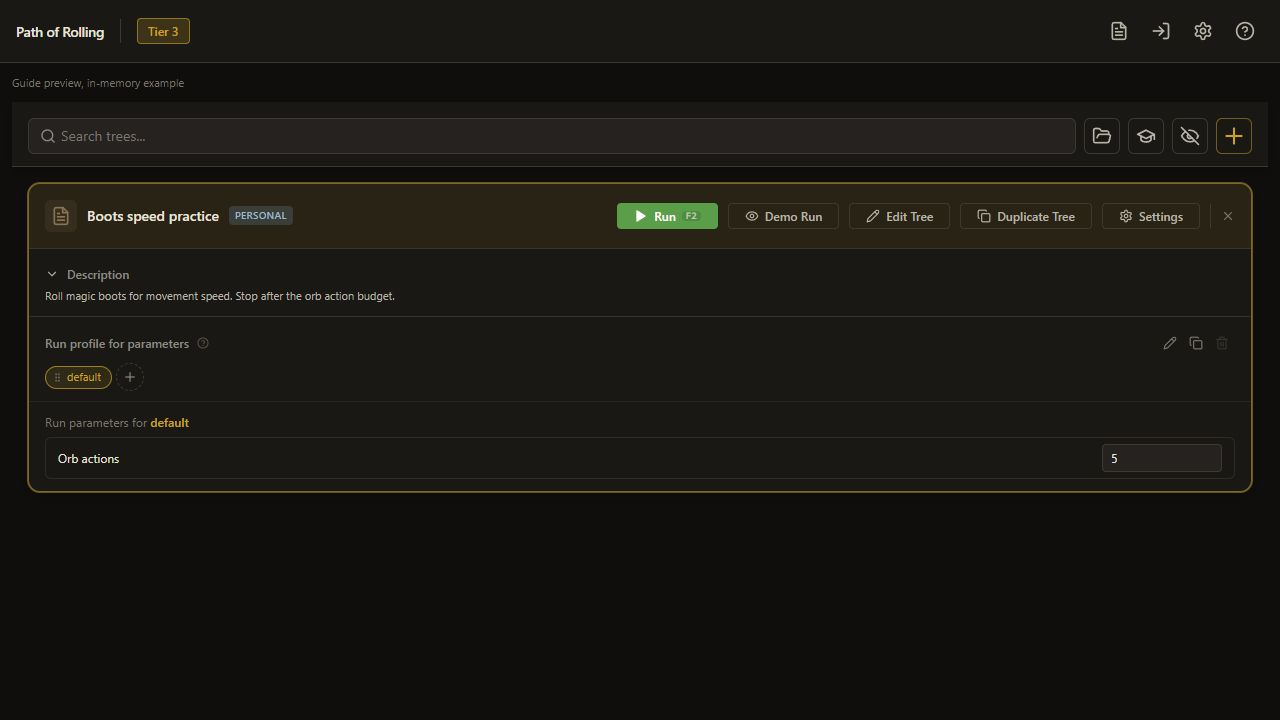
    Choose Back to Hub to set the parent Roll budget.

    The selected copy appears on the Hub.

    Open full-size screenshot
  39. 5. Select a tested single-item child

    39. Supply one action

    In Run Parameters, set the parent Roll budget to 1.

    The parent supplies one action to the child.

    Open full-size screenshot
  40. 5. Select a tested single-item child

    40. Wait for Saved

    Wait until the form shows Saved.

    The parent Roll budget is persisted.

    Read and complete this step before continuing.

  41. 5. Select a tested single-item child

    41. Return to the editor

    Choose Edit Tree to continue.

    The requested view opens.

    Open full-size screenshot
  42. 5. Select a tested single-item child

    42. Open Bulk settings

    Click the sliders button beside Bulk, labeled Configure bulk / grid settings.

    The Bulk settings dialog opens.

    Open full-size screenshot
  43. 5. Select a tested single-item child

    43. Keep bulk off

    Click Current item in the Bulk settings dialog.

    Current item is selected in the dialog; click Save next.

    Open full-size screenshot
  44. 5. Select a tested single-item child

    44. Save one-item mode

    Click Save in the Bulk settings dialog.

    Current item is saved and the dialog closes.

    Open full-size screenshot
  45. Check the result

    45. Inspect Start output to Exchange for materials

    Trace the saved connection from Start's unnamed output to an input on Exchange for materials.

    The next route reaches Exchange for materials.

    Open full-size screenshot
  46. Check the result

    46. Inspect Exchange for materials output to Run craft tree

    Trace the saved connection from Exchange for materials's unnamed output to an input on Run craft tree.

    The next route reaches Run craft tree.

    Open full-size screenshot
  47. Check the result

    47. Inspect Run craft tree output to Finish

    Trace the saved connection from Run craft tree's unnamed output to an input on Finish.

    The next route reaches Finish.

    Open full-size screenshot
  48. Check the result

    48. Check the node settings

    With Node autosave on, check the settings on the canvas. Switching nodes or using Back to Hub saves pending edits. If Node autosave is off, use Add to Tree for new nodes and Update for edits.

    The graph contains the configured nodes.

    Read and complete this step before continuing.

  49. Check the result

    49. Return to the Hub

    Choose Back to Hub.

    The personal tree is shown.

    Open full-size screenshot
  50. Check the result

    50. Start the test

    On the selected Hub card, choose Run after checking the real setup.

    The configured run can begin on the prepared item.

    Open full-size screenshot
  51. Check the result

    51. Open Logs

    Choose Logs.

    The actual sequence and exit can be inspected.

    Open full-size screenshot
  52. Check the result

    52. Inspect the actual result

    Inspect the actual exchange order, spend, materials received, Logs and the actual crafted item.

    The order and bounded child result are checked separately.

    Complete and verify this step in the stated app or game.

  53. If it does not work

    53. Review if it does not work

    If the exchange fails, check pins, gold, exact currency names, inventory space and outstanding orders. If the child fails, inspect its reference, linked budget and available stock before repeating any exchange.

    The section context and checks are preserved.

    Read and complete this step before continuing.

  54. Next guide

    54. Review next guide

    [Set up a small Currency Exchange order](currency-exchange.md).

    The section context and checks are preserved.

    Read and complete this step before continuing.

On this page

At a glance

Learn > Trade Exchange > Restock Exchange Craft connects Start > Exchange for materials > Run craft tree > Finish. Its exchange node uses Buy price (listed receive) and a saved maximum of ten orders, but has no currencies or sell amount configured. It is a template requiring setup.

The preset also enables tree-level Material Replenish and points to Boots Magic Roll. This example makes the exchange explicit, disables the separate replenishment policy and uses a child you have checked.

1. Prepare a personal copy

Duplicate Learn: Restock, Exchange, Craft on the Hub and name it One Alteration restock. Complete Currency Exchange capture, Inventory Grid, required currency and gold setup, and the exchange Must-dos. Clear unfinished orders and leave inventory room.

Open Edit Tree. Click the sliders button beside Bulk in the editor toolbar, labeled Configure bulk / grid settings. Choose Current item, then click Save. The dialog closes and the tree uses one item.

Read the app's Currency Exchange ban-risk acknowledgment. I Understand applies specifically to CX automation, including this order. Review it before proceeding with those actions.

2. Bind the missing order inputs

Open Exchange for materials in Edit. Under Parameters, click Auto-fill parameters to create the missing bindings. Inspect the bindings for Sell currency, Buy currency, Amount to sell and Max orders per run.

Click Back to Hub. In the selected copy's Run Parameters, enter Chaos Orb for Sell currency and Orb of Alteration for Buy currency. Set Amount to sell to a small amount you accept, for example 1, and Max orders per run to 1. Wait for Saved, then use Edit Tree to continue.

3. Keep the intended pricing route

Retain Buy price (listed receive) for this example. The amount is the sell amount offered per order. Check the actual exchange quote before running.

The alternative poe.ninja buy route requires Chaos Orb and interprets the amount as a maximum chaos offer. Choose it only after reviewing its different calculation. Leave bulk-grid planning off because this example has no bulk loop.

4. Turn off the separate replenishment policy

Disable the copy's tree-level Material Replenish. Its saved rule would independently replenish Alterations below 50 toward 200, with a separate maximum of 30 listings. That policy is distinct from the visible Exchange node's one-order limit.

Supply other crafting materials yourself. The visible order buys only the configured currency and does not guarantee enough Alterations for an open-ended recipe.

5. Select a tested single-item child

Replace Run craft tree's default Boots Magic Roll reference with your own verified one-item tree. For a finite example, use the bounded Alteration tree, set its Roll budget to 1, and check it alone on an identified magic practice item first.

Open Edit Tree. Click the sliders button beside Bulk in the editor toolbar, labeled Configure bulk / grid settings. Choose Current item, then click Save. The dialog closes and the tree uses one item.

In the embed controls, choose Same groups and names. If Link params is shown, choose it. If the budget is already linked, continue to View linked params. If Params already exist appears, choose Use existing for Roll budget, then click Apply. Open View linked params to check that the child's Roll budget maps to the parent parameter.

Close the table and return to the Hub. In the parent copy's Run Parameters, set Roll budget to 1 and wait for Saved. Open Edit Tree again, keep bulk off, and position the intended practice item using the child's configured location.

Check the result

Check Start > Exchange > Run craft tree > Finish, then review all saved values and start once. Inspect the exchange order, currency spent and materials actually received. Read Logs to confirm whether the child ran, then inspect the item.

If it does not work

If the exchange fails, check pins, gold, exact currency names, inventory space and outstanding orders. If the child fails, inspect its reference, linked budget and available stock before repeating any exchange.

Next guide

Set up a small Currency Exchange order.

Keep learning

Browse all guides

For setup help, the installer or license keys, join the official Discord. Sales and key issues: DM PathOfRolling. Check the account before paying; watch for impostors.