List a bought cluster jewel using a saved price lookup

Updated
Complete

List a bought cluster jewel using a saved price lookup

Read the written guide

Follow each step in the app. Numbered markers show the real controls. To connect nodes, drag from output marker 1 to input marker 2. Connection maps show the completed route. Steps outside the app name where to continue.

  1. At a glance

    1. Read the scope

    Read the practice target and changes from the saved sample.

    The scope and limits are clear.

    Read and complete this step before continuing.

  2. 1. Prepare the copy and data

    2. Select the example

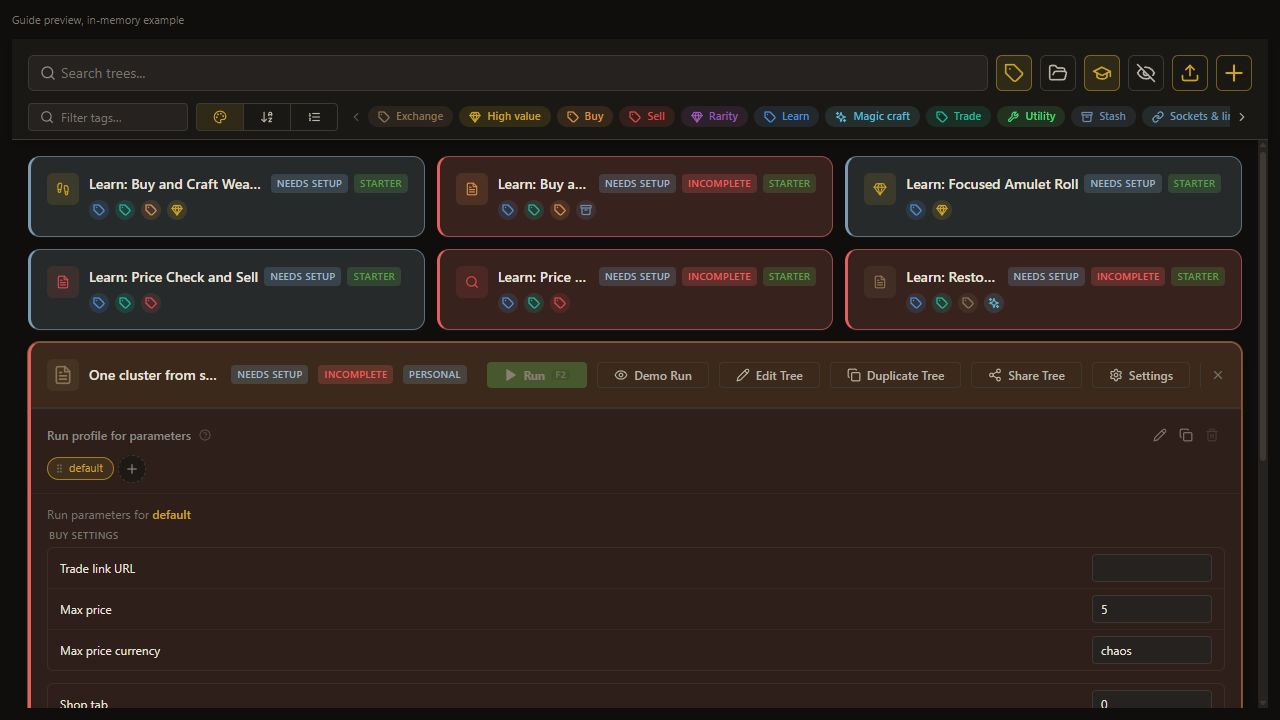
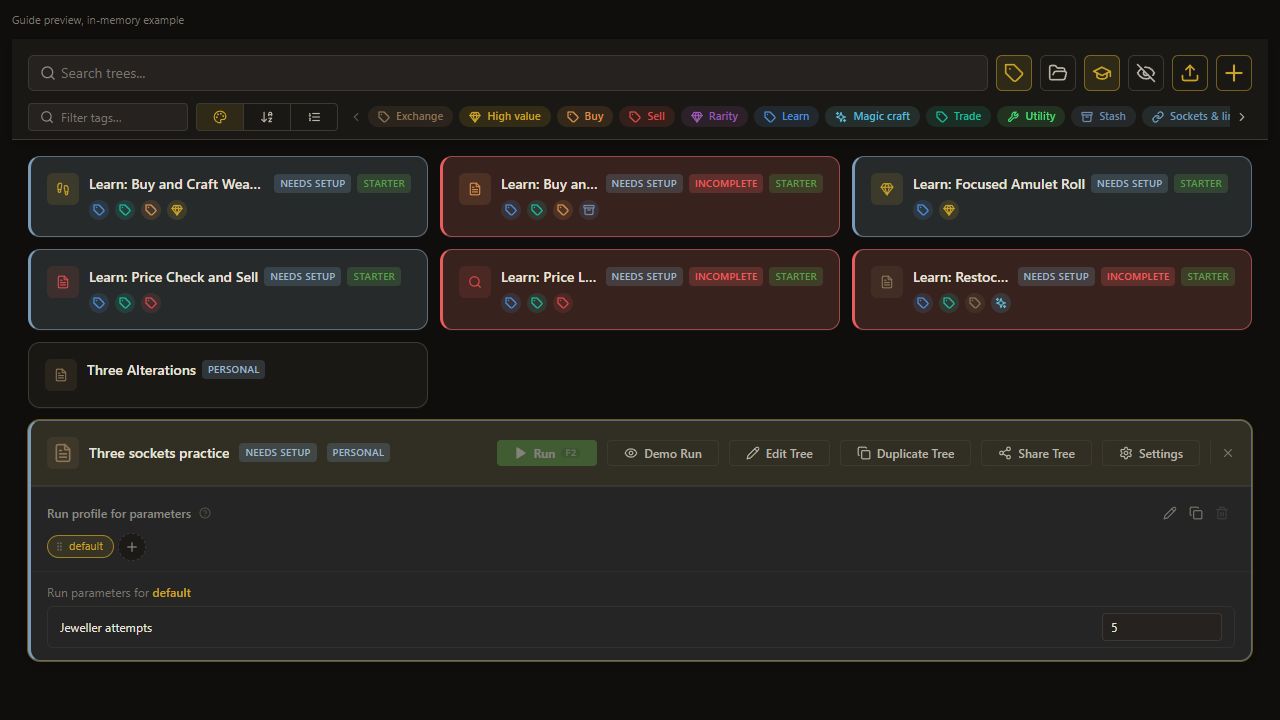
    Choose Learn: Price Lookup then Sell.

    The intended Learn card is selected.

    Open full-size screenshot
  3. 1. Prepare the copy and data

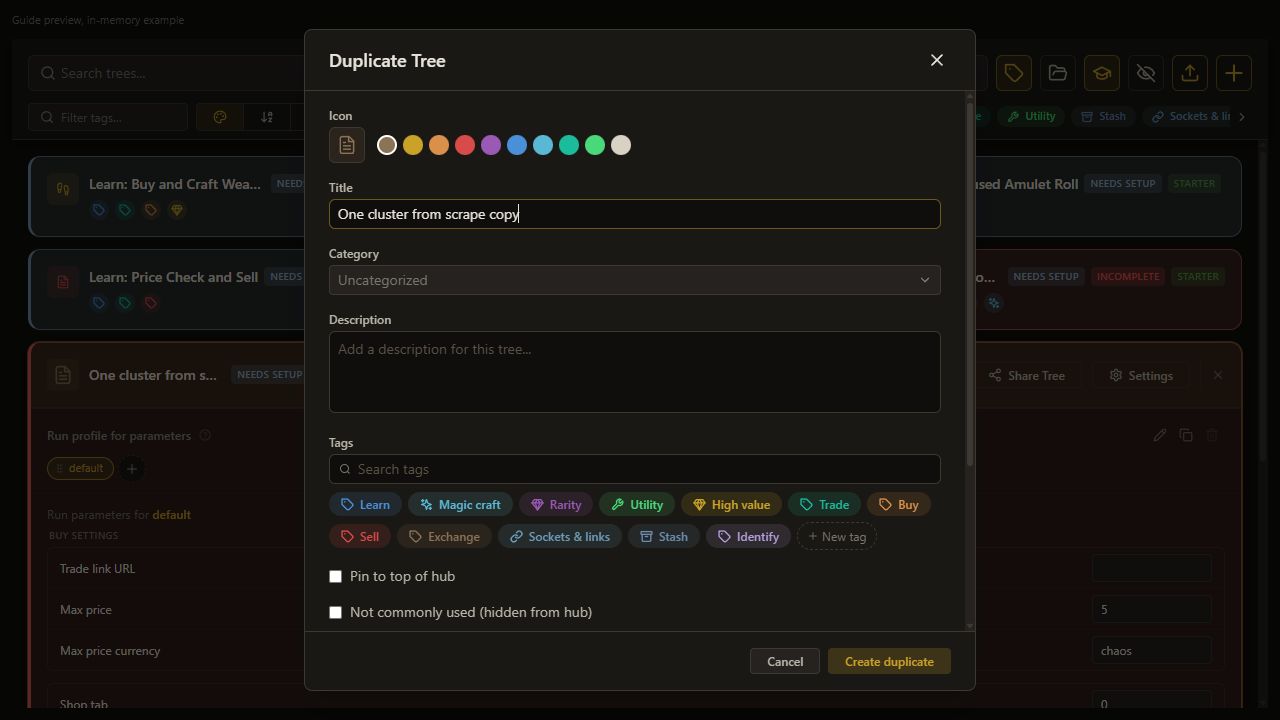
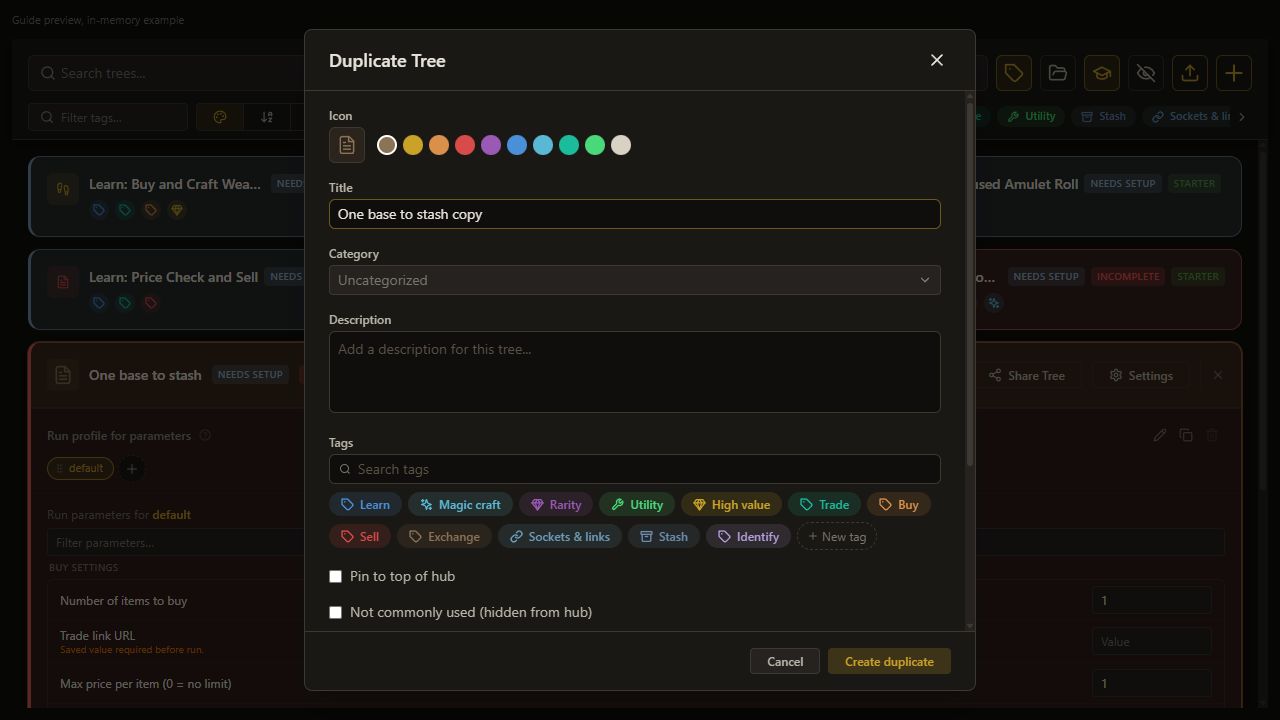
    3. Duplicate the example

    Choose Duplicate Tree.

    The copy dialog opens.

    Open full-size screenshot
  4. 1. Prepare the copy and data

    4. Name the personal copy

    Set Name to One cluster from scrape.

    Name keeps the selected value.

    Open full-size screenshot
  5. 1. Prepare the copy and data

    5. Create the copy

    Choose Create duplicate.

    The personal copy appears.

    Open full-size screenshot
  6. 1. Prepare the copy and data

    6. Open the personal copy

    Choose Edit Tree.

    The copied production graph opens.

    Open full-size screenshot
  7. 1. Prepare the copy and data

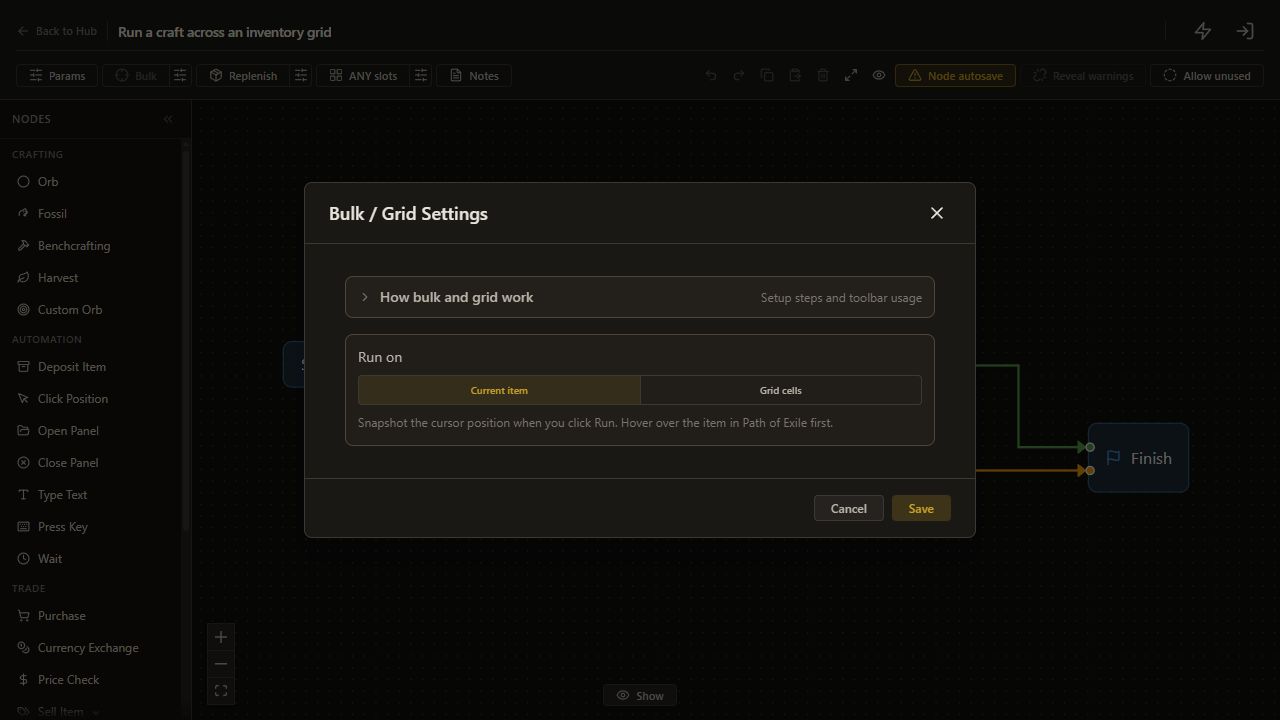
    7. Open Bulk settings

    Click the sliders button beside Bulk, labeled Configure bulk / grid settings.

    The Bulk settings dialog opens.

    Open full-size screenshot
  8. 1. Prepare the copy and data

    8. Keep one-item mode

    Click Current item in the Bulk settings dialog.

    Current item is selected in the dialog; click Save next.

    Open full-size screenshot
  9. 1. Prepare the copy and data

    9. Save one-item mode

    Click Save in the Bulk settings dialog.

    Current item is saved and the dialog closes.

    Open full-size screenshot
  10. 1. Prepare the copy and data

    10. Open the saved lookup

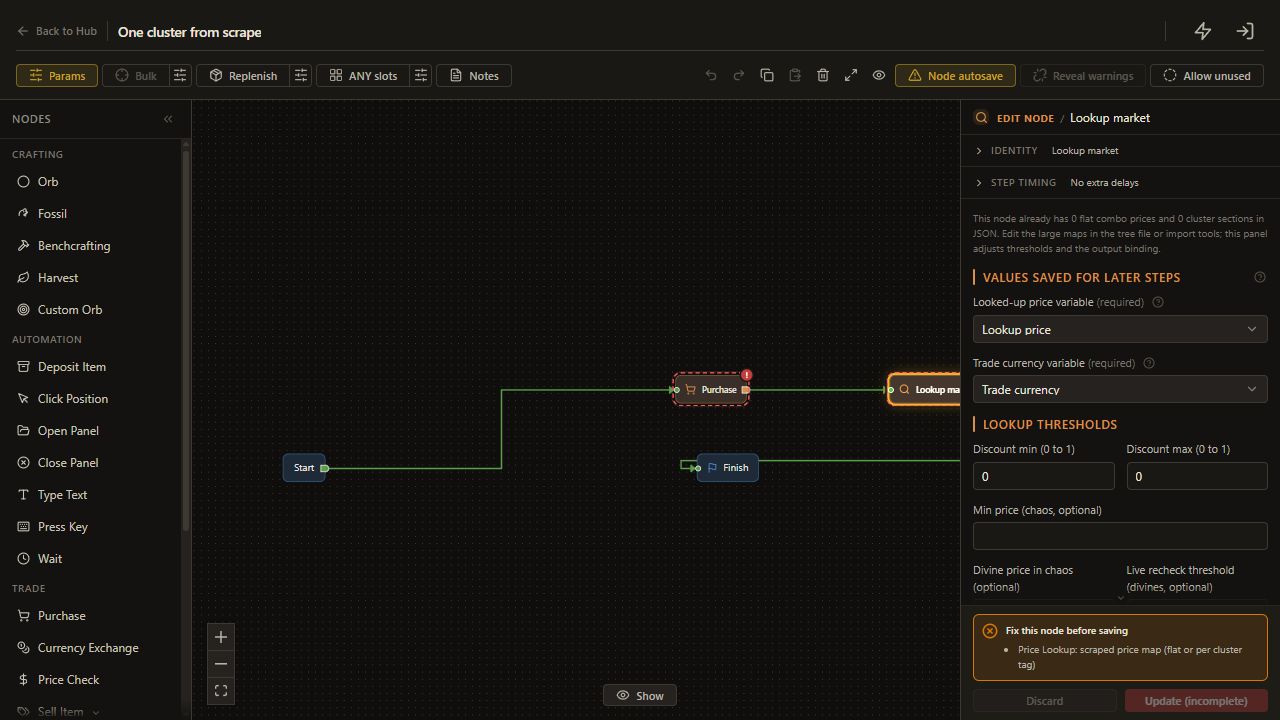
    Choose Lookup market.

    The saved node opens; it is absent from the normal palette.

    Open full-size screenshot
  11. 1. Prepare the copy and data

    11. Check scrape coverage

    Confirm current available scrape data covers the cluster type/notable combination. This preset embeds no maps. If data is unavailable, use case-price-check-and-sell.

    The lookup has applicable data.

    Read and complete this step before continuing.

  12. 2. Configure one purchase

    12. Inspect an official trade search

    Choose the correct league and the intended cluster type, passive count and notables on the official PoE trade site. Inspect matching listings, then copy the full saved search URL.

    The purchase search is deliberate.

    Complete and verify this step in the stated app or game.

  13. 2. Configure one purchase

    13. Find saved inputs

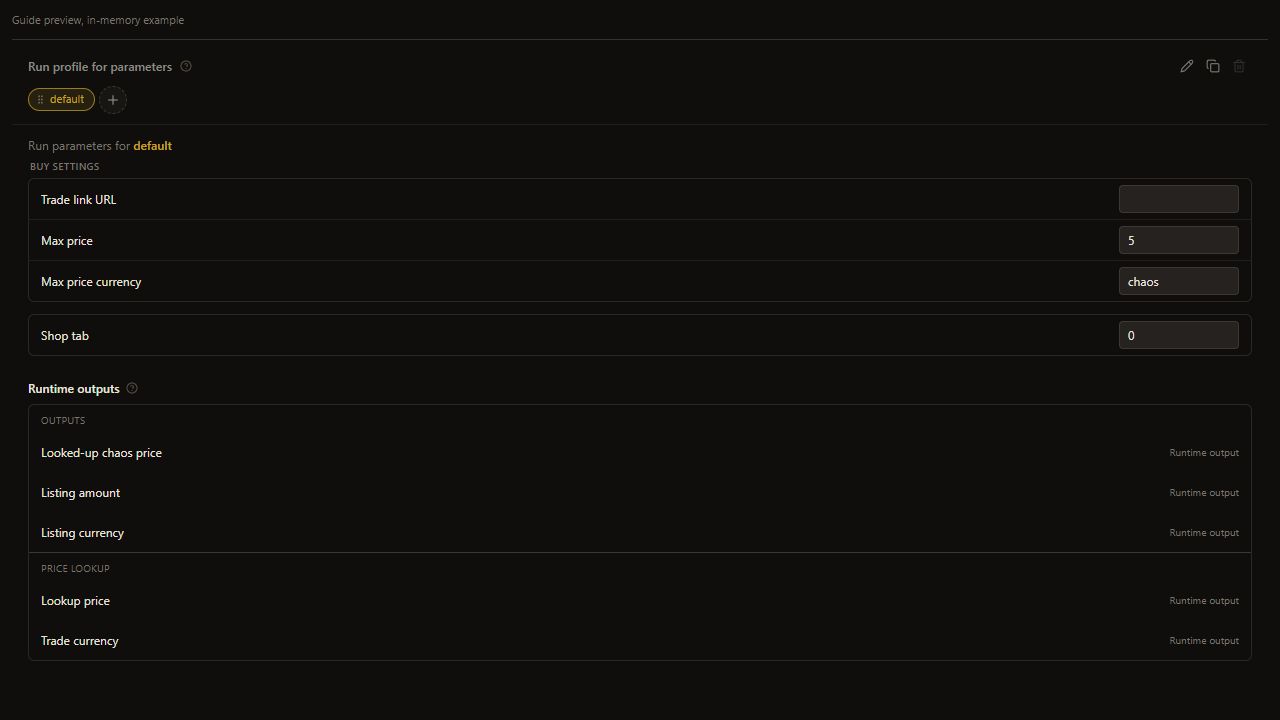
    Select the tree on the Hub and find its Run Parameters section.

    The copy's saved values appear.

    Read and complete this step before continuing.

  14. 2. Configure one purchase

    14. Save the search URL

    Set Trade link URL to the inspected official saved search URL.

    The copy uses the intended search.

    Open full-size screenshot
  15. 2. Configure one purchase

    15. Set Max price

    Set Max price to 5.

    Max price keeps the selected value.

    Open full-size screenshot
  16. 2. Configure one purchase

    16. Set Max price currency

    Set Max price currency to chaos.

    Max price currency keeps the selected value.

    Open full-size screenshot
  17. 2. Configure one purchase

    17. Wait for Saved

    Wait until the form shows Saved.

    The inputs are persisted.

    Read and complete this step before continuing.

  18. 2. Configure one purchase

    18. Return to the editor

    Click Edit Tree on the Hub.

    The Purchase settings expose its destination and amount binding.

    Open full-size screenshot
  19. 2. Configure one purchase

    19. Open Purchase settings

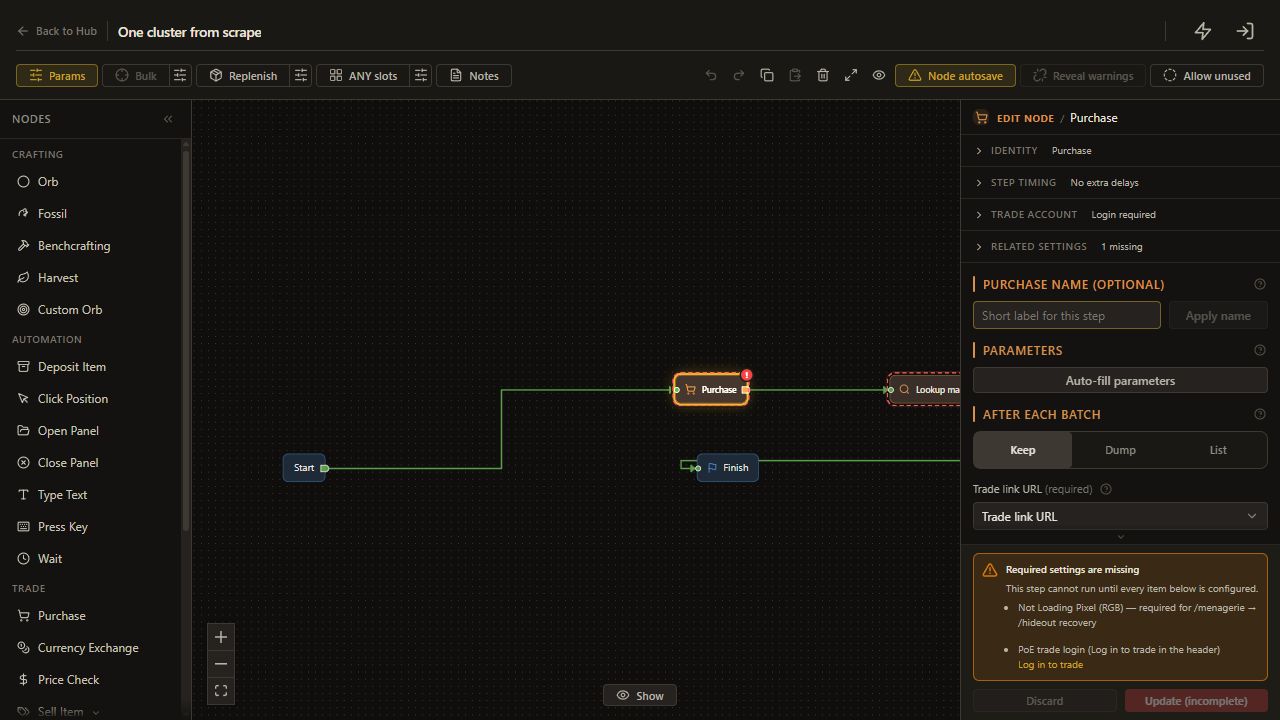
    Click the Purchase node on the canvas.

    The Purchase settings expose its destination and amount binding.

    Open full-size screenshot
  20. 2. Configure one purchase

    20. Keep the purchase

    Choose Keep.

    The item remains available for lookup and listing.

    Open full-size screenshot
  21. 2. Configure one purchase

    21. Verify one-item default

    Confirm the saved Purchase has no amount binding, so it buys one item.

    The one-item amount is understood.

    Open full-size screenshot
  22. 2. Configure one purchase

    22. Prepare trade login and inventory

    Complete trade login and inventory setup before the purchase test.

    The purchase prerequisites have been checked in the real app and game.

    Read and complete this step before continuing.

  23. 3. Keep the lookup outputs paired

    23. Return to Lookup market

    Choose Lookup market in the graph.

    The lookup output bindings and threshold settings are visible.

    Open full-size screenshot
  24. 3. Keep the lookup outputs paired

    24. Bind lookup price

    Set Looked-up price variable to Lookup price (trade_price).

    Looked-up price variable keeps the selected value.

    Open full-size screenshot
  25. 3. Keep the lookup outputs paired

    25. Bind lookup currency

    Set Trade currency variable to Trade currency (trade_currency).

    Trade currency variable keeps the selected value.

    Open full-size screenshot
  26. 3. Keep the lookup outputs paired

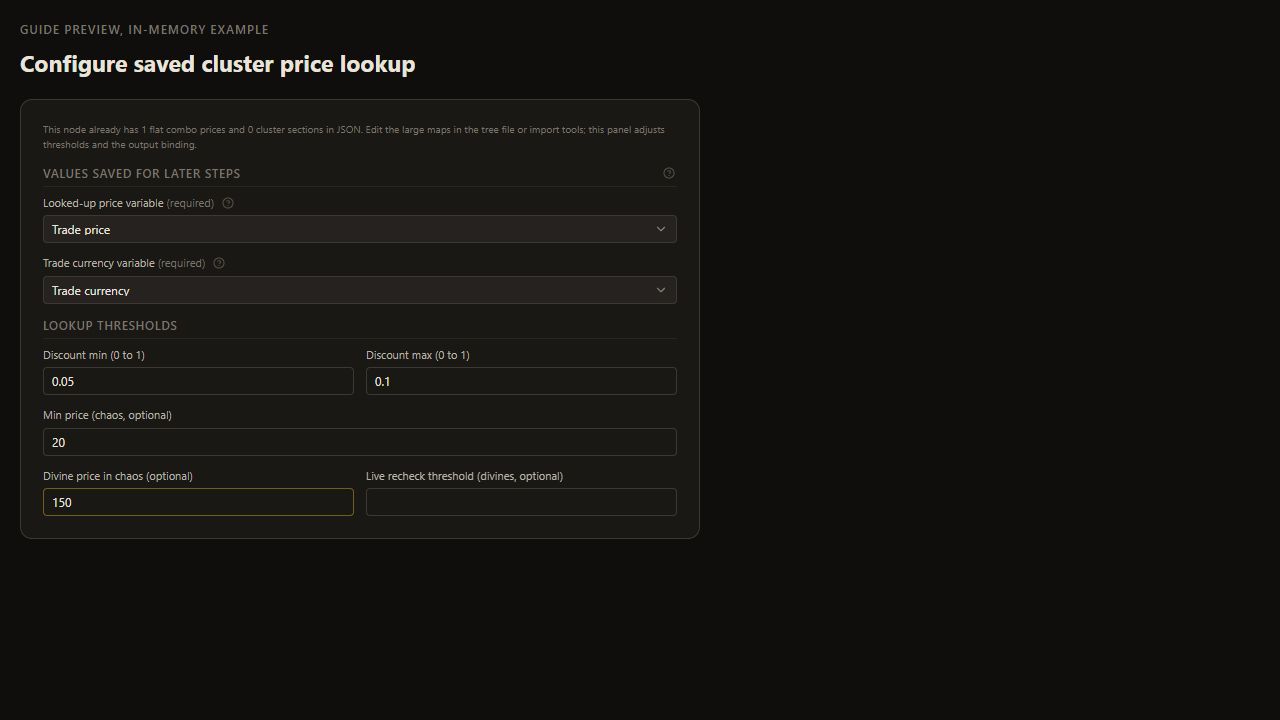
    26. Clear the minimum discount

    Enter 0 for Discount min in this case study.

    The lookup applies no minimum percentage discount.

    Open full-size screenshot
  27. 3. Keep the lookup outputs paired

    27. Clear the maximum discount

    Enter 0 for Discount max in this case study.

    The lookup applies no maximum percentage discount.

    Open full-size screenshot
  28. 3. Keep the lookup outputs paired

    28. Clear the minimum price

    Clear Min price (chaos, optional).

    Min price (chaos, optional) is unset.

    Open full-size screenshot
  29. 3. Keep the lookup outputs paired

    29. Clear the Divine conversion rate

    Clear Divine price in chaos (optional).

    Divine price in chaos (optional) is unset.

    Open full-size screenshot
  30. 3. Keep the lookup outputs paired

    30. Clear the live-recheck threshold

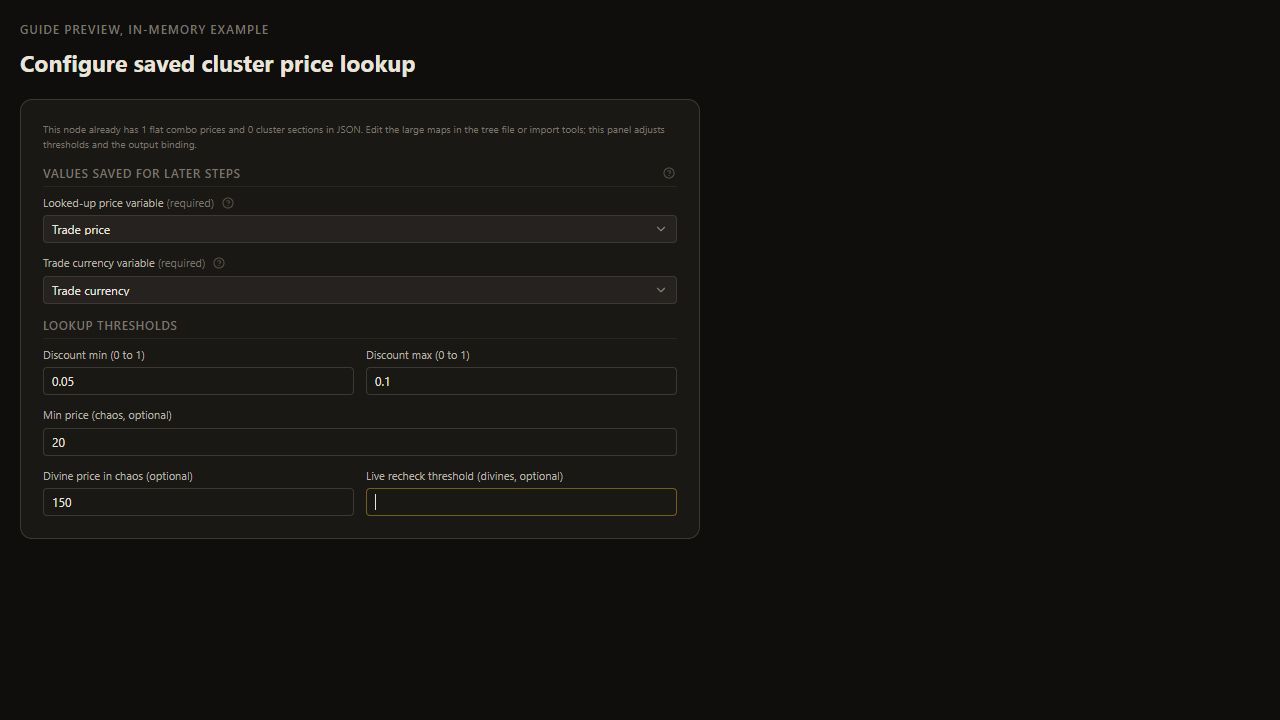
    Clear Live recheck threshold (divines, optional).

    Live recheck threshold (divines, optional) is unset.

    Open full-size screenshot
  31. 3. Keep the lookup outputs paired

    31. Verify the node settings

    Review the configured node values. With Node autosave on, the edits persist when switching nodes or using Back to Hub. In manual confirmation mode, use Update for this existing node.

    The paired outputs and zero discounts are saved.

    Read and complete this step before continuing.

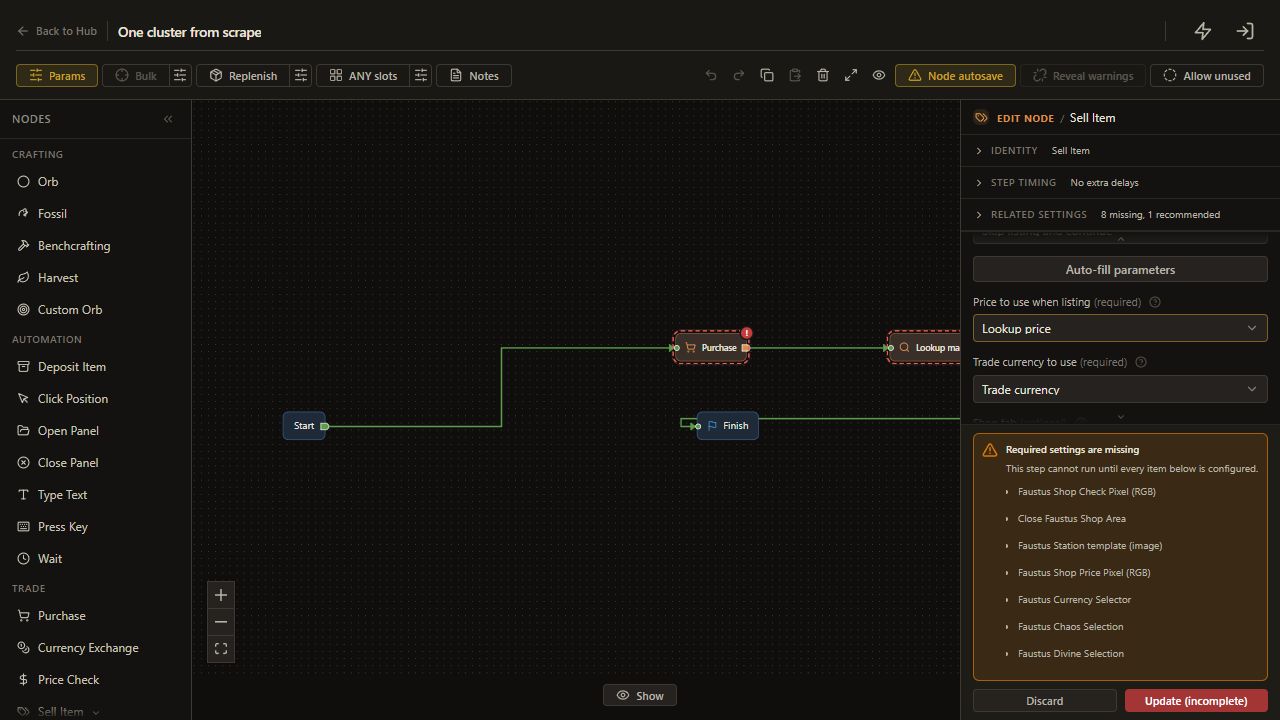
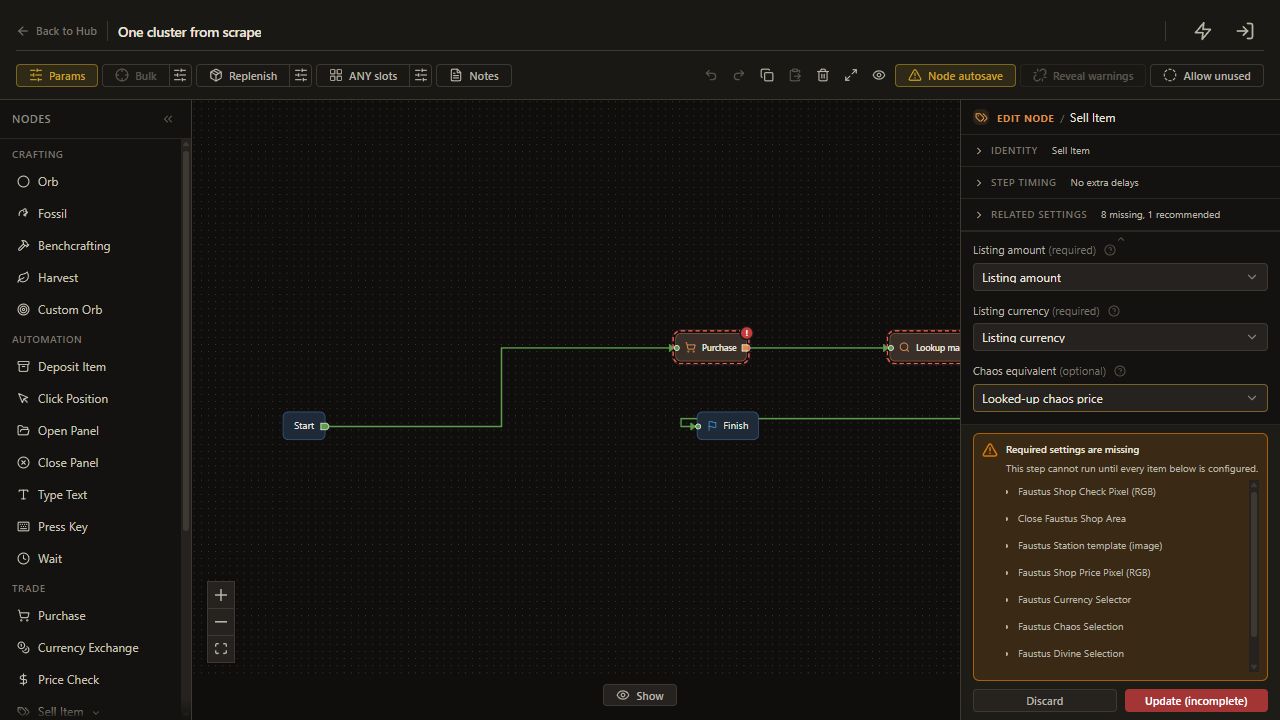
  32. 4. Repair the listing inputs and outputs

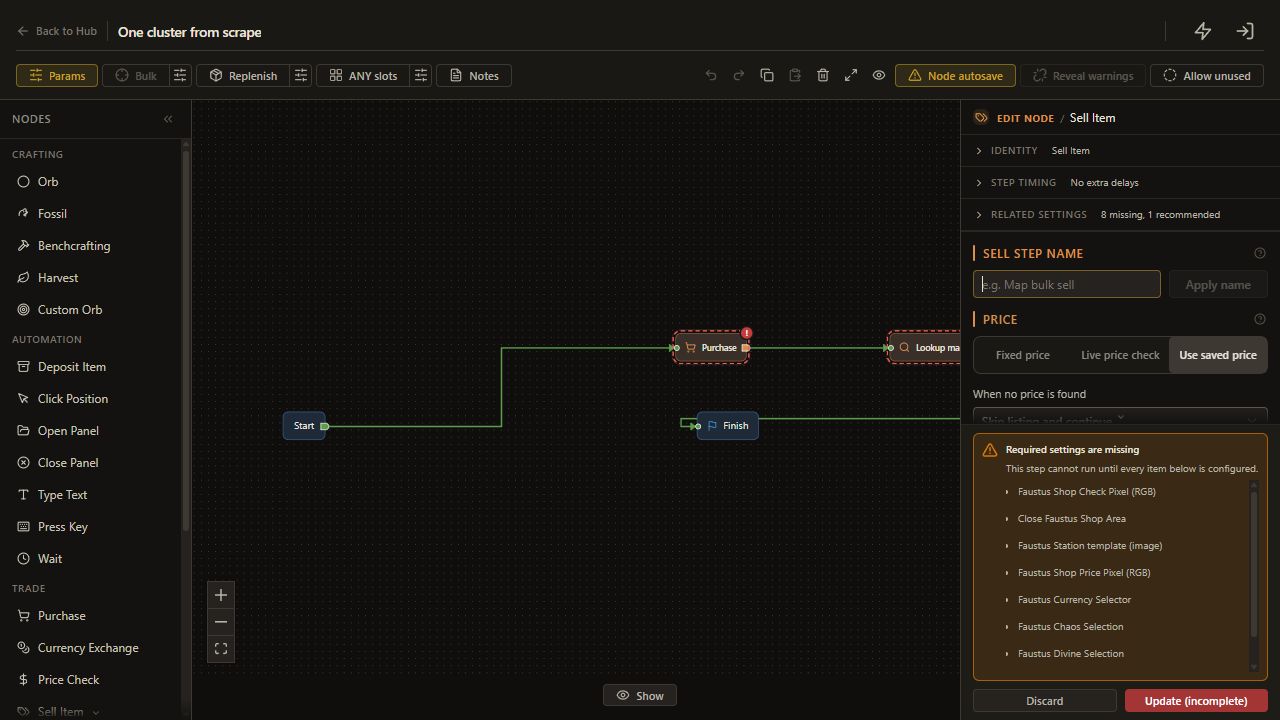
    32. Open listing settings

    Choose Sell Item.

    The saved node opens.

    Open full-size screenshot
  33. 4. Repair the listing inputs and outputs

    33. Reveal the saved-price inputs

    Choose Use saved price to expose the incoming lookup price and currency fields.

    Sell Item exposes the inputs for a previously calculated price.

    Open full-size screenshot
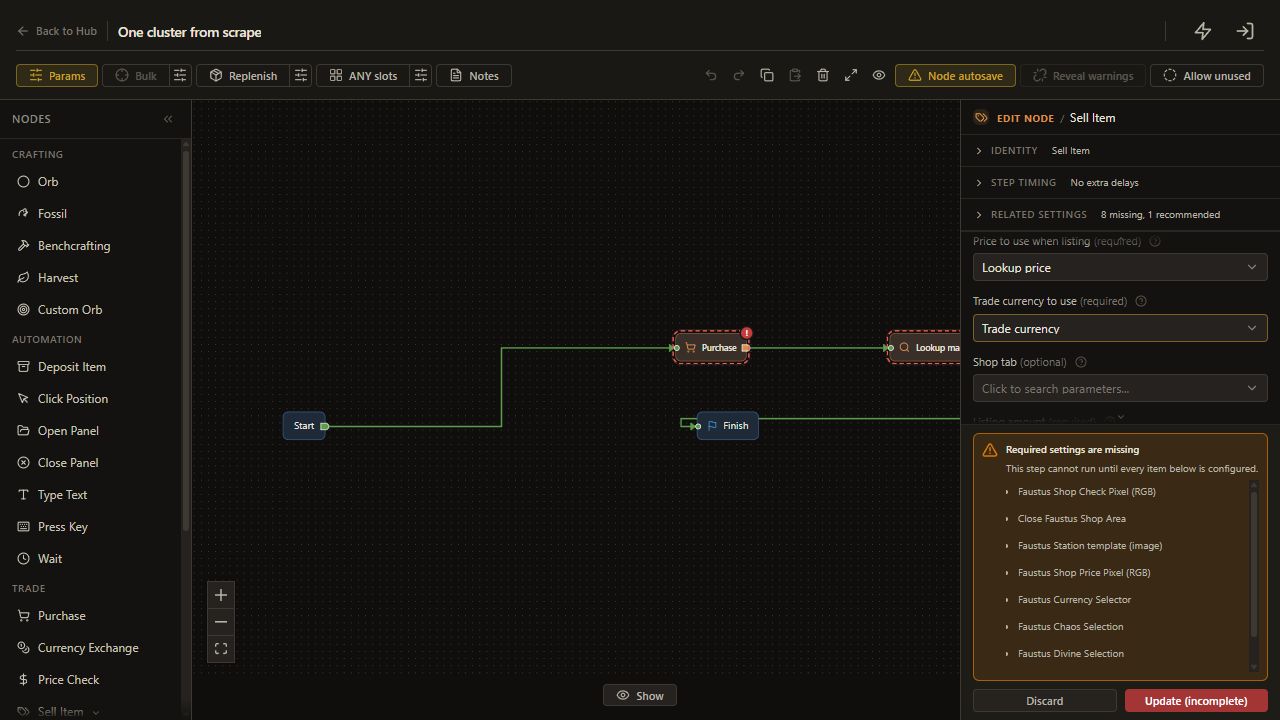
  34. 4. Repair the listing inputs and outputs

    34. Use lookup amount

    Set Price to use when listing to Lookup price (trade_price).

    Price to use when listing keeps the selected value.

    Open full-size screenshot
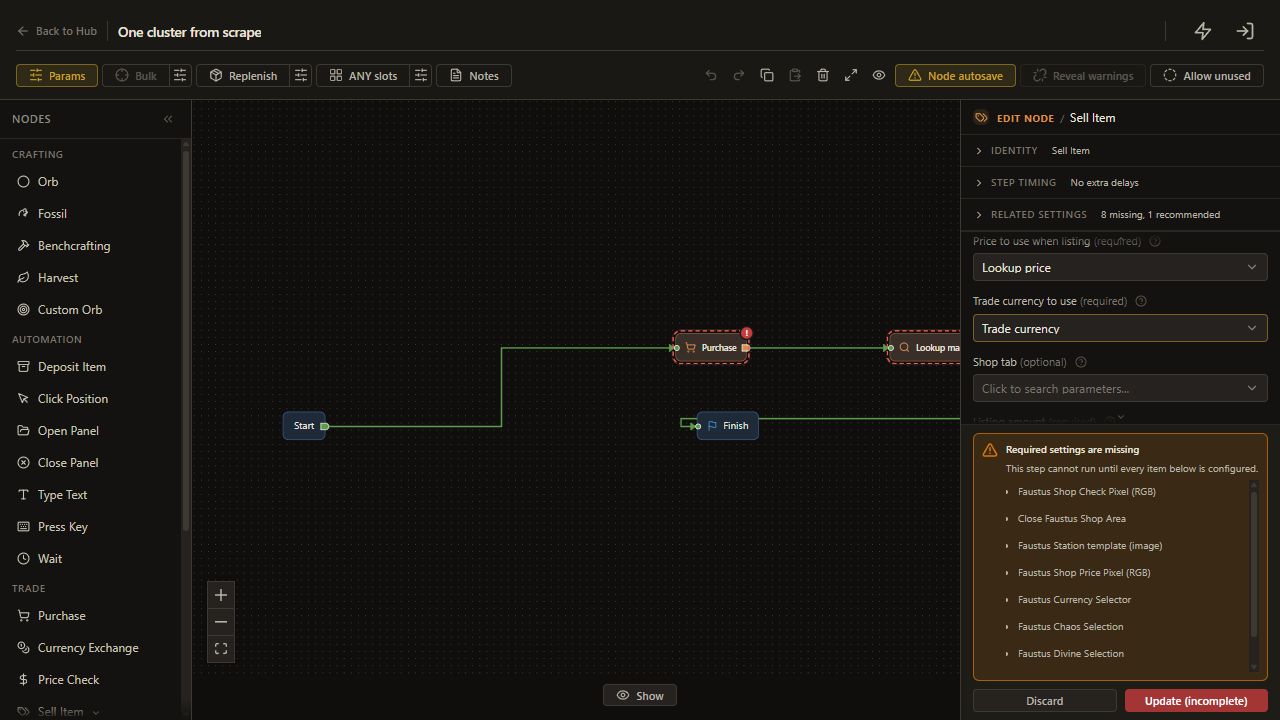
  35. 4. Repair the listing inputs and outputs

    35. Use lookup currency

    Set Trade currency to use to Trade currency (trade_currency).

    Trade currency to use keeps the selected value.

    Open full-size screenshot
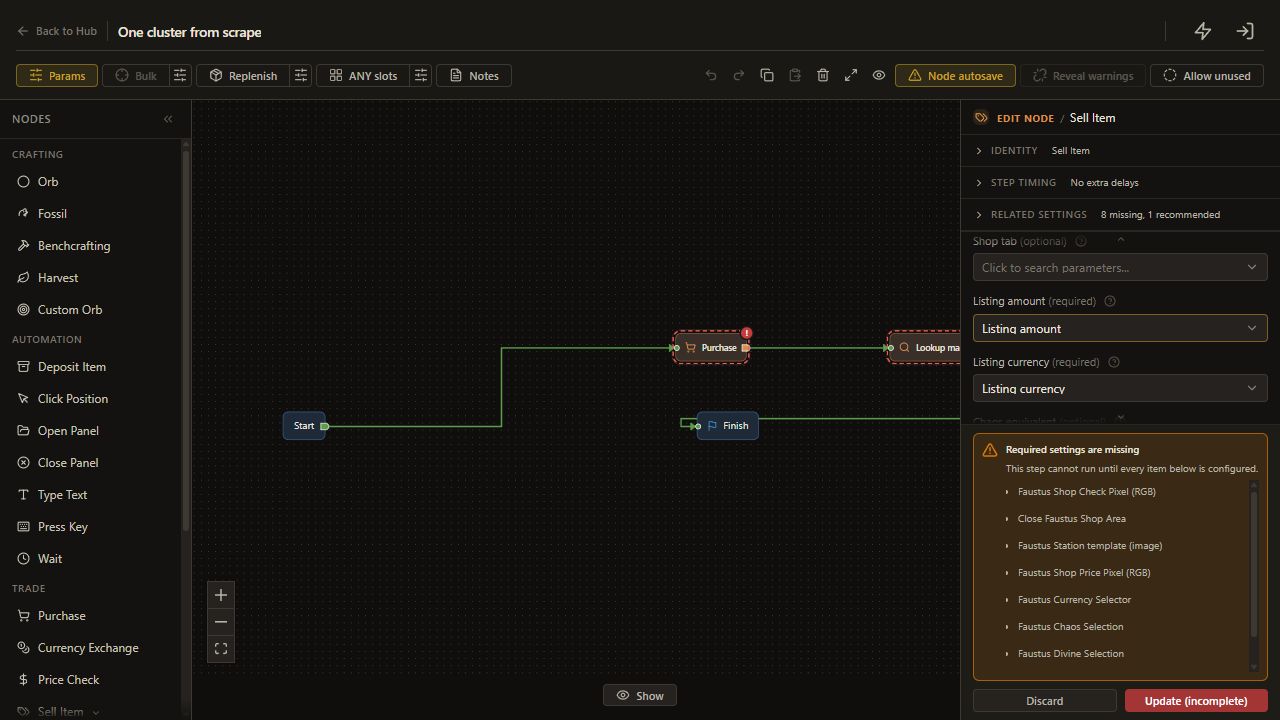
  36. 4. Repair the listing inputs and outputs

    36. Bind Listing amount

    Under Values saved for later steps, retain or bind Listing amount to listing_amount.

    Listing amount records a listing output separately from the incoming lookup price and currency.

    Open full-size screenshot
  37. 4. Repair the listing inputs and outputs

    37. Bind Listing currency

    Under Values saved for later steps, retain or bind Listing currency to listing_currency.

    Listing currency records a listing output separately from the incoming lookup price and currency.

    Open full-size screenshot
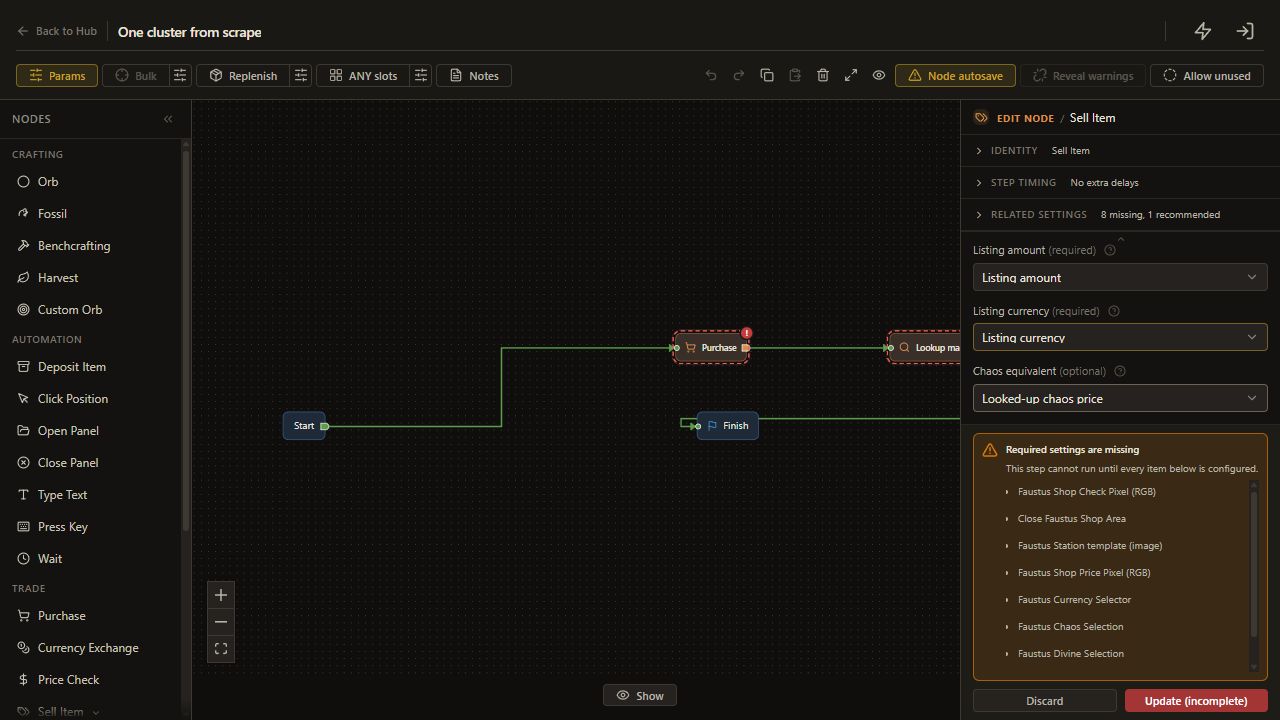
  38. 4. Repair the listing inputs and outputs

    38. Bind Chaos equivalent

    Under Values saved for later steps, retain the Chaos equivalent binding to Looked-up chaos price (chaos_price), a Number runtime output.

    Chaos equivalent records a listing output separately from the incoming lookup price and currency.

    Open full-size screenshot
  39. 4. Repair the listing inputs and outputs

    39. Read listing outputs

    The three visible output bindings record the listing result separately from the incoming lookup sources.

    The visible listing outputs remain distinct from the lookup price pair.

    Read and complete this step before continuing.

  40. 5. Set the tab and connections

    40. Bind the destination

    Bind Shop tab to Shop tab (shop_tab), a Number saved run setting. Find the Run Parameters section on the selected Hub card, enter 0 for the first shop tab and wait for Saved.

    The destination is explicit.

    Open full-size screenshot
  41. 5. Set the tab and connections

    41. Prepare Player Shop

    Complete Player Shop capture and tab locations.

    The selected shop tab is available.

    Read and complete this step before continuing.

  42. 5. Set the tab and connections

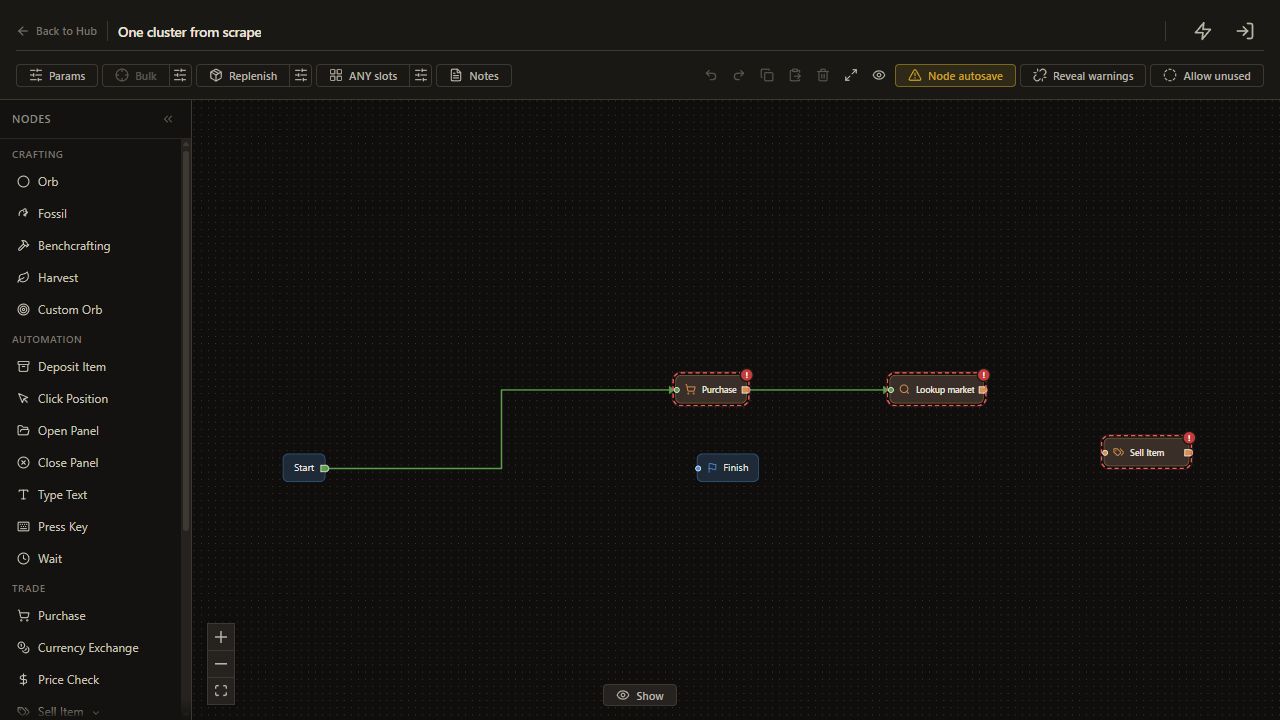
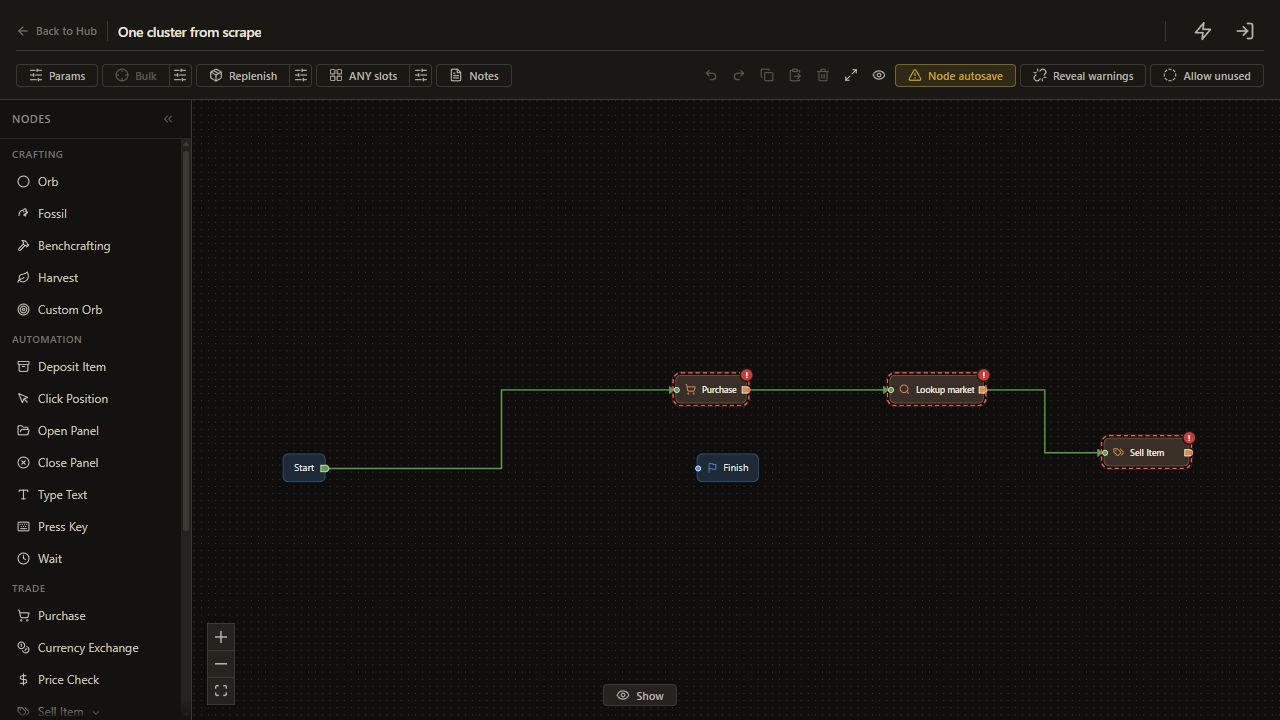
    42. Connect Lookup market to Sell Item

    Drag Lookup market's single unnamed output to Sell Item's input.

    The single output connects to Sell Item.

    Open full-size screenshot
  43. 5. Set the tab and connections

    43. Connect Sell Item to Finish

    Drag Sell Item's single unnamed output to Finish's input.

    The single output connects to Finish.

    Open full-size screenshot
  44. 5. Set the tab and connections

    44. Check the data and complete price bindings

    Before purchasing, confirm matching current cluster scrape data. Check Lookup market writes trade_price and trade_currency; Sell Item reads that same pair, writes the visible listing outputs and has shop_tab bound to 0. Embedded-map counts may be zero in this preset; those counts do not prove current runtime scrape coverage.

    The single-output route, incoming price pair, listing outputs, destination and applicable data are checked before the run.

    Open full-size screenshot
  45. Check the result

    45. Run the prepared one-item purchase

    After confirming bindings, matching scrape data, trade login, inventory and Player Shop setup, select the personal copy and run once in Current item mode.

    The real run can be inspected for lookup and listing outcomes; a capture fixture does not establish a purchase or listing.

    Complete and verify this step in the stated app or game.

  46. Check the result

    46. Verify the actual lookup and listing

    Inspect the real lookup outputs, then verify the actual item, price, currency and shop tab. Treat the scrape estimate and shop listing separately from a completed sale.

    The observed lookup and listing result is recorded without claiming a completed sale.

    Read and complete this step before continuing.

  47. If it does not work

    47. Review if it does not work

    If lookup does not provide the expected price, check cluster identification, notable coverage, item copy and saved-price bindings before another purchase.

    The section context and checks are preserved.

    Read and complete this step before continuing.

  48. Next guide

    48. Review next guide

    [List an item at a fixed price](selling-items.md).

    The section context and checks are preserved.

    Read and complete this step before continuing.

On this page

At a glance

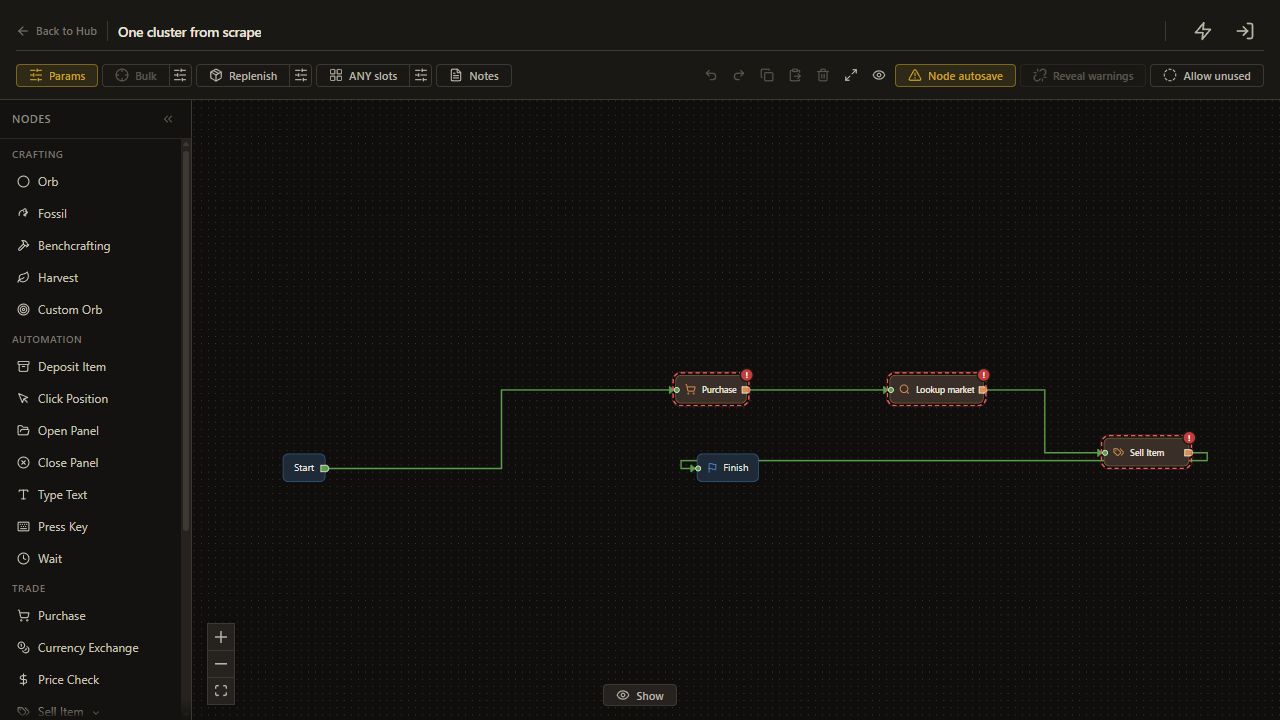
Learn > Trade Sell > Price Lookup then Sell contains Start > Purchase > Lookup market > Sell Item > Finish. Lookup reads cluster notable prices from available scrape data. It requires a recognized cluster type and a matching price entry.

The saved example needs configuration: Lookup writes trade_price and trade_currency, while Sell Item lacks the saved-price source bindings. Lookup has one output. Work on a personal copy and finish the following edits before running.

1. Prepare the copy and data

Duplicate Learn: Price Lookup then Sell on the Hub. Name it One cluster from scrape. Open the existing Lookup market node in Edit; this case adapts the saved node rather than adding it from the palette.

Open Edit Tree. Click the sliders button beside Bulk in the editor toolbar, labeled Configure bulk / grid settings. Choose Current item, then click Save. The dialog closes and the tree uses one item.

Confirm current scrape data covers your cluster type and notable combination. The editor shows counts for maps embedded in the tree; this preset embeds none. Available cluster scrape data can also supply runtime prices. If no matching data is available, use Price Check and Sell instead.

2. Configure one purchase

Use an official saved trade search for the correct league, cluster type, passive count and desired notables. Put it in Trade link URL. Choose Max price, such as 5, and currency chaos after reviewing matches.

The saved Purchase has no amount binding, so it buys one item. Keep its destination Keep, corresponding to the saved none value, so the following lookup and listing can use that item. Complete trade login and inventory setup first.

3. Keep the lookup outputs paired

In Lookup market, bind Looked-up price variable to Lookup price (trade_price) and Trade currency variable to Trade currency (trade_currency). Both are runtime outputs.

For an unadjusted comparison, set Discount min (0 to 1) and Discount max (0 to 1) to 0. Clear Min price (chaos, optional). Clear Divine price in chaos (optional). Clear Live recheck threshold (divines, optional). Leave all three unset for this first example. With Node autosave on, switching nodes or using Back to Hub saves the edit.

4. Repair the listing inputs and outputs

Open Sell Item and choose Use saved price. Set Price to use when listing to Lookup price and Trade currency to use to Trade currency. These are the lookup's incoming price sources.

Under Values saved for later steps, retain or bind the three visible output fields: Listing amount, Listing currency and Chaos equivalent. These record the listing result; they do not replace its incoming lookup sources.

5. Set the tab and connections

Bind Shop tab to a saved run setting and enter 0 for the first shop tab. Complete Player Shop capture.

Connect Lookup's single output to Sell Item, then connect Sell Item to Finish. Confirm the scrape data and both price bindings before making a purchase.

Check the result

Run once only after bindings and data are ready. Verify the lookup outputs, then the actual item, price, currency and shop tab. A scrape estimate and a shop listing do not establish a completed sale.

If it does not work

If the lookup does not provide the expected price, check cluster identification, notable coverage, item copy and the saved-price bindings before another purchase.

Next guide

List an item at a fixed price.

Keep learning

Browse all guides

For setup help, the installer or license keys, join the official Discord. Sales and key issues: DM PathOfRolling. Check the account before paying; watch for impostors.